

You’re inside of my mirror, and I know exactly how you got there. Obviously, you’ve made your way through Dodongo’s Cavern and acquired a Bomb Bag. Then, you either scaled the Death Mountain Trail or retraced your steps on the pathway to Hyrule Castle and blew up the suspiciously arranged rocks before making your way inside.
There’s not much going on in here, just a little harp music playing.
Wait, what’s that? You found a Triforce symbol on the floor? Well you know what you have to do now: whip out your ocarina and tootle “Zelda’s Lullaby.” (Low chuckle.)
AAAAAHAHAHAHAHAHA!


Photo: Jennifer Culp
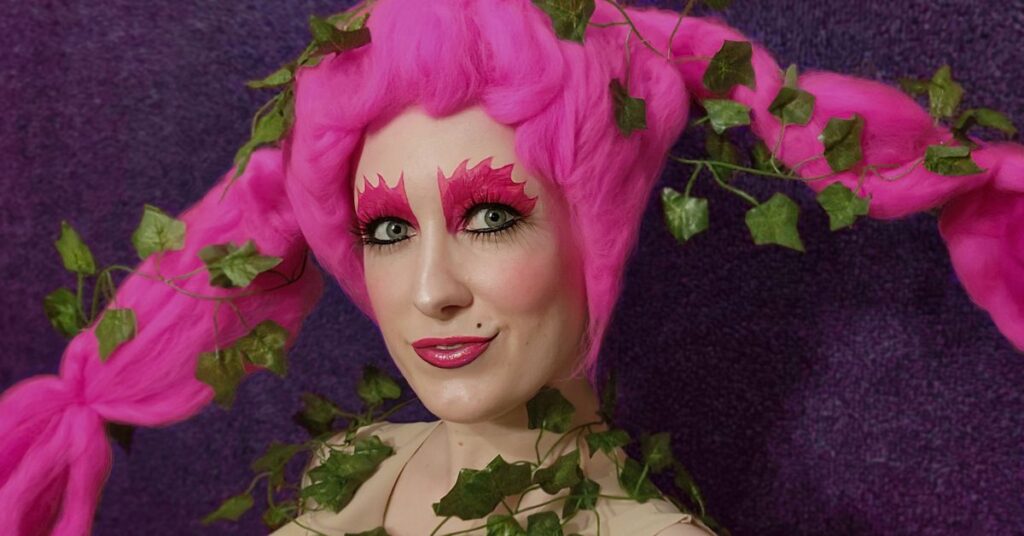
It’s me, the Great Fairy! Or I will be in a few minutes, with the help of a few makeup tricks that you can pick up too. Let’s get into it.
Every incarnation of the Great Fairy is magnificent. I first encountered her in 1998’s The Legend of Zelda: Ocarina of Time. At the time, nearly every game I played featured only one prominent girly character. And they were always my favorite: Peach was my default selection for Mario Kart, and Pipsy the Mouse is still my choice for Diddy Kong Racing. Dixie Kong and Peach actually offered a hover-jump advantage in Donkey Kong Country 2 and Super Mario All-Stars’ version of Super Mario Bros. 2, respectively. Kazooie in Banjo-Kazooie was a female-identified bird in a backpack, so I suppose it was technically a blow for representation whenever I held the trigger to Talon Trot Banjo’s weight up a too-steep-for-bear-feet slope. Culturally, I didn’t realize we were all living right in the middle of the ’90s shift in video game marketing to target teen boys, but I certainly felt its effects. Then, my younger brother shoved the Ocarina of Time cartridge into our shared console.
This game was teeming with women! Hyrule was created by goddesses. Link’s best friend is Saria, and his sometimes-annoying fairy companion Navi uses she/her pronouns. Titular Zelda tasks Link with the game’s main quest, though her caretaker Impa honestly seems like she could wipe the floor with Ganondorf from the start. Malon runs a whole farm while her dad snoozes. Princess Ruto is a demanding brat, but I adore her! The understandably misandrist community of Gerudo will actually jail you for happening to present as male, which seems pretty harsh until you consider their own experience with Ganondorf. And then there’s the Great Fairy, the shrieking drag queen who rocked my entire concept of femininity.
Imagine my surprise when a nearly naked babe burst forth from the Fairy Fountain, but instead of snickering when the Great Fairy bounced her ass in the air, all the preteen boys of my acquaintance were scared into silence. She actually seems to be trapped in a disempowered position — when summoned, she invariably appears and helps you out. She’s dressed and depicted in an intentionally titillating fashion, with the camera panning slowly along her body. And yet her introduction reliably causes men to recoil in fright. Is it her large size? Is it simply that her laugh is that powerful? I still struggle to articulate a cogent explanation for her impact, but I immediately embarked upon a lifelong attempt to imitate it.
To bring the Great Fairy’s style out of the fountain and into real life, you’ll need:
- Glue stick
- Hot-pink eyeshadow
- Hot-pink liquid liner (or face paint)
- Black eyeliner pencil
- Black liquid eyeliner
- Faux eyelashes (two pairs)
- Lash glue
- Pink blush
- Highlighter
- Hot-pink lipstick
- A little ingenuity in costuming!
I first met the Great Fairy on my Nintendo 64, which sports early 3D graphics. And so, my first step to imitating the Great Fairy’s style is adopting her iconically pointy polygonal-modeled boobs.
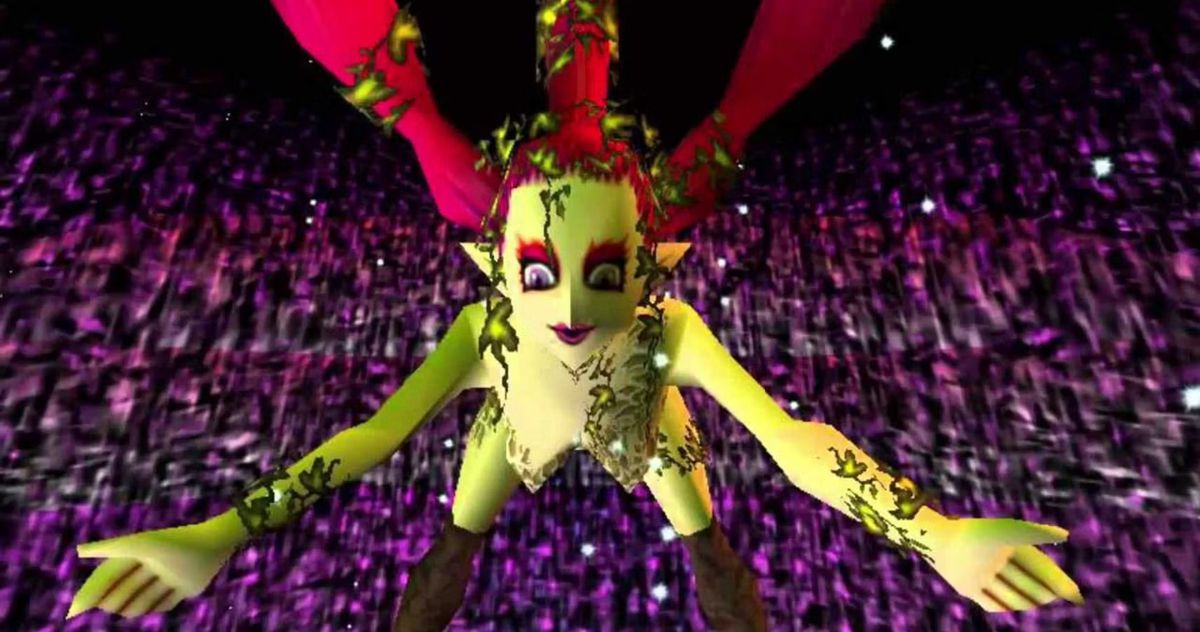

Image: Nintendo
I am not a cosplayer. I am way too lazy to commit to the level of diligence the average cosplayer devotes to each of their characters. Instead, I consider myself a Halloweener — a person who impulsively puts a few hours of frantic effort into creating a serviceable approximation of a costume that’s only required to hold up for one night.
In that spirit, my Great Fairy bod is now lookin’ just right!
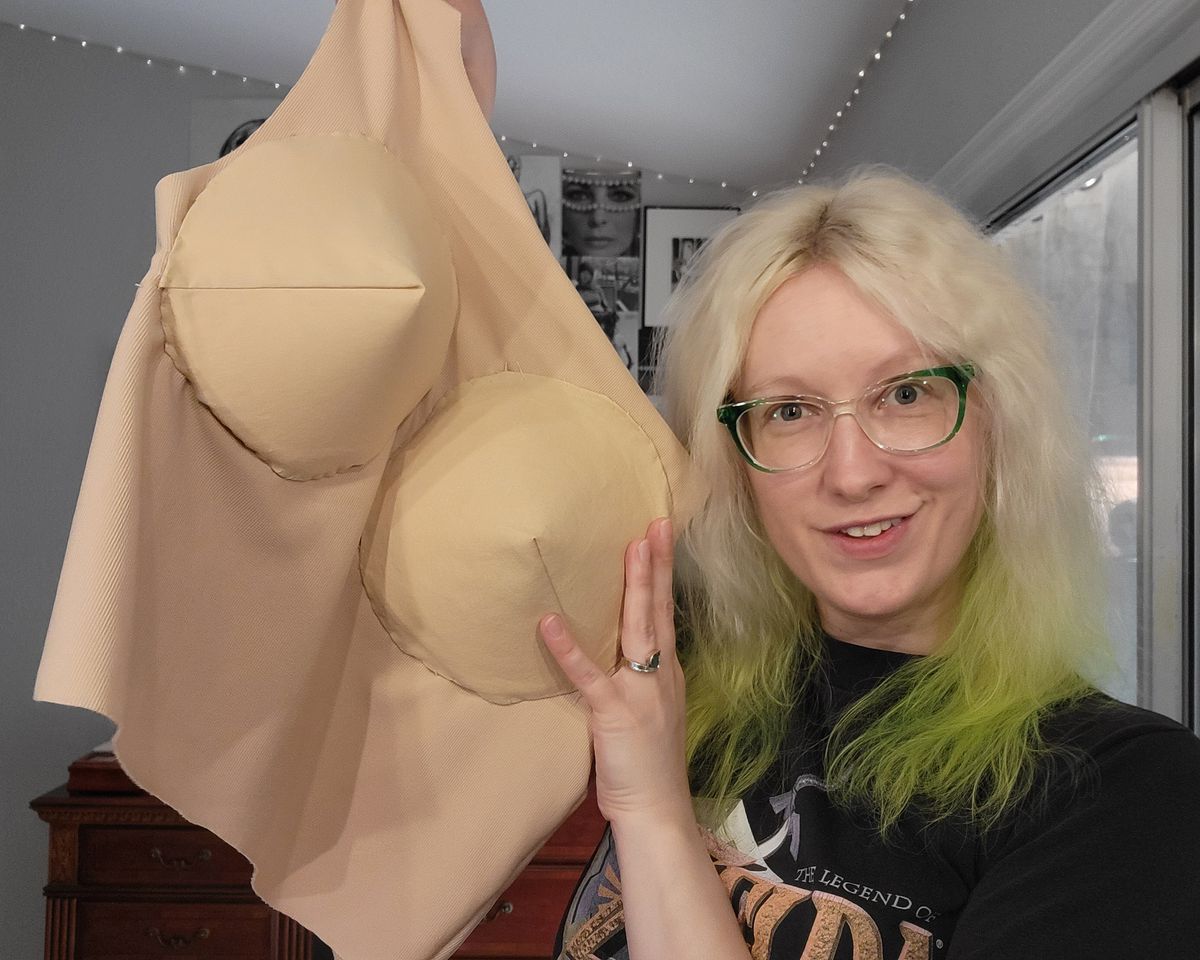
Photo: Jennifer Culp

Photo: Jennifer Culp
Now, the brows. I have considered this conundrum for many years. Does the Great Fairy have no eyebrows, merely deep-set eyes with large lids, and the spiky protrusions at the top of her makeup adorn the bit of eyelid emerging from the crease? Or are the jagged pink points that mimic the ends of her ponytails her eyebrows, and her magenta shadow merely extends to cover her entire brow bone beneath? I can never decide, but given that I have hooded eyes and need the extra facial real estate to properly pull off the look, I’m gonna go with the latter.
First let’s get my own eyebrows out of the way.
Here’s how you can do it too. Clean your brows and skin before gluing them down; forgo moisturizer or any product that might interfere with stickiness. I used a washable kids’ glue stick to avoid toxicity and the hassle of removing a “permanent” product afterward, but it’s not the most durable adhesive. Learn from my mistakes and scrub your temples all the way out to your hairline before applying — my left brow started to pop back up at the tail after a couple hours.
You don’t really need to cover your brows with foundation, as you’re going to paint over them entirely in a few minutes. Still, I felt this was a great opportunity to practice my eyebrow-erasure technique.
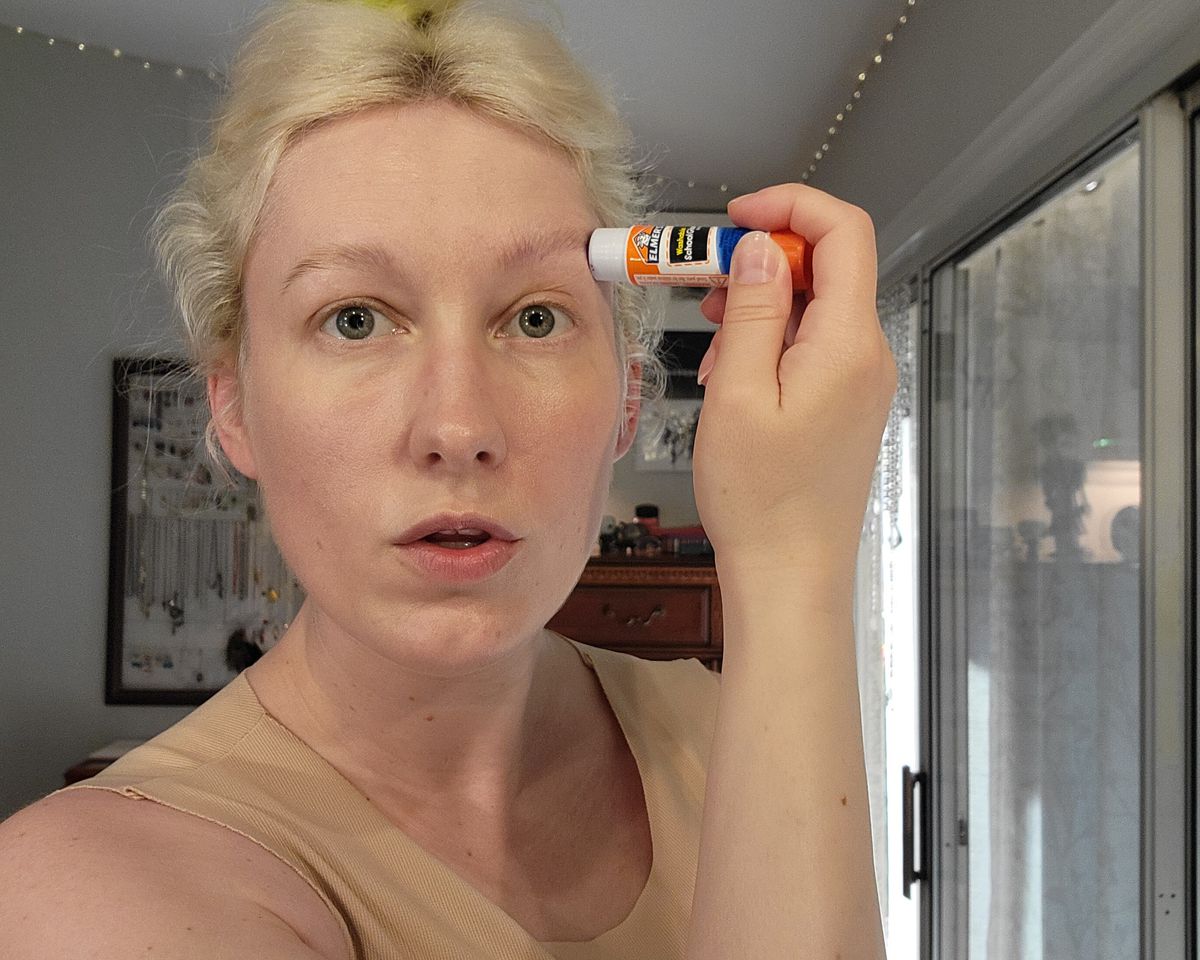
Photo: Jennifer Culp
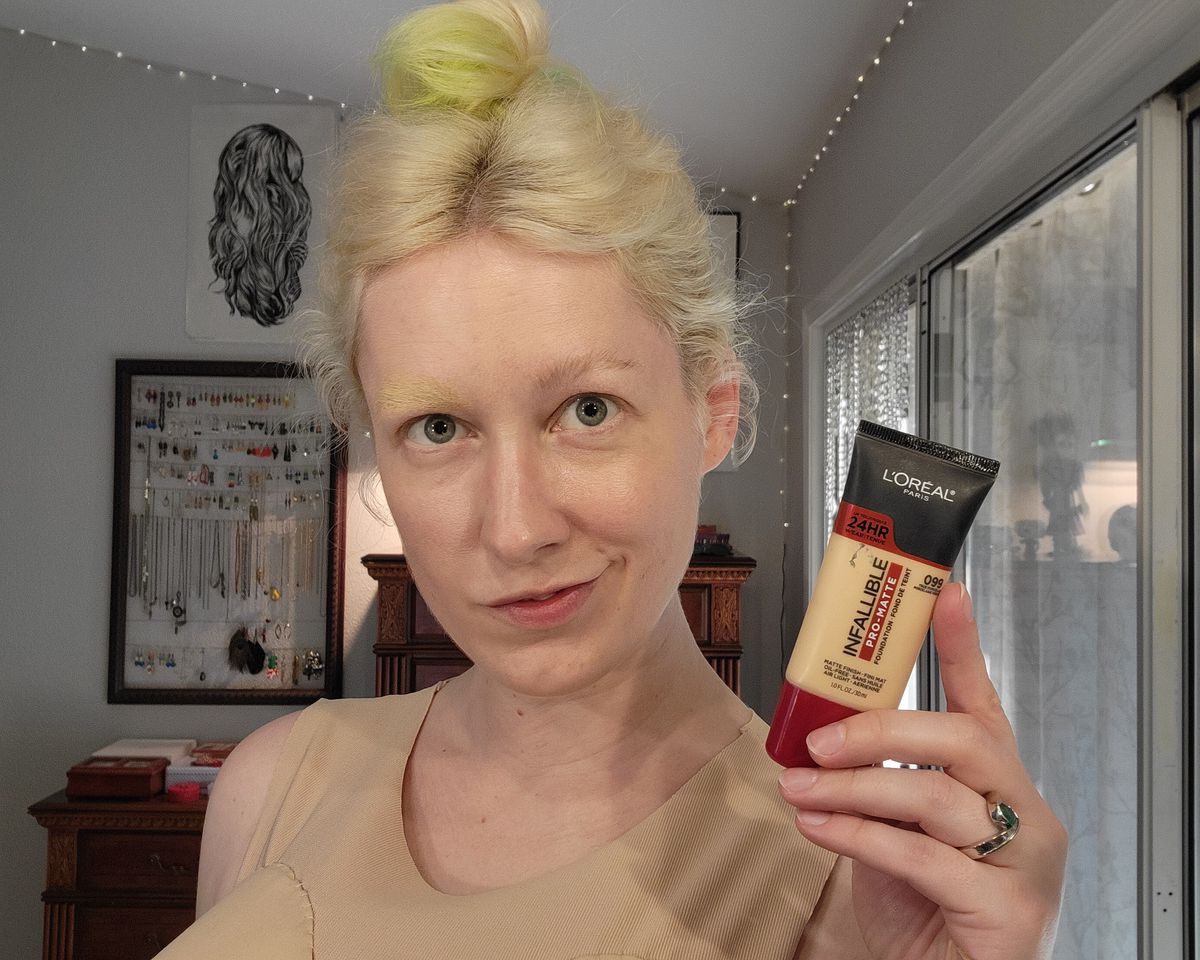
Photo: Jennifer Culp
For any look that requires lining inside your lashes, it’s best to go ahead and do it before applying eyeshadow. You’ll need a black eyeliner pencil for the job. (My favorite is the NYX Epic Wear Waterproof Eyeliner, but be warned: You’ll need makeup remover to take it off when you’re done.)
Drawing on your waterline is one of those skills that seems intimidating, but there are tricks to make it easier! First, be conscious of your pencil placement. You’re not trying to stab the tip directly into your eyeball; you’re aiming it to shade the outer edge of the waterline near your lashes. (Don’t color over your tear duct!)
Use a finger to hold your eyelid for stability, and be aware that you will blink occasionally. Just take it slow and draw while your eyes are open. And finally, try to angle yourself toward the mirror so that you don’t cross your own sightline with the pencil while you’re lining — cop an extreme side-eye toward or away from your nose, depending on which part of your inner lid you’re shading. Startling your own pupil by suddenly covering your vision with the cosmetic implement is the primary instigator of those deadly, involuntary defensive blinks that crush the eyeliner pencil into your retina.
Symmetry: It’s the worst. To get things lined up as closely as possible, start with your “off” side — it’s usually (but not always!) opposite your dominant hand. It’s always easier to match when you begin with the most difficult bit, then finish where you’re more adroit.
I used a hot-pink liquid eyeliner (Profusion Cosmetics brand) to draw on my spiky Great Fairy brows. After filling in the top edge of the shape, I painted the product over my browbones down to the folds in my eyelids. Don’t put liquid product down inside the crease — it’ll turn into a cracked, flaky mess once it dries.
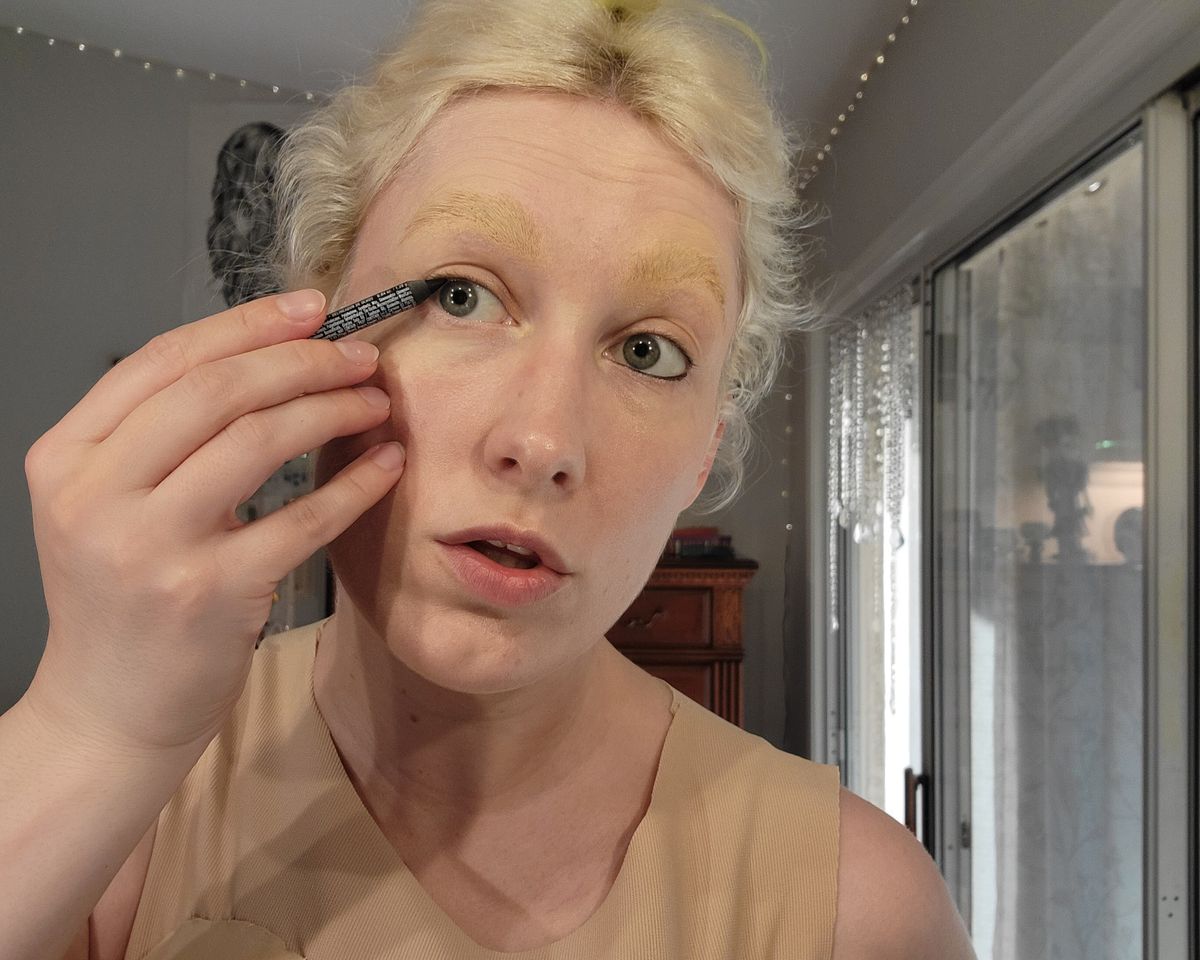
Photo: Jennifer Culp
Next, I used a hot-pink pressed eyeshadow to color in the rest of my eyelids. The secret to wringing some opacity out of cheap drugstore eyeshadow is water. Not a whole Empty Bottle’s worth; we’re not growing Magic Beans here! Just slightly dampen a Q-tip or brush, rub it on the shade of your choice to pick up some powder, then put the dampened color on your face.
Then, I used an even pinker liquid liner to highlight each brow-spike. It’s not very noticeable from a distance, but I know it’s there, and that’s the important thing.
(All three of the pink products I’ve used here are from a drugstore brand called Profusion Cosmetics. The quality is hit-or-miss, but when it hits it slams like the Megaton Hammer! I’m distraught that their neon orange “Bright Lights” liquid liner from last year is no longer stocked at Walmart.)
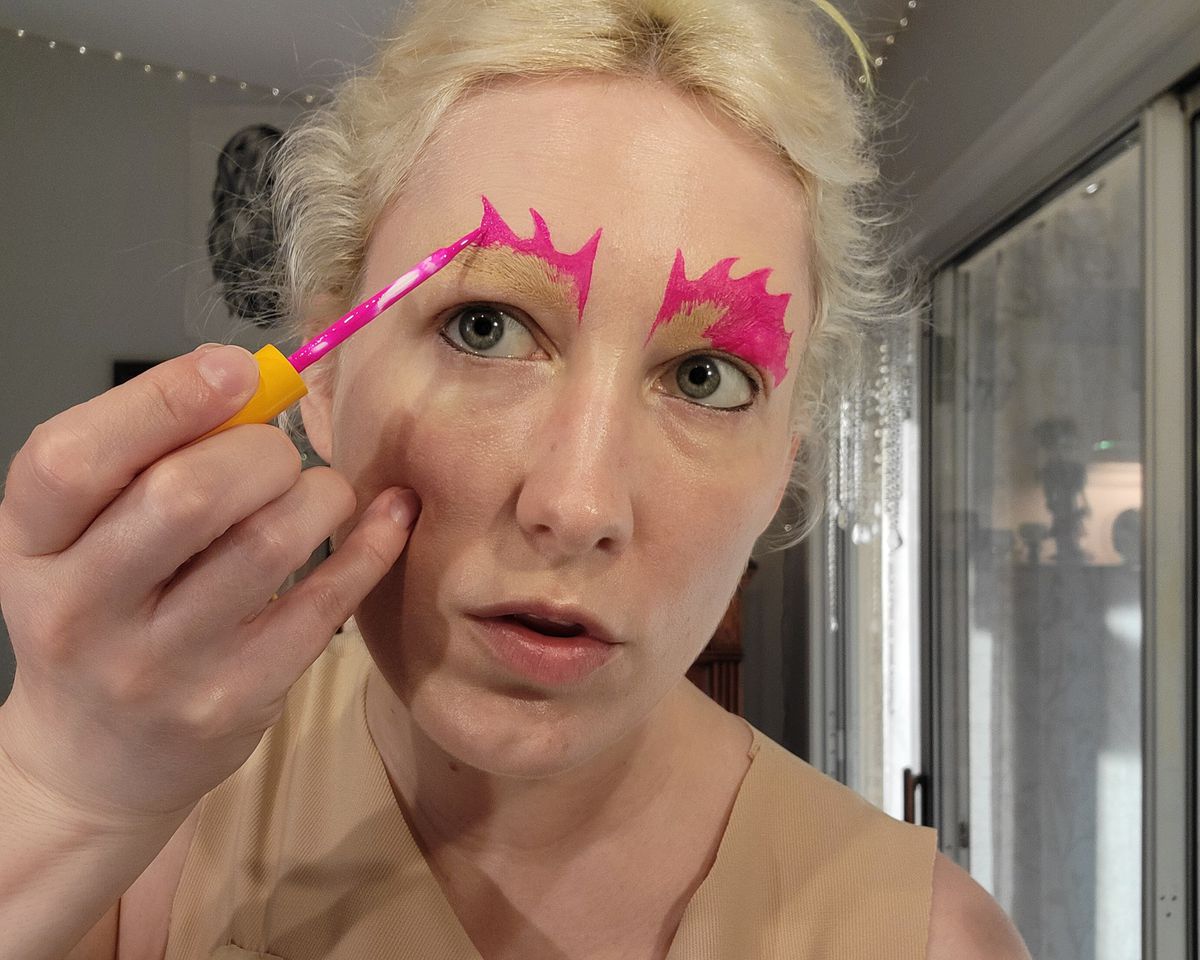
Photo: Jennifer Culp
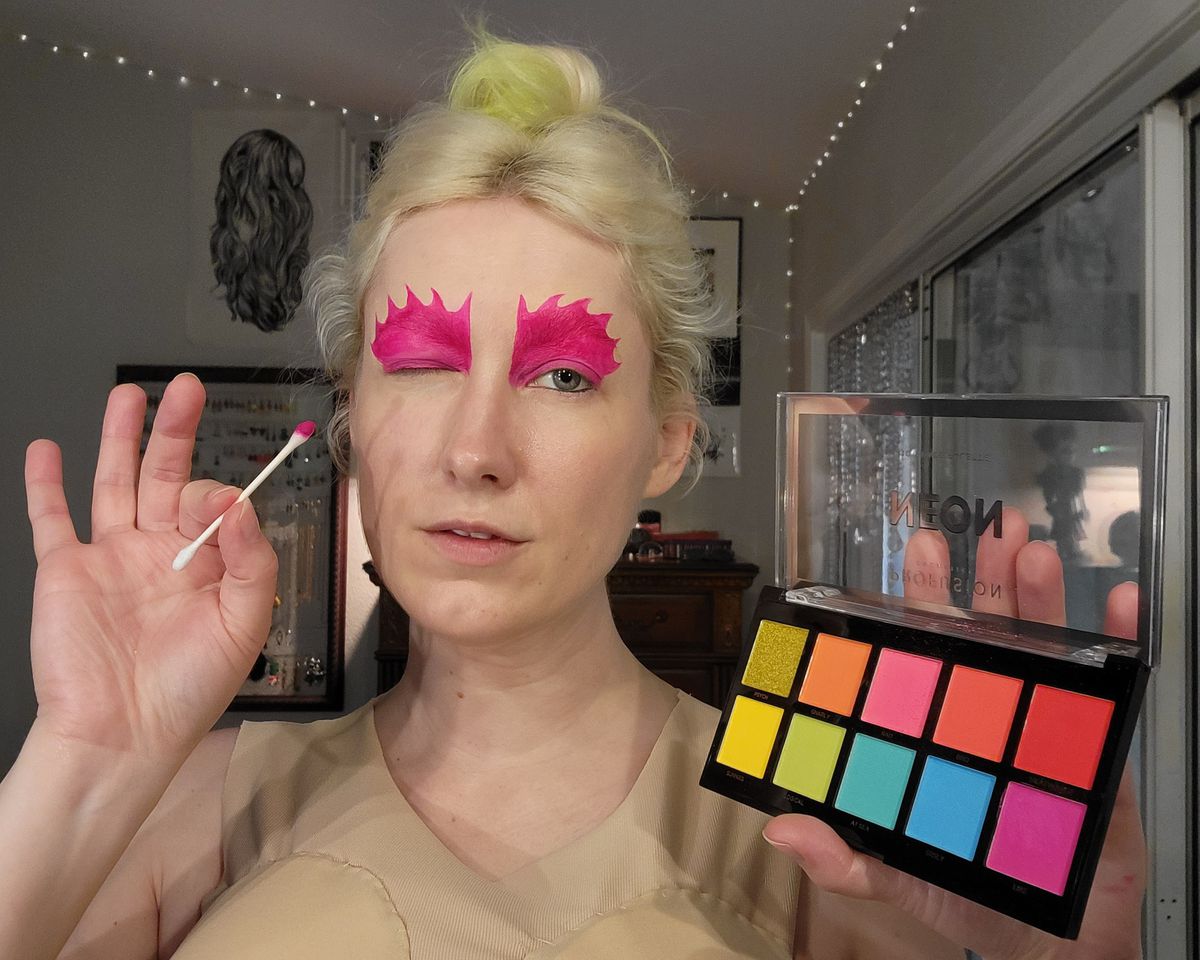
Photo: Jennifer Culp
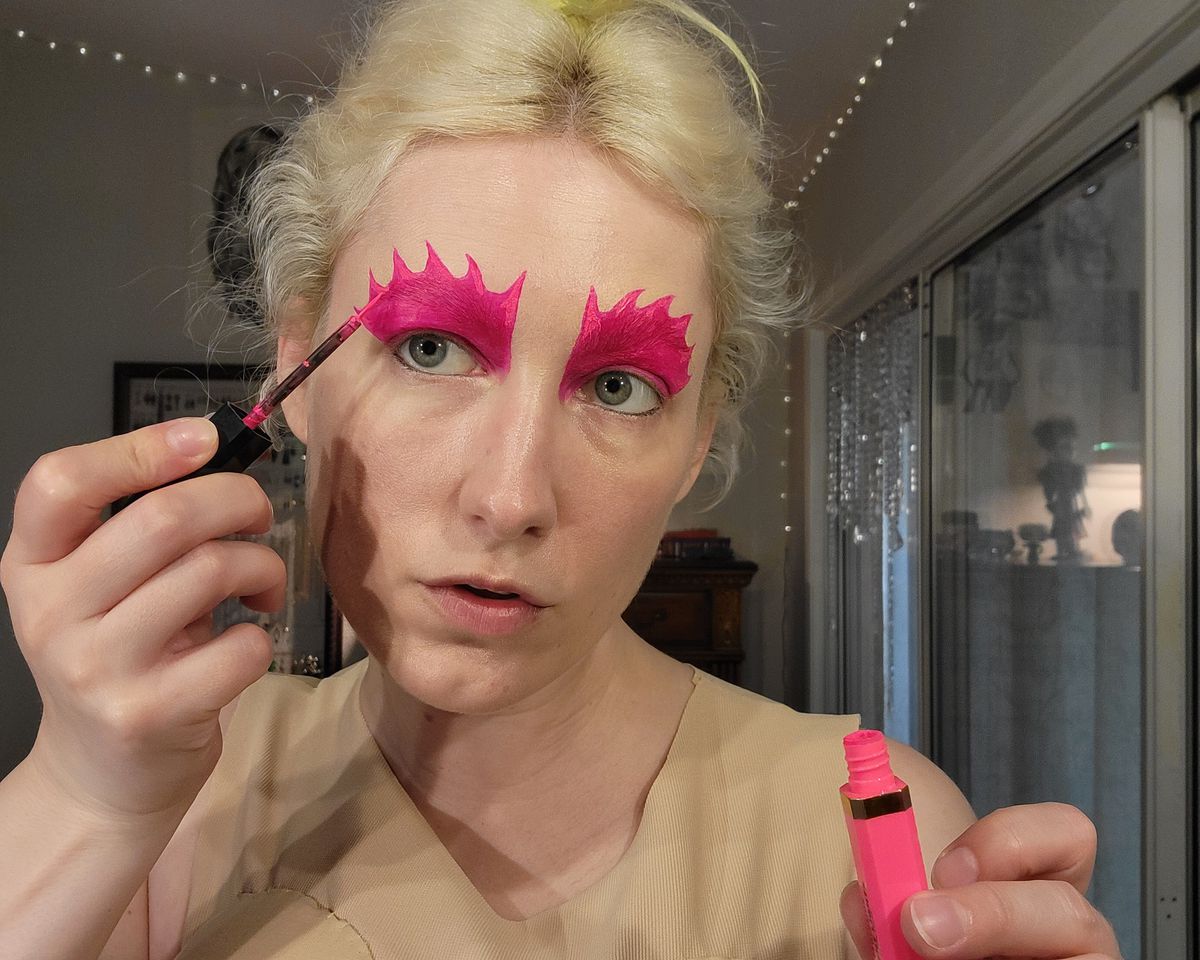
Photo: Jennifer Culp
You’ve got to put down a base of liquid eyeliner to visually integrate your fake lashes. Eyelids are crinkly! Lining above your lashline is a series of small strokes, not a swoop — more like spamming the B button for repeated sword swipes to cut grass in Kokiri Forest instead of holding B for a spin attack.
Pull your eyelid taught, but not so tight that you distort its resting shape. Just as before, start with your tough side so you can more easily maintain symmetry with your strong hand.
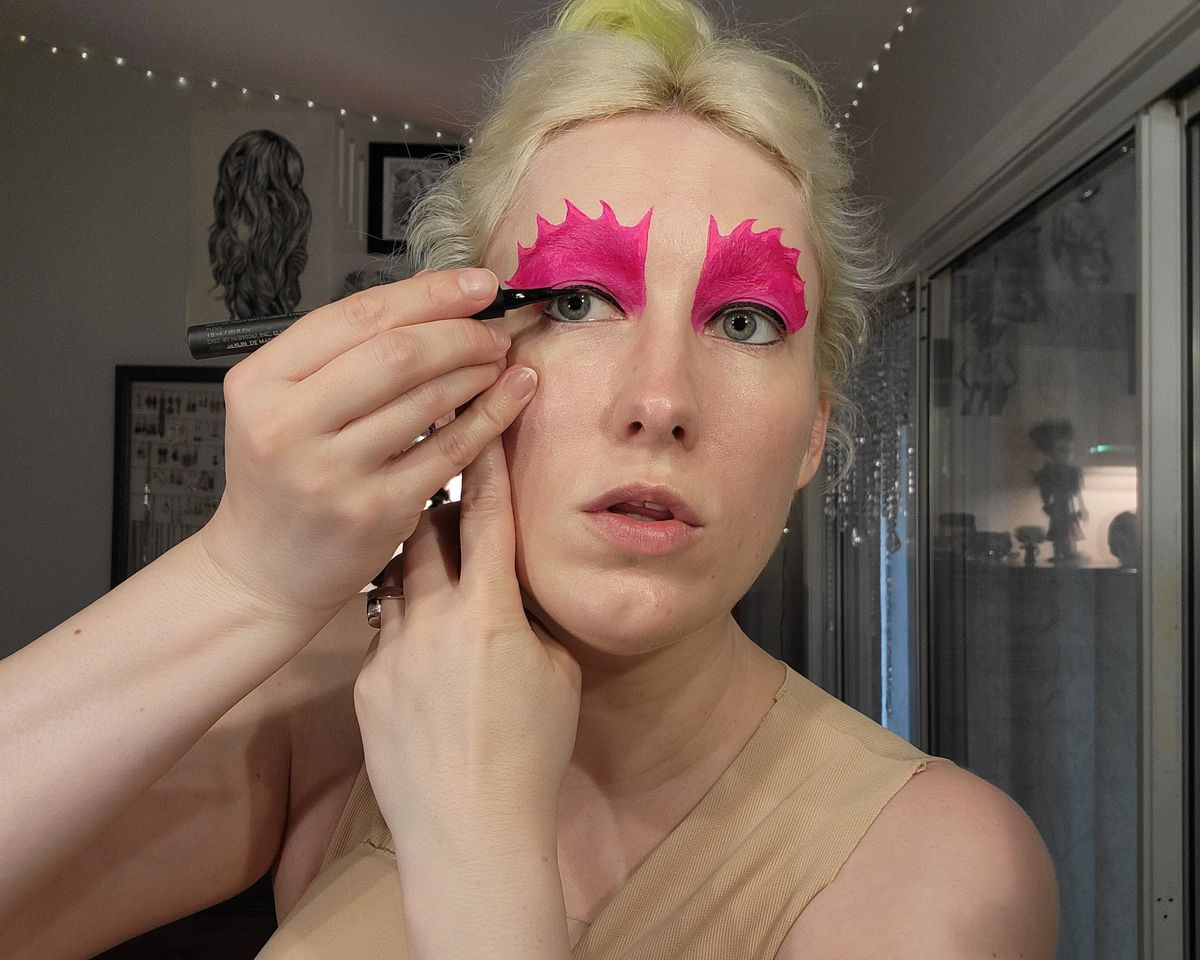
Photo: Jennifer Culp
My one regret in this particular Great Fairy manifestation is lack of spikiness in my lashes. Behold, my Great Fairy costume for Halloween 2012:
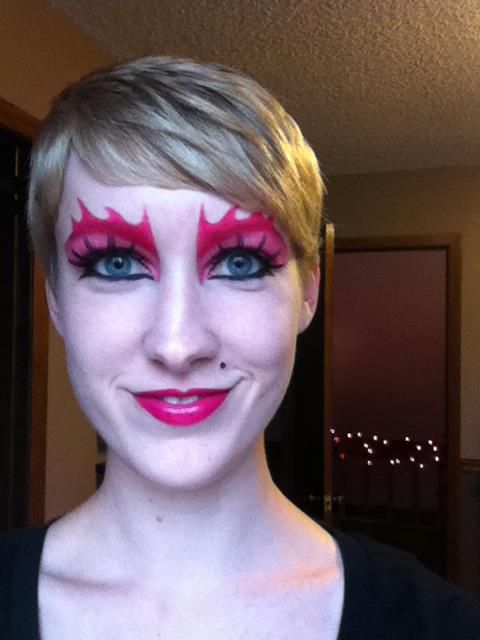

Photo: Jennifer Culp
Those were some excellent lashes! Sally Beauty, baby!! This time around I did the best I could with what was presently available at the drugstore, but with a little more planning I’d recommend purchasing a pointier pair.
Faux lashes take a bit of patience to apply, not so much because of the difficulty level but simply due to the mechanics of the glue. First, hold the lashes up to test their fit against your eye. If the strip is longer than your eyelid — which it usually is — take it away from your face and trim down the length of the strip with scissors to make sure the lashes fit correctly. After brushing the adhesive onto the base of the fake lashes, you’ve got to let it sit and get tacky for a moment before pressing the strip to your eyelid.
You’d think the “Song of Time” would be most appropriate here, but nah. I recommend doing a little dance while you wait! Make like Darunia jamming “Saria’s Song” and your lash glue will be ready in no time.
When you finally apply, remember that you’re placing the strip above your own lashes, not directly onto them. You want to snuggle the falsies as close as possible to your own eyelid strands without risking ripping them out when removing your lash-wigs afterward. I usually feel like I’m most dexterous with my fingers, but it can be very helpful to use a pair of tweezers to stick the inner corner down.
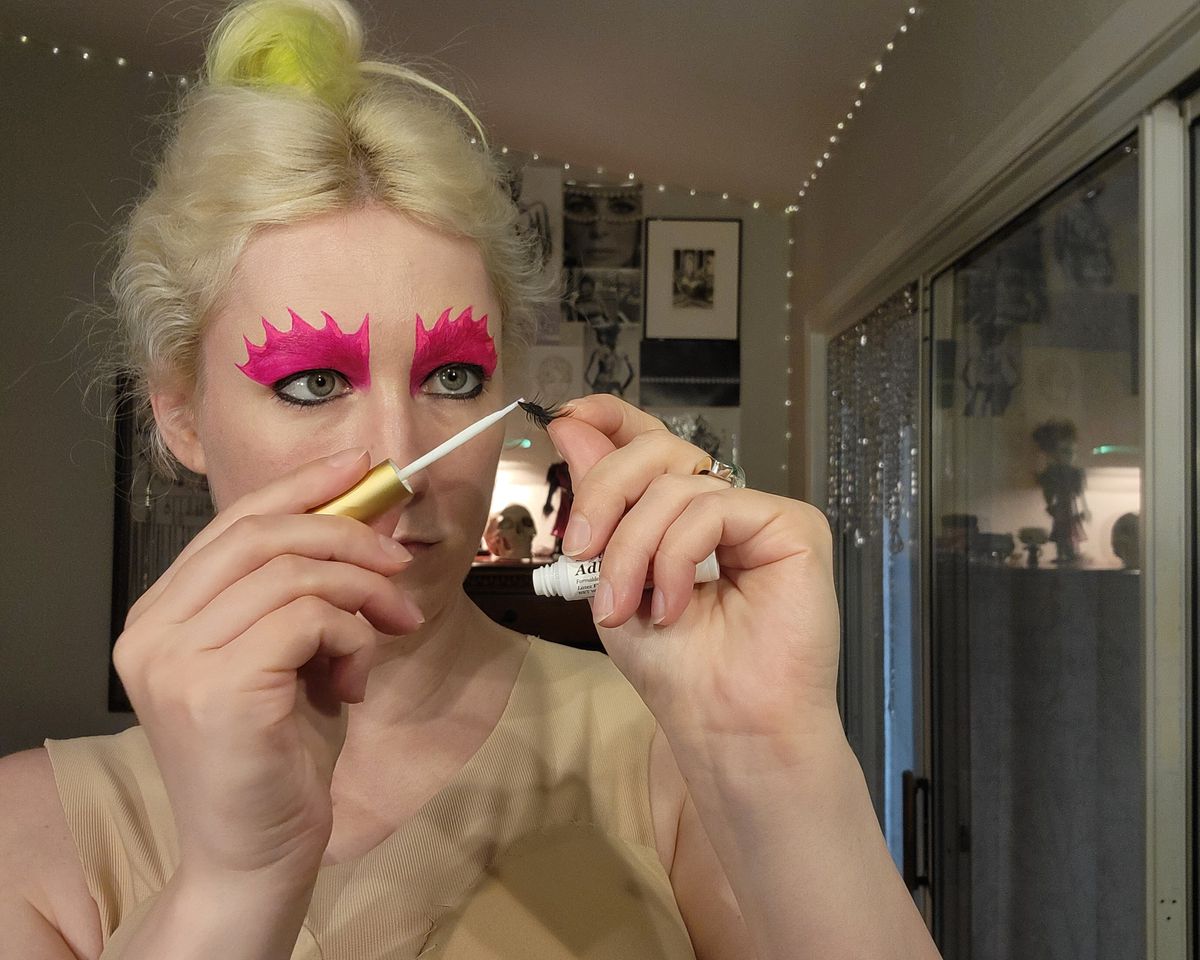
Photo: Jennifer Culp
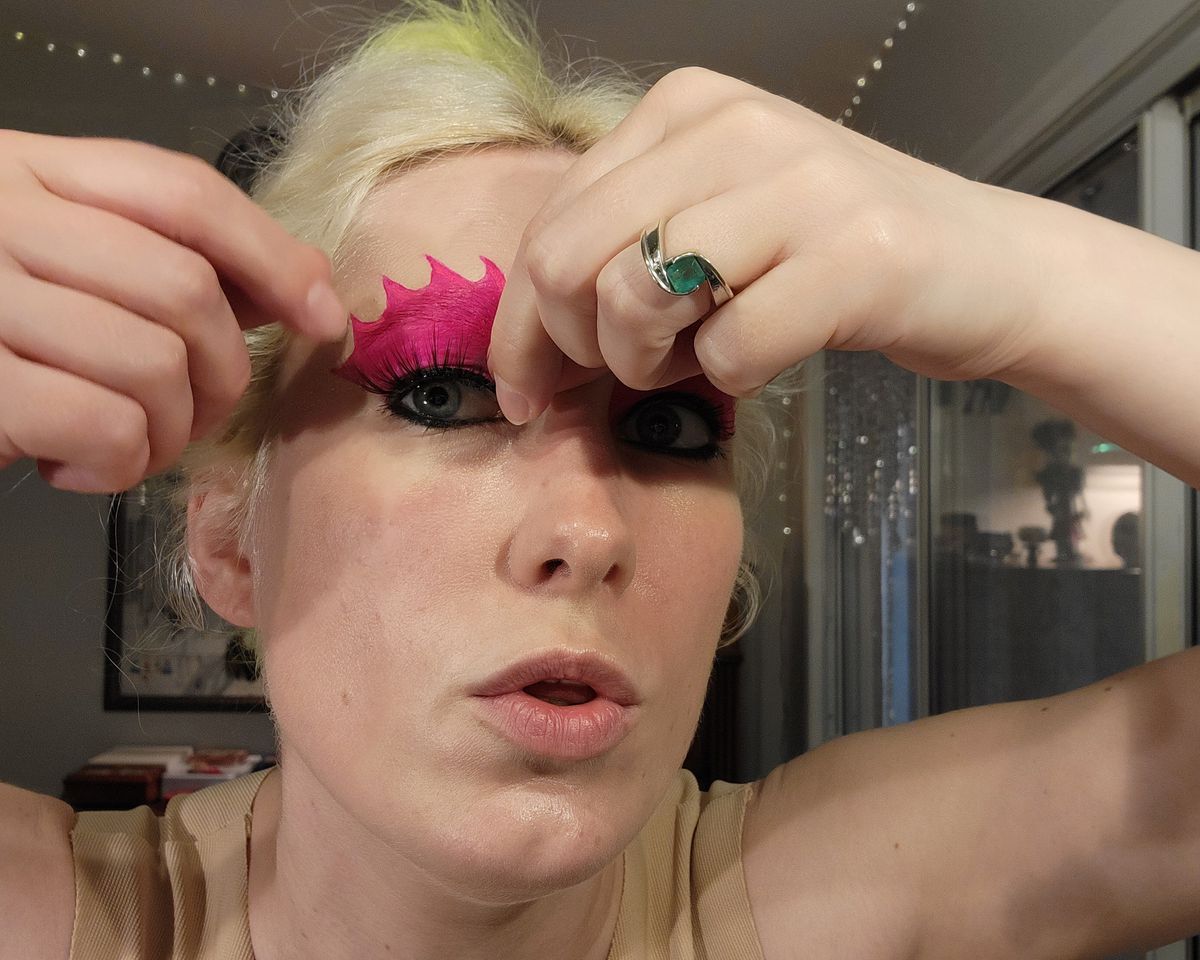
Photo: Jennifer Culp
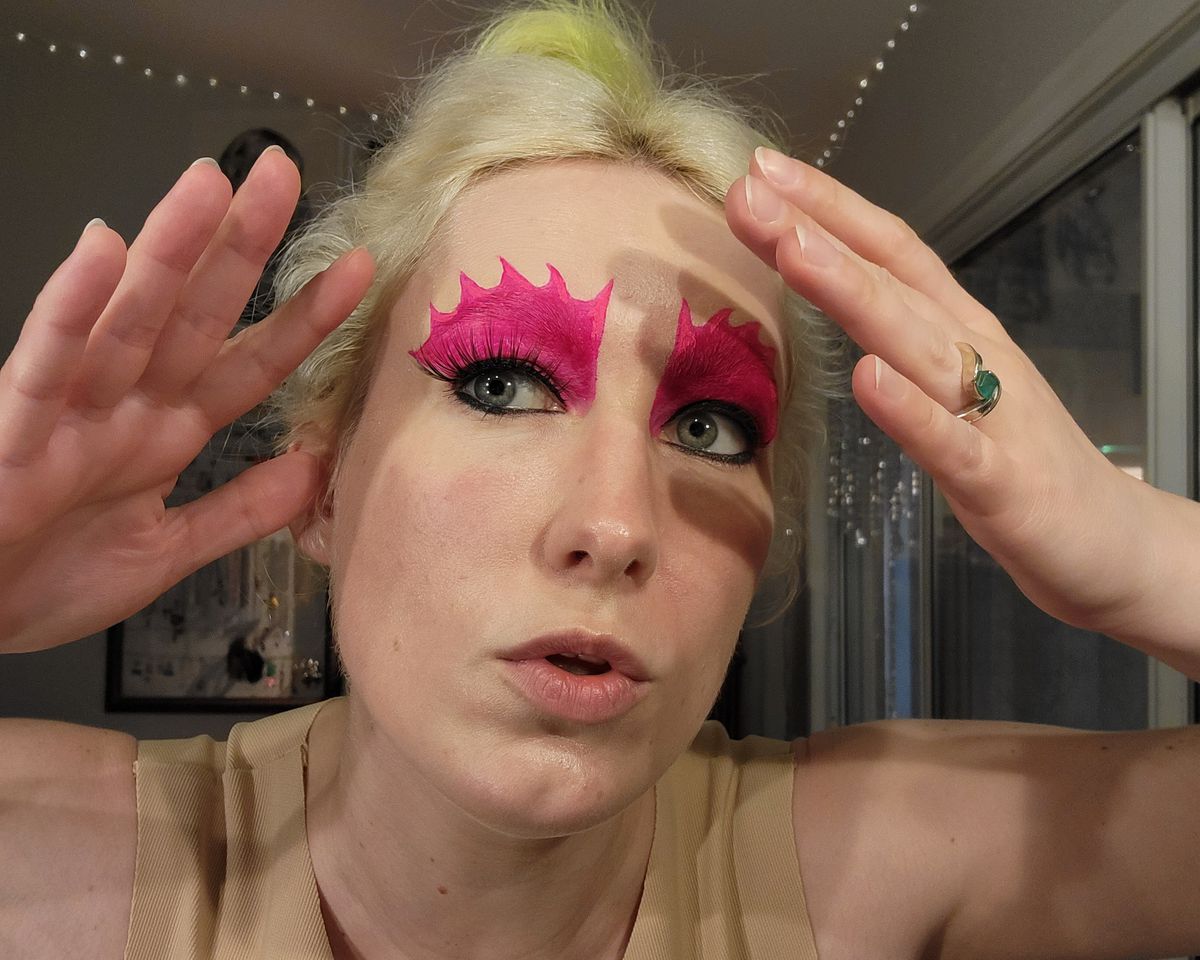
Photo: Jennifer Culp
My 2023 top lashes may not be quite spiky enough for my liking, but this time I stepped up the game with bottom lashes to compensate. Exact same deal happening here, just upside down, dangling from your lower lid like a Skulltula! You have to go below your own lashes, up underneath, not on your waterline.
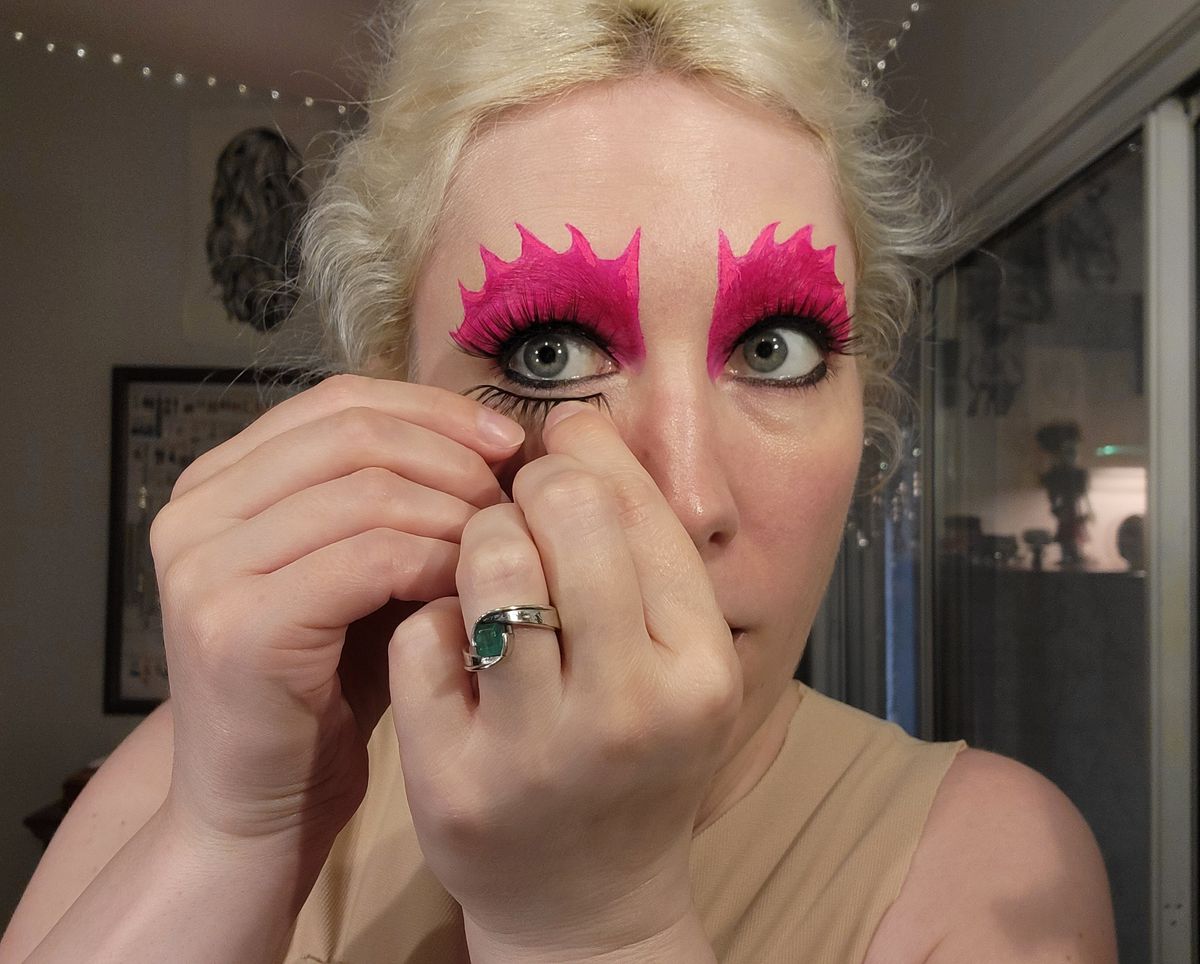

Photo: Jennifer Culp
I’ve often wondered what the Great Fairy spends all her time doing inside the fountain. Is she as floaty in there as she appears when called by “Zelda’s Lullaby”? As I’m wearing my current chestplate, I can assure you that the Great Fairy is definitely buoyant. My aggressively sharp Fairy-breasts keep riding up and distracting me.
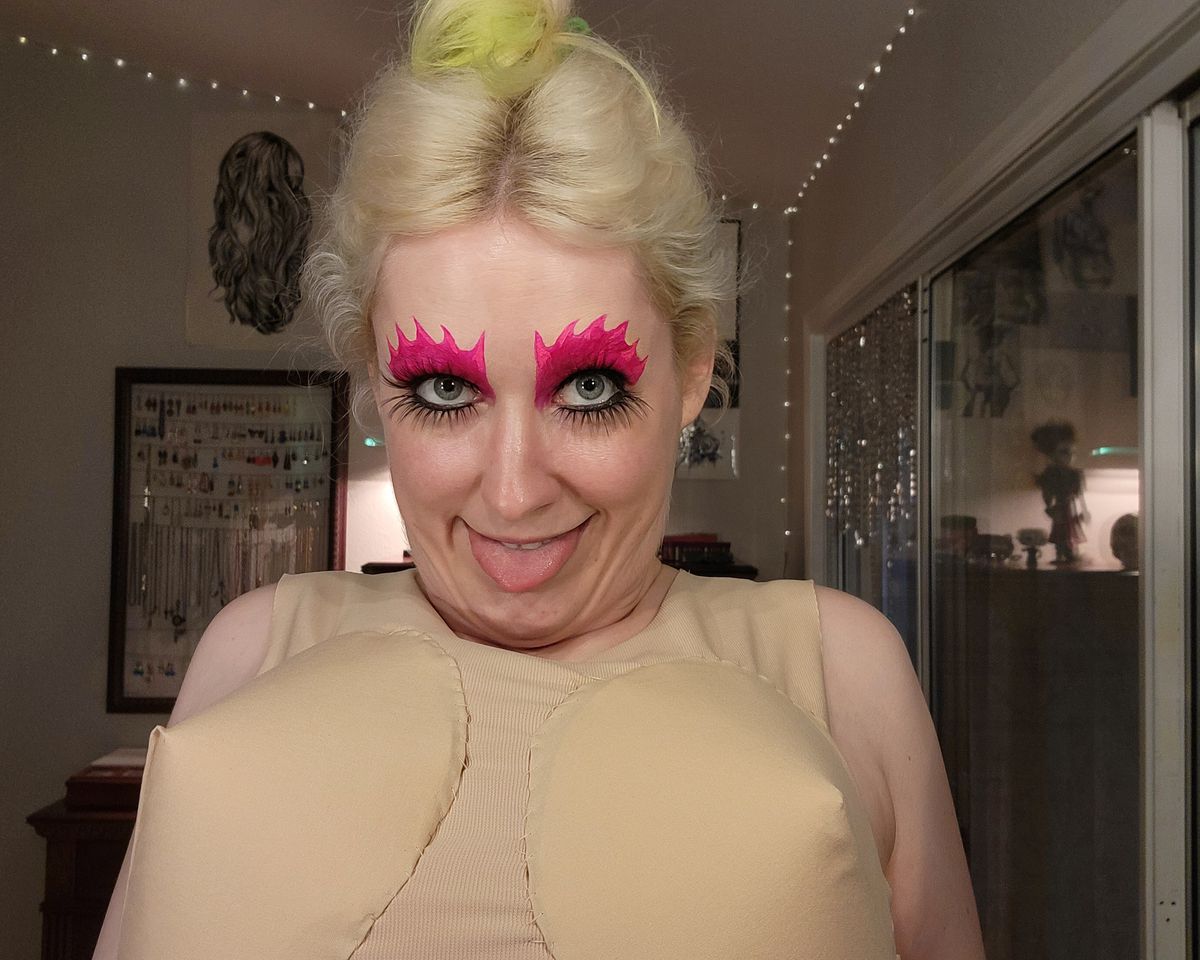
Photo: Jennifer Culp
The Ocarina of Time Great Fairy does not wear blush. But as an organic human being, rather than a mesh of triangles, blush really does make you look more three-dimensional and vivid. So! Let’s swipe a paler pink shade over the whole cheekbone. Then you can finish it with a brighter pink — it’s actually the same eyeshadow from the lids — on the apples of the cheeks.
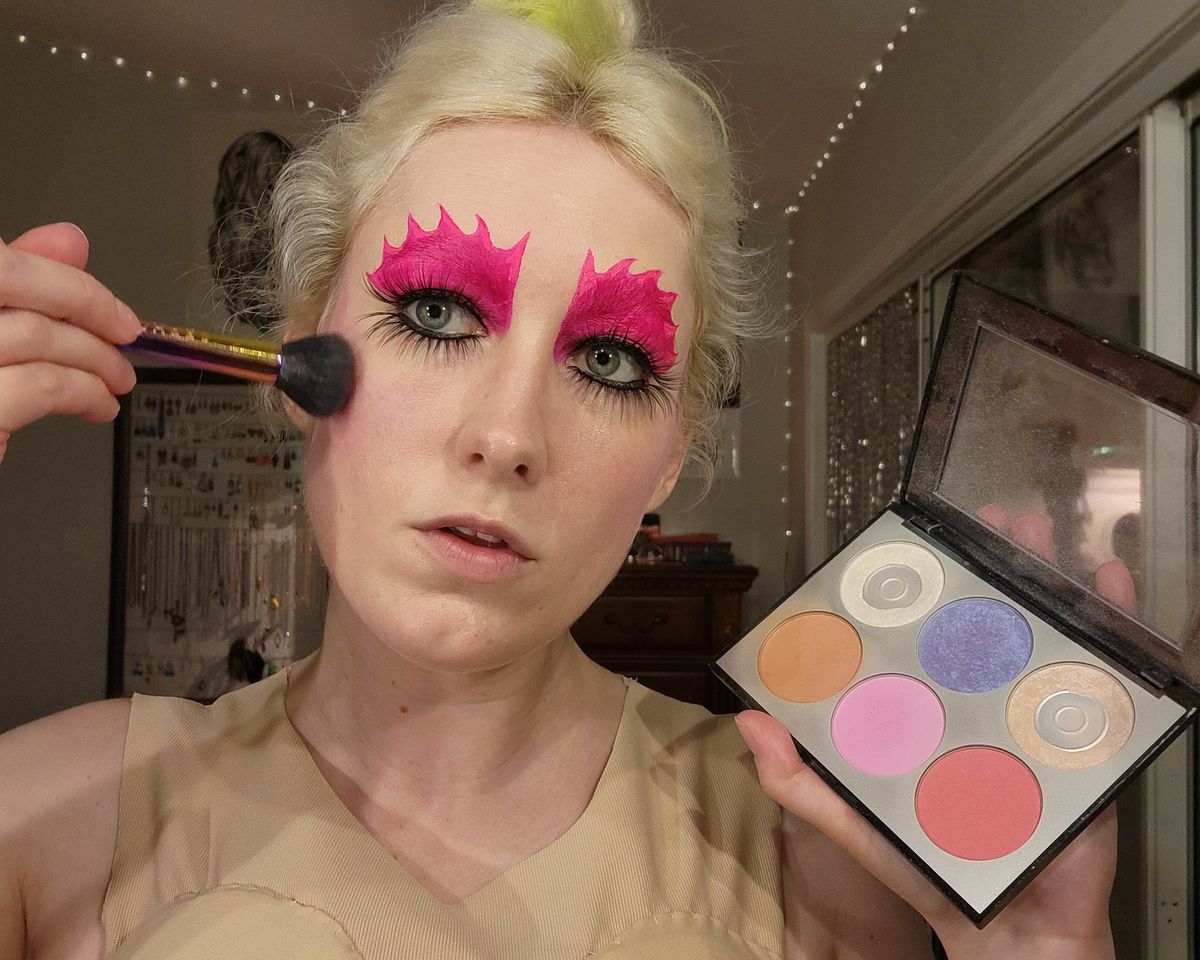
Photo: Jennifer Culp
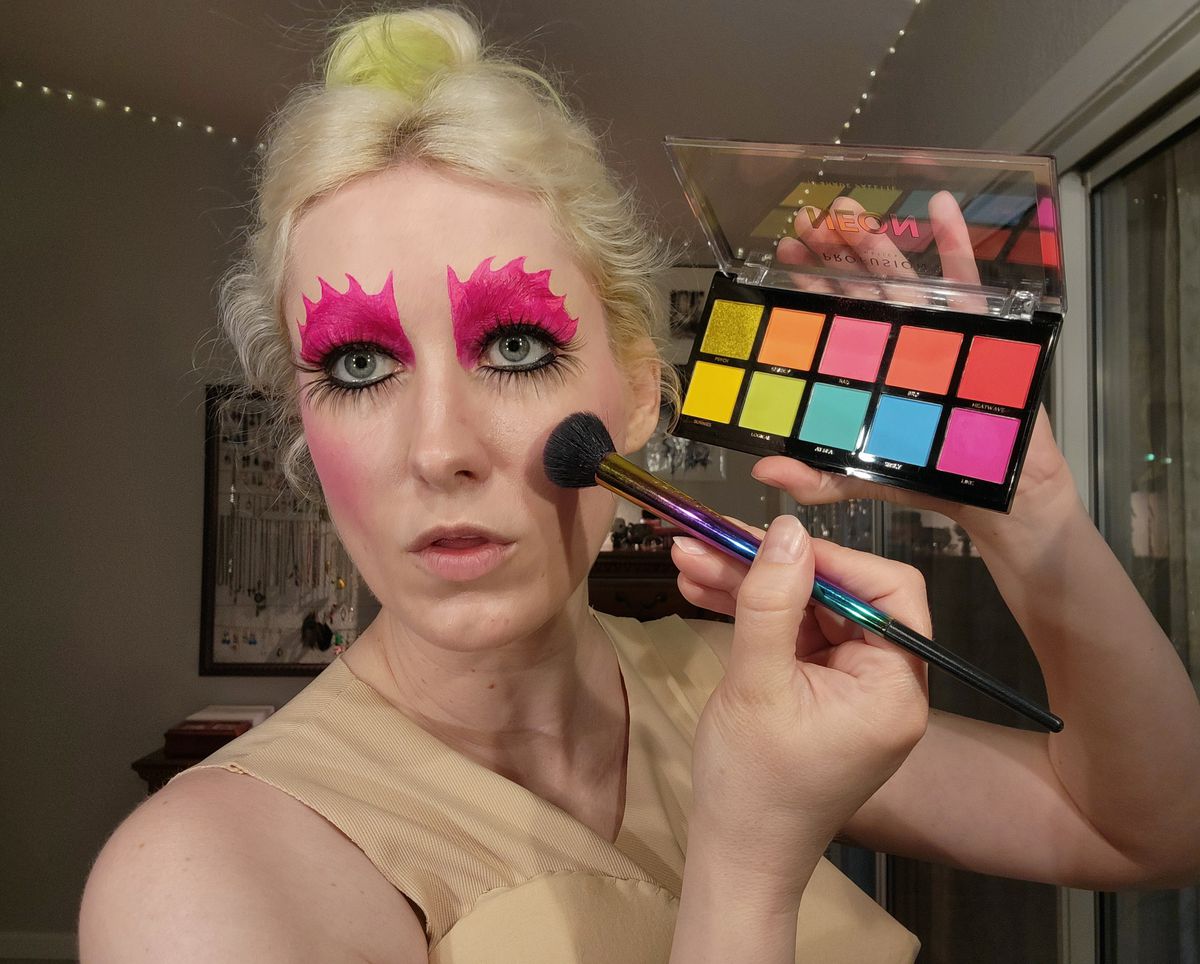
Photo: Jennifer Culp
Highlighting your nose is a power move. Lay down a vertical Master Sword slice of product from bridge to tip. Then glide that same highlight on the very tip of your chin, the tops of your cheekbones, along your jawline, on your temples, and atop the bony bits of forehead above your eyebrows.
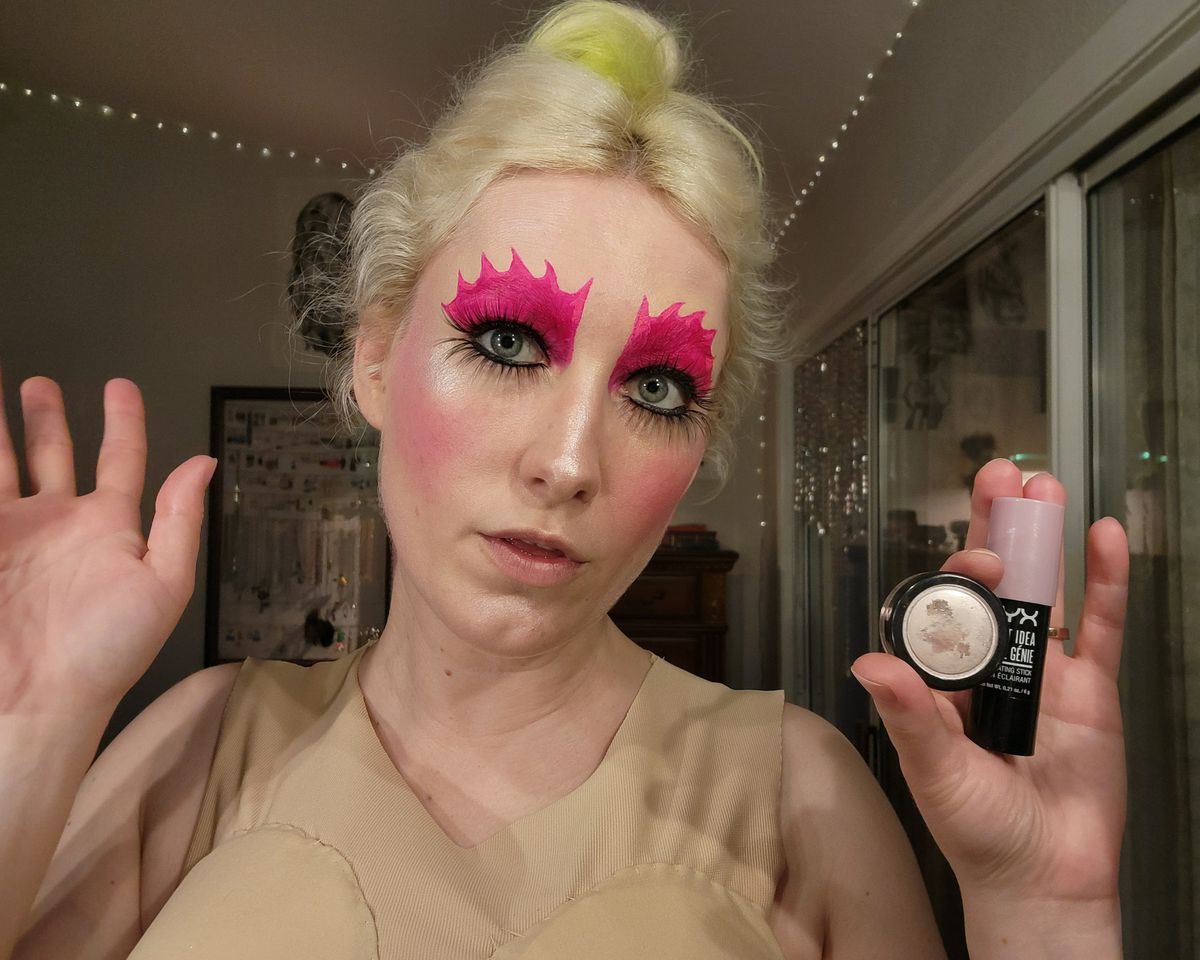
Photo: Jennifer Culp
To pull off the look, your lips must also be devastatingly pink, a blinding blush shade powerful enough to emit the Great Fairy’s screaming laugh. But her mouth isn’t a flat pink hue! There’s shading here, depths like the belly of Lord Jabu-Jabu or the bottom of the Well. Let’s use the Lens of Truth to take a closer look.
Highlight the center of your upper and lower lips. Then add a little Kakariko Village-style goth pop by delineating the lower lip with black. You can use an eyeliner pencil to outline your lower lip — just make sure you sanitize the tip with isopropyl alcohol before re-capping or touching it to your eye. (To avoid provoking a breakout from popping up like a Stalchild in Hyrule Field at night, I also cleaned the pencil before adding the Great Fairy’s signature mole.)
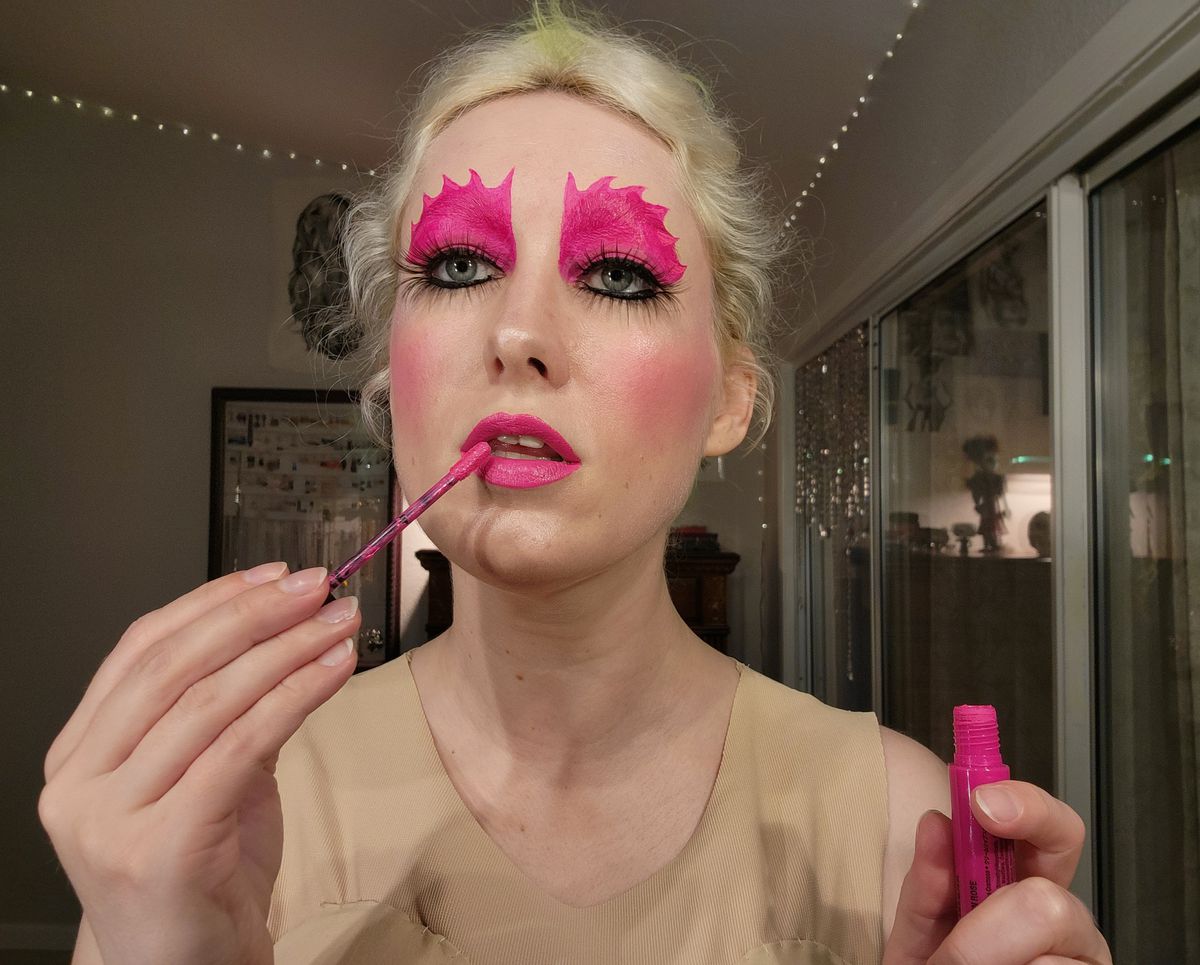

Photo: Jennifer Culp
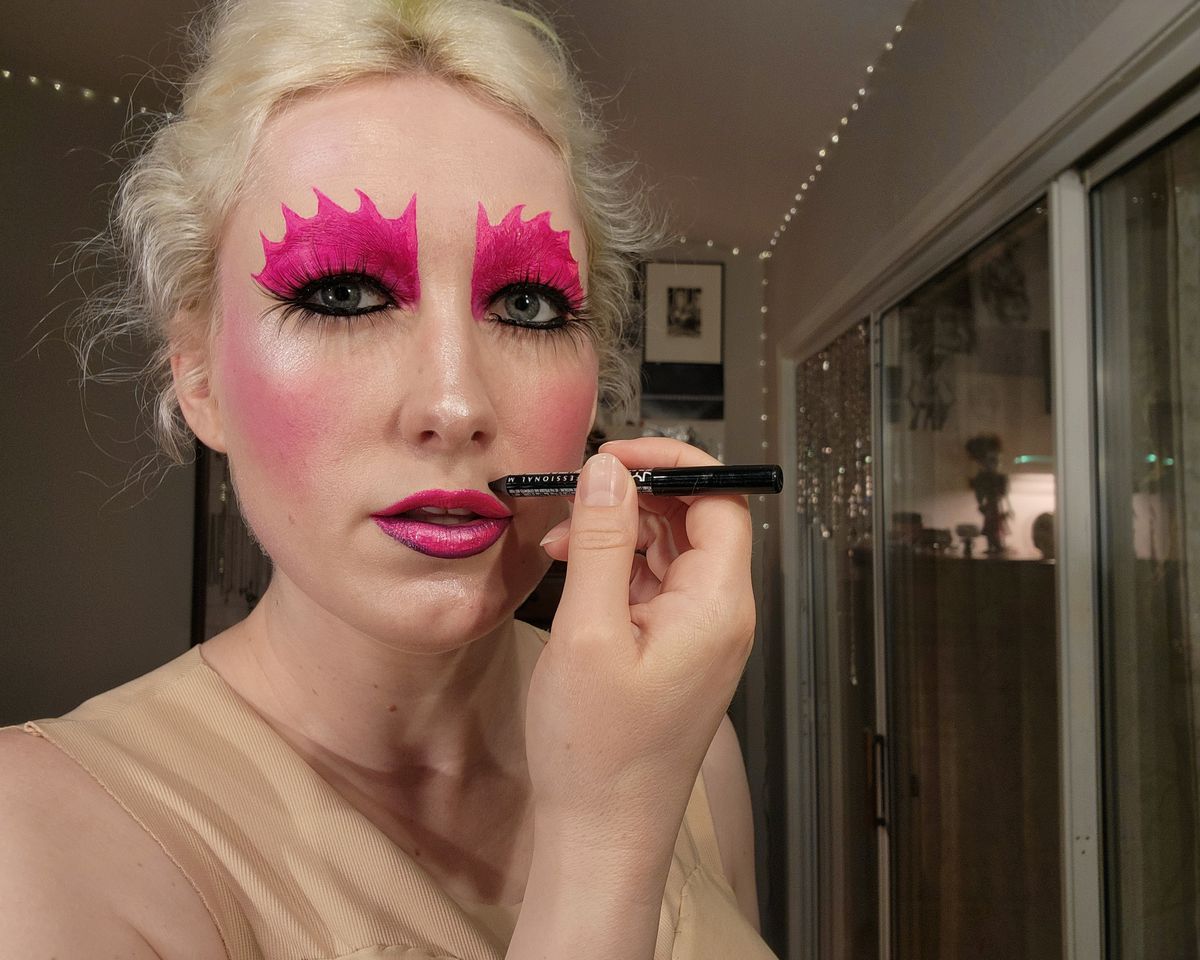
Photo: Jennifer Culp
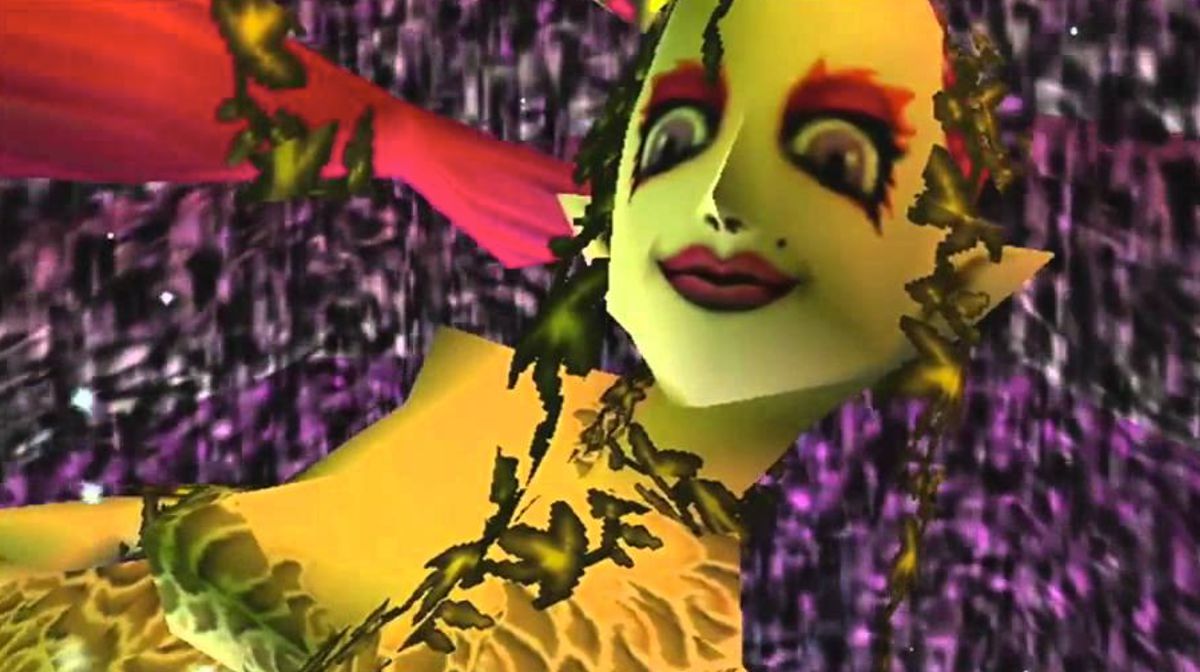

Image: Nintendo
Now it’s time to move onto getting the hairstyle just right. The Great Fairy, OoT version, is famous for her gravity-defying ponytails. Presumably this effect is due to the weightless state of her whole body while hovering above the Fairy Fountain, rather than a deliberate style achieved with, like, mohawk glue.
Previously, for the 2012 Halloween gathering mentioned above, I simply tied a regular wig into three sections. It was too curly and slightly off-shade, but it got the job done; fellow partiers recognized who I was supposed to be. Still, I imagined that if time travel ever afforded me another opportunity at the costume in future, I’d have some more advanced, Adult Link ideas about how to portray the hair.
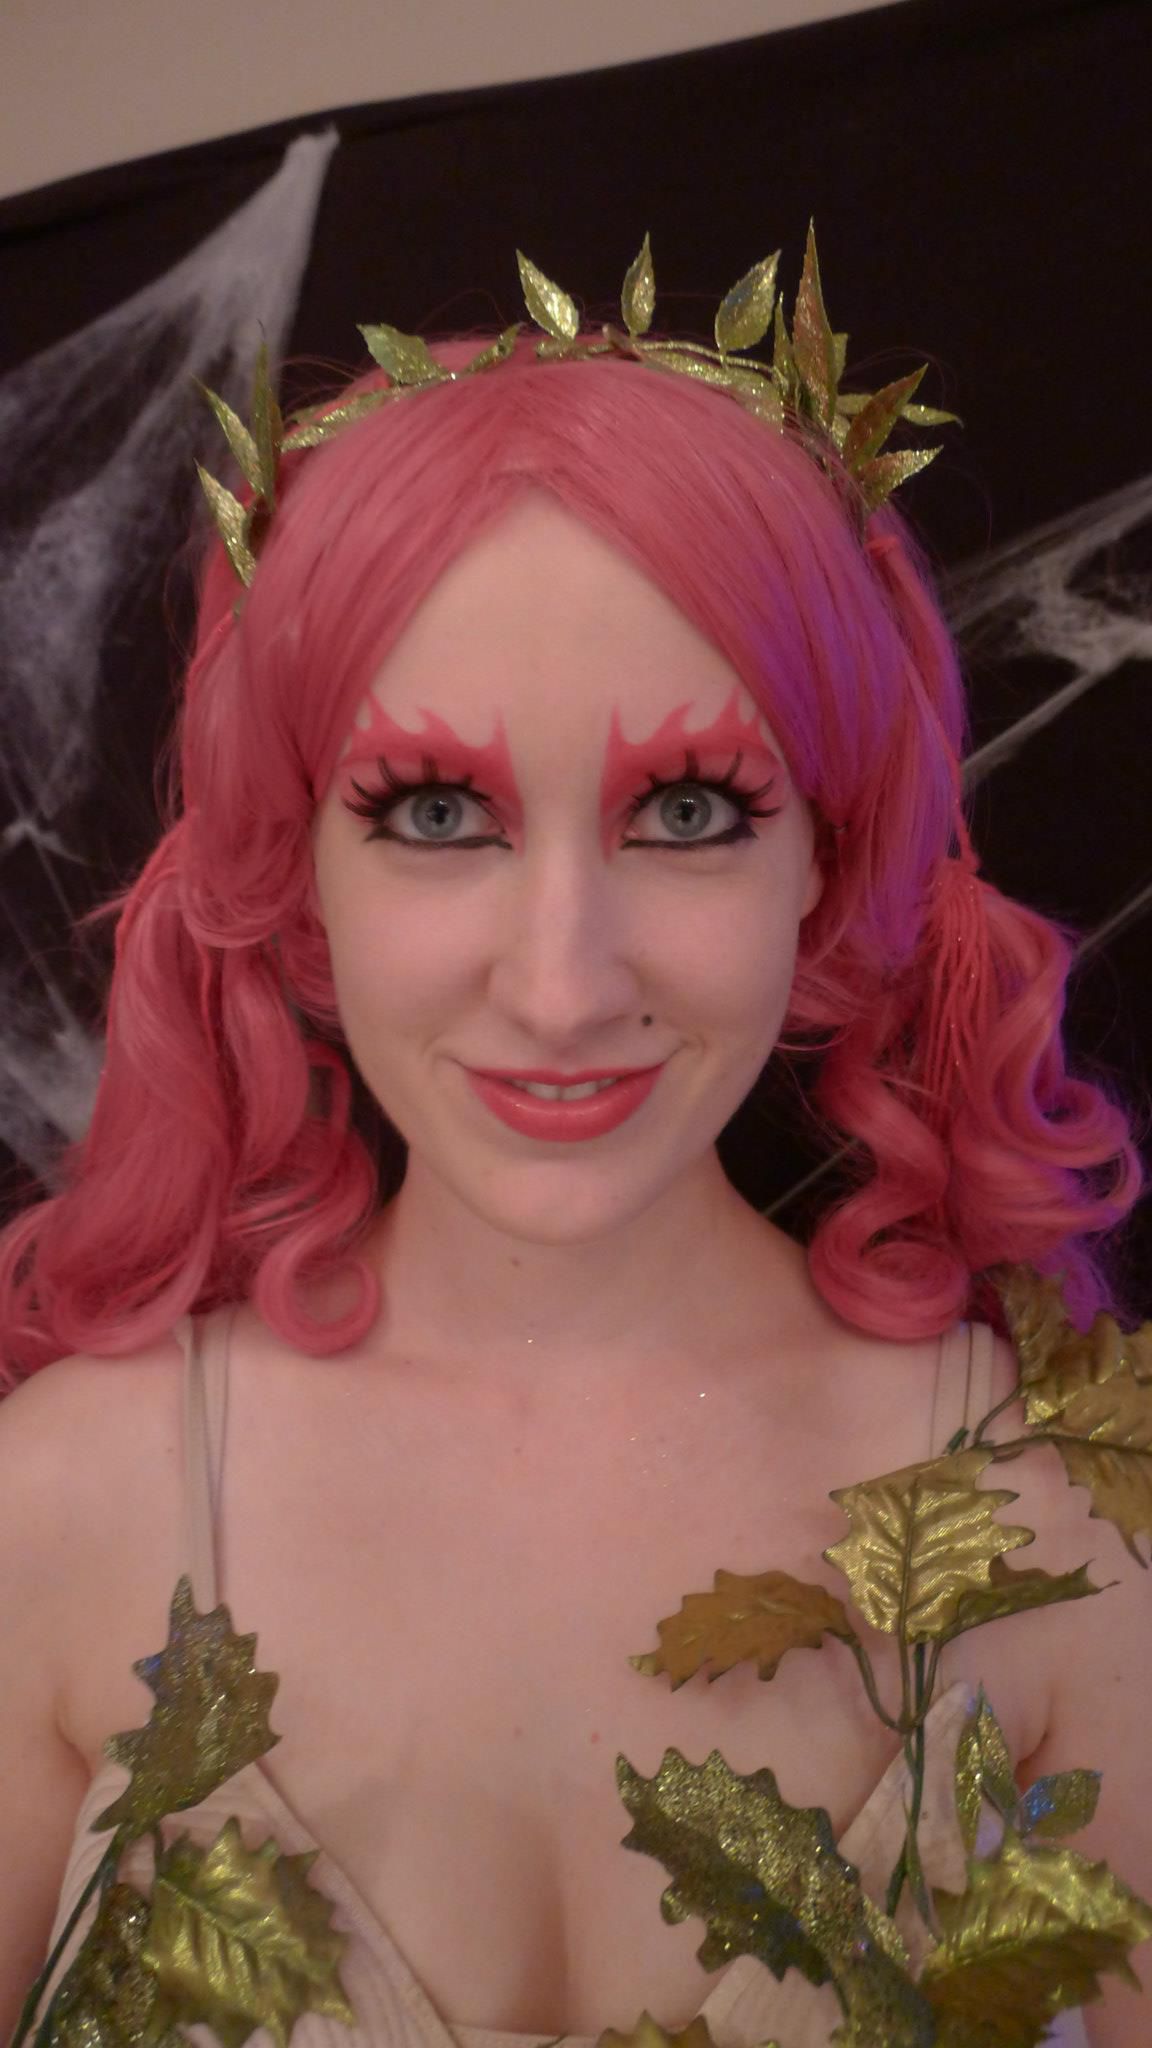

Photo: Jennifer Culp
This time around I got some hot-pink wool roving, the stuff you use to make yarn or felt. It’s really lightweight, so I figured it would be easily supported with wire to give a floating effect.
I probably should have taken photos throughout the creation process, but I got too wrapped up in what I was doing. I took two plastic headbands with hair-holding teeth and wired them together about 3.5 inches apart, so that the first sat at my hairline and the other sat on top of my head. I attached three long pieces of sturdy wire to the “back” headband, using finer gauge wire to wind it tightly to the plastic. Then I covered the entire structure with the roving, securing it to the headbands by sliding it onto their teeth, and using fine wire to attach it to the thicker structural wires at regular intervals. It worked!!!
The floating effect is perfect; the wild, extended hair bobs around organically when worn! But! This particular draft of the wig is also a public health hazard, due to its massive size and my failure to cap the ends of the sharp supporting wires beneath the roving. Its placement on my head was dangerously destabilized by addition of the elf ears, so I ditched them for the time being. Just imagine that my ears are pointy underneath the pink hair. Fabulous!
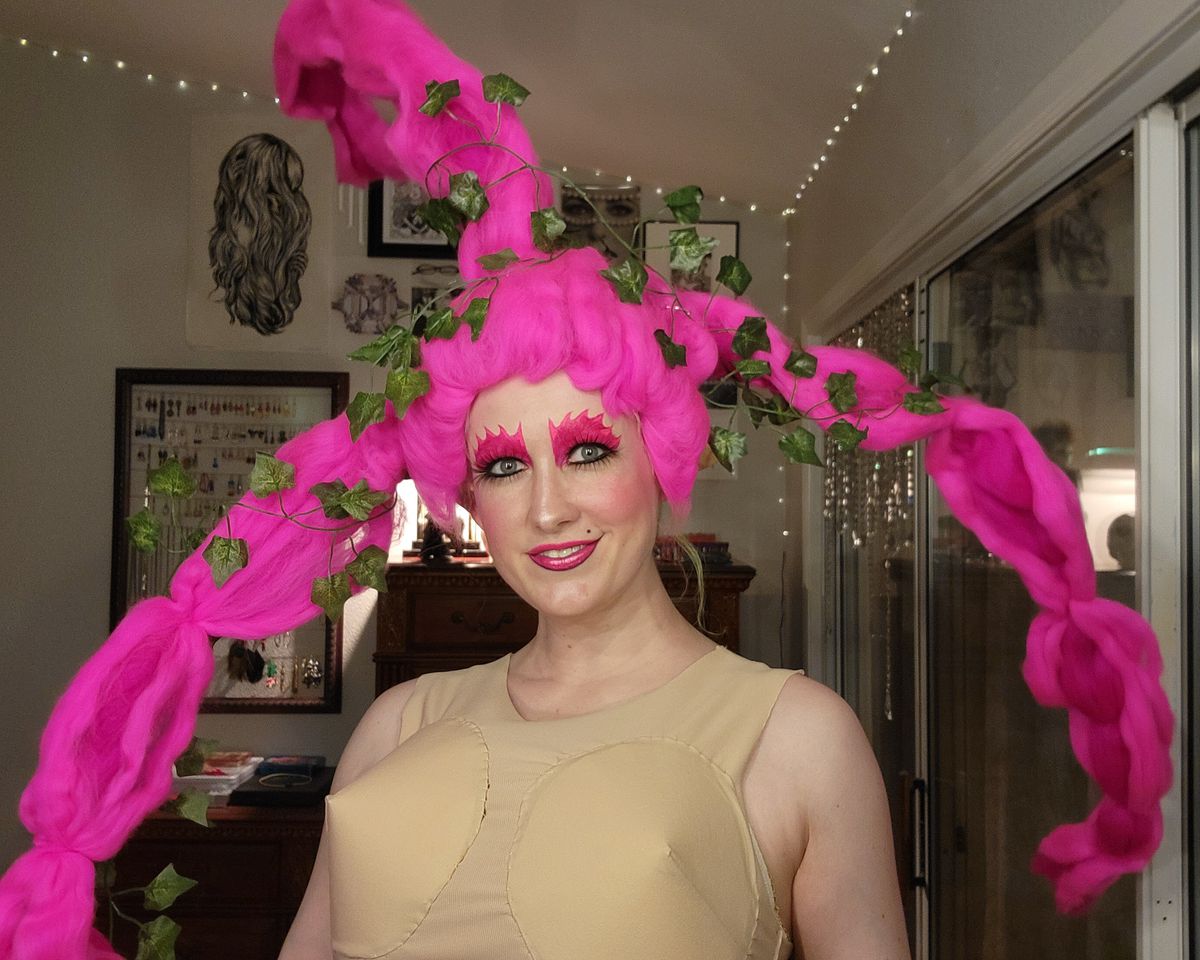
Photo: Jennifer Culp
All we need is a few leaves for modesty, and I’m ready to hand out a boon from the goddesses! When battle has made you weary, please come back to see me.
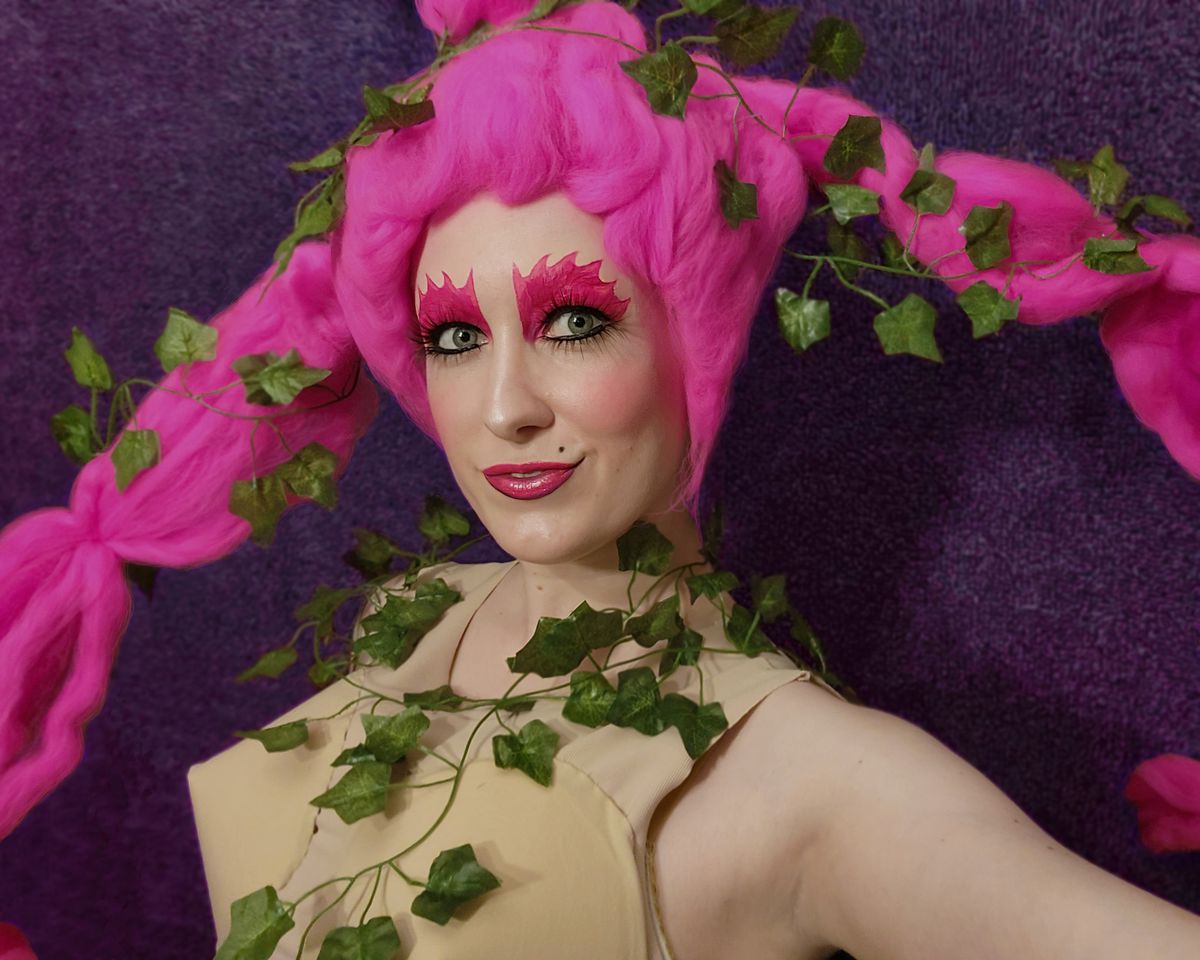
Photo: Jennifer Culp
For a more casual take on the Great Fairy’s style that you can flaunt in your everyday life, you’ll need:
- Clothing that mimics your skin color to create a disconcerting illusion of nudity
- Hot-pink graphic eyeliner and lips
- Big honkin’ eyelashes
- A left upper-lip mole
- An alarmingly loud laugh
If you’ve got magenta hair, this is your time to shine! You could even do three ponytails if you like. For my part, I chose to wear my green-tipped hair down to hint at the Great Fairy’s ivy “clothing.”
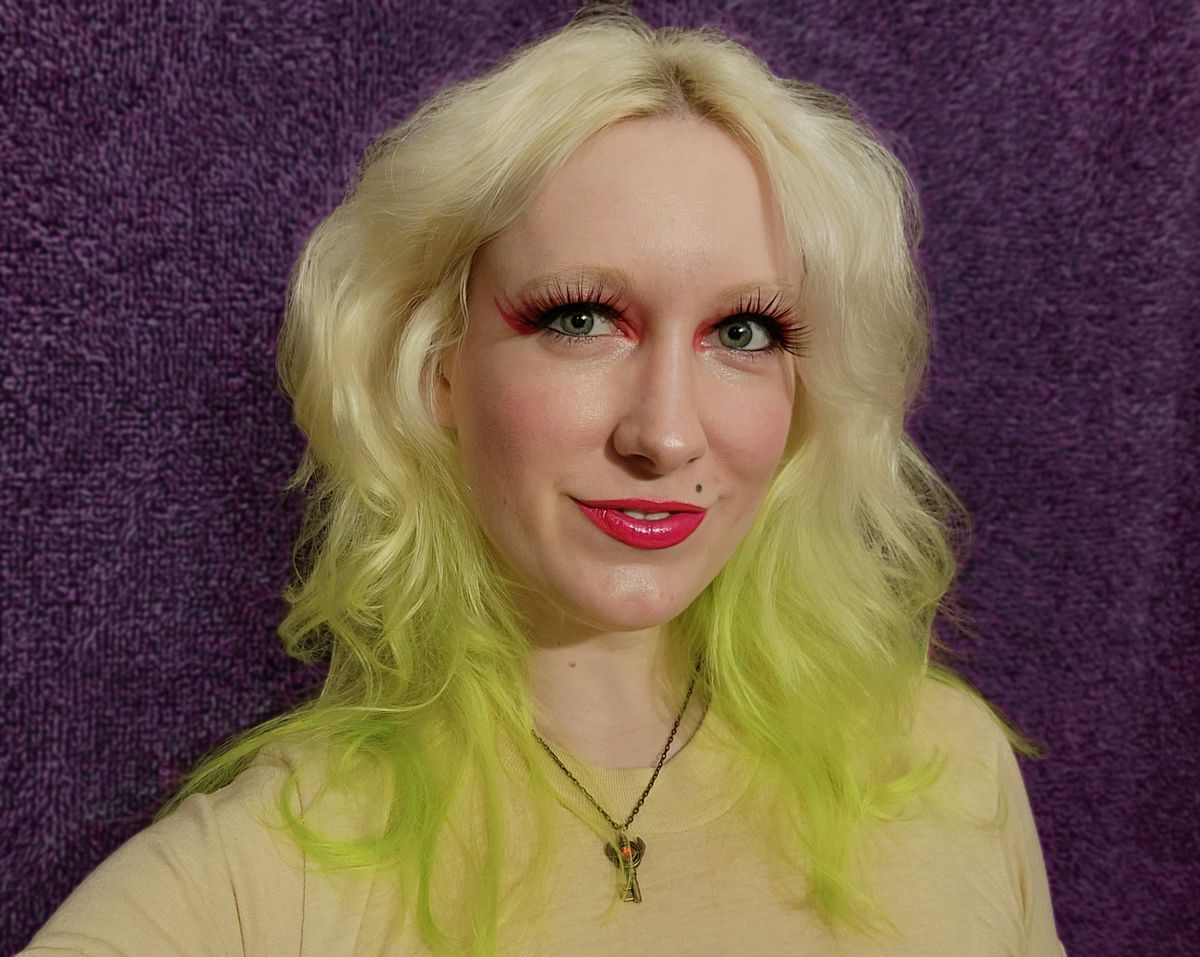

Photo: Jennifer Culp
And now, we’re that bitch, the one who appears in the game for a few fleeting moments but remains imprinted on everyone’s minds for the rest of their lives. Enjoy your mysterious doings off in your own isolated, rock-blockaded Fairy Fountain.