

North Lomei Labyrinth hides a shrine within The Legend of Zelda: Tears of the Kingdom’s Hebra Mountains region. At the center of the maze, you’ll find the Mayaotaki Shrine. Mazes are always tough, but there are a few different ways you can navigate the labyrinth and complete the shrine.
Our guide will help you find the Mayaotaki Shrine location by navigating through the North Lomei Labyrinth to collect the treasure and Light of Blessing.
Once you’re done with the surface level maze, you’ll head upward into the sky to complete the North Lomei Sky Labyrinth, which will then open up the the North Lomei Depths Labyrinth. While on the sky structure, you’ll also be able to complete the Tenbez Shrine.
When you’re done, our shrine locations page and interactive Hyrule map can direct you toward something else to do.
North Lomei Labyrinth location
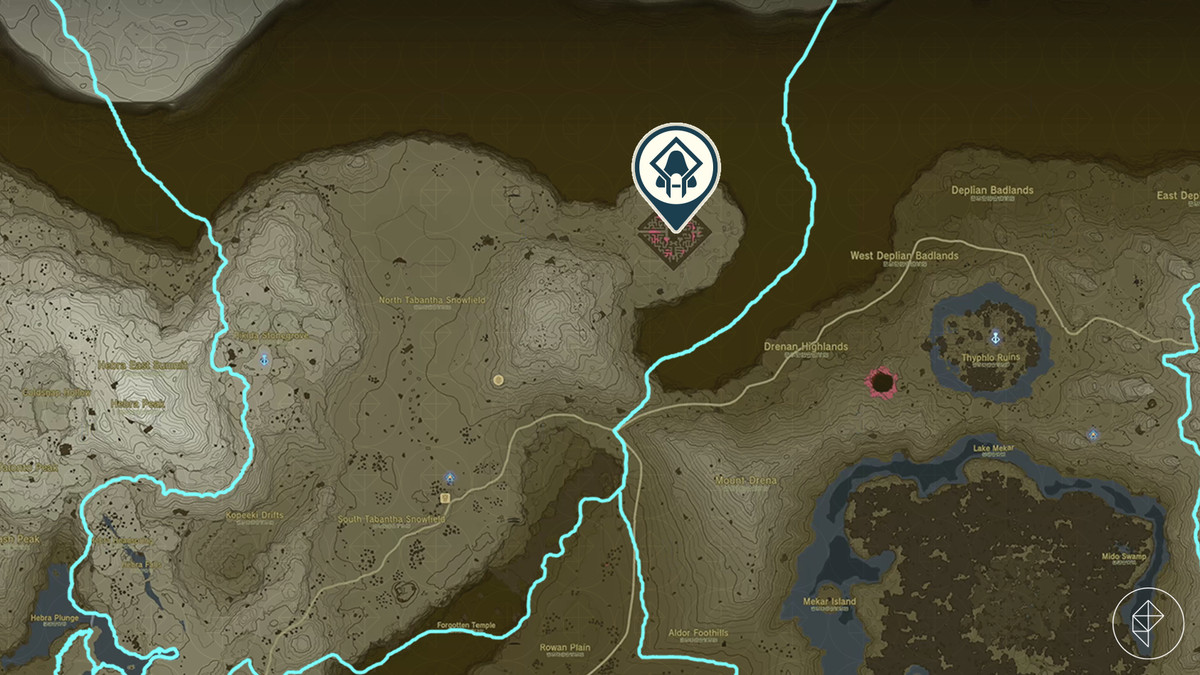

Graphic: Jeffrey Parkin, Nicole Carpenter/ProSpelare | Source images: Nintendo EPD/Nintendo via ProSpelare
The North Lomei Labyrinth and the path toward the Mayaotaki Shrine are found within the Hebra Mountains region of Hyrule at the coordinates (-056, 3535, 0234). The North Lomei Labyrinth is almost directly north of Hyrule Castle, just a bit to the west. The sky and depths versions of these are, naturally, right above and below.
North Lomei Labyrinth path and reach the Mayaotaki Shrine
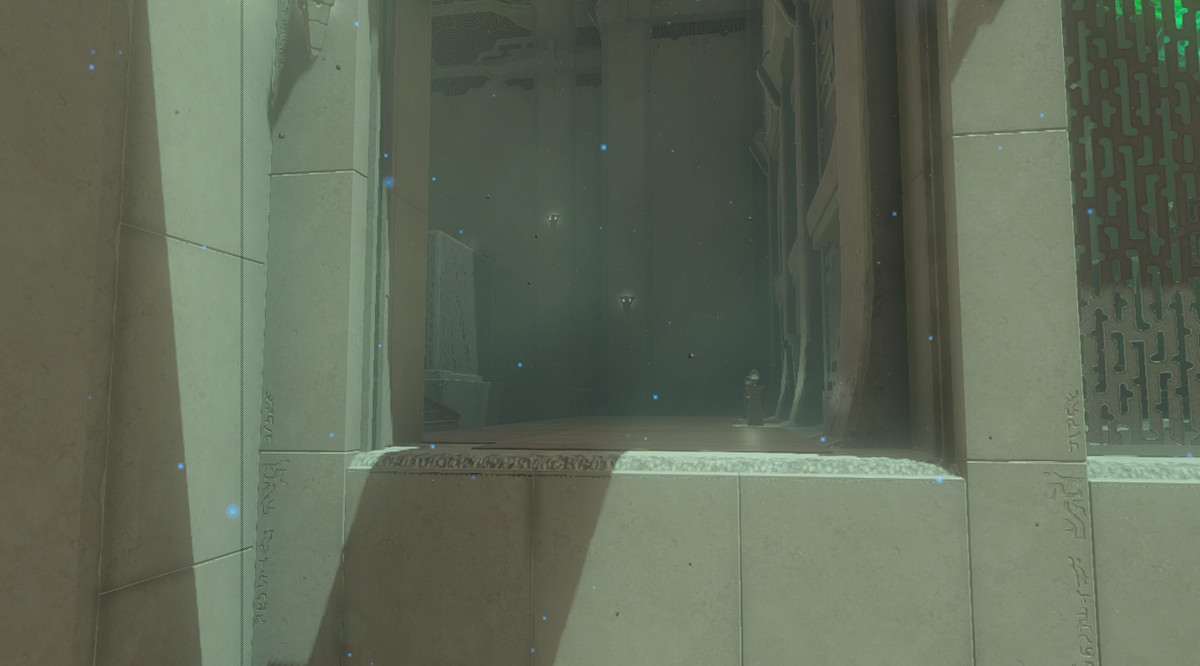
You’ll have to make your way into the maze to find the shrine, which is the shrine puzzle itself. You’ll know you’re at the entrance to the labyrinth when you reach a Zonai tablet and a note from a researcher. The researcher left a trail of pine cones to follow, which will lead you to the center and the Mayaotaki Shrine.
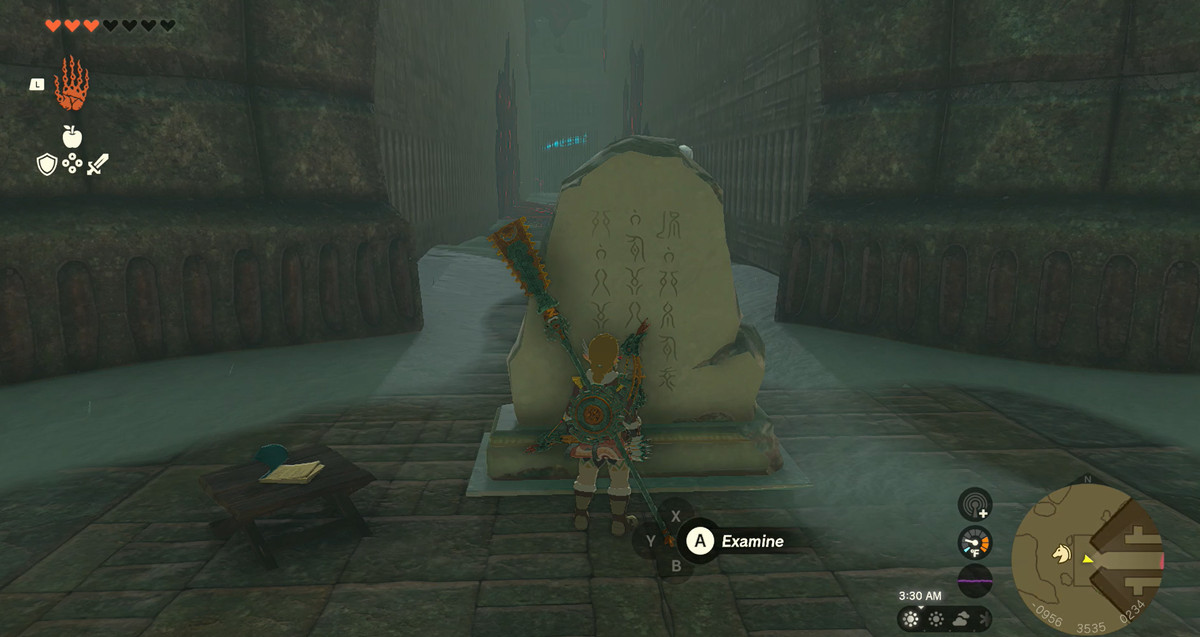

Image: Nintendo EPD/Nintendo via ProSpelare
That’s the easy way make your way through the maze, but it is a fairly long path.
Before you go, make sure you’ve got a way to make fire. It’s essential.
(Ed. note: As well as the walkthrough in text below, here’s a visual representation of the path, which may be easier to follow. The yellow lines are the surface, and the green is when you climb the ladder to the second floor.)
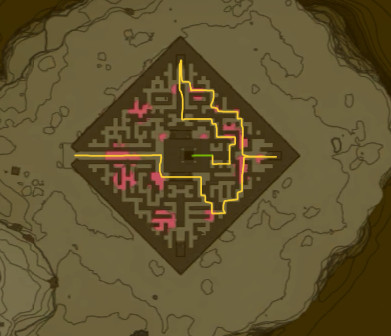

Graphic: Nicole Carpenter/ProSpelare | Image: Nintendo EPD/Nintendo via ProSpelare
Here’s how to complete the North Lomei Labyrinth:
1. Head straight into the maze, using fire to melt the ice. Light the campfire straight ahead, and create a draft using the pinecones. Use that draft to soar over the gloom.
2. Turn right, then turn left where the gloom is mostly blocking the way.
3. Head straight to the next campfire and note. Turn right.
4. Follow the path until the next fork. Turn left.
5. Turn right, then turn immediately left before the gloom.
6. Turn left. There’s a fork — on the right side, there are two ice blocks. Turn right, past the ice.
7. Follow the path until you reach the next campfire. Use the campfire and pinecone to create a draft to head straight and over the gloom.
8. Turn right.
9. Head straight past the gloom. You’ll meet a barricade of ice. Melt it to get past, then roll the boulders to get a Zonaite Bow from the chest.
8. Head back down the stairs and take the second right. Make a fire with wood, flint, and a pinecone to create a draft to soar right over the gloom. Go straight to the end of the hallway.
9. Take the last left then the second left, where the gloom is in the corner.
10. Continue straight, turn right, left, and then right.
11. Turn left using fire and pinecones to continue over the gloom. (Alternatively, you can climb the wall to get past.)
12. Take a left and then a right to get to the next note and campfire.
13. Continue straight past the campfire (and slightly to the right, at the tip of the maze) and melt the ice to reveal a chest that awards a Mighty Zonaite Shield.
14. Turn around and head straight toward the light at the end of the hallway.
15. Take the first left, then continue straight.
16. Turn right and then right again, and continue until you find a whole mess of gloom. You can use a fire to get over it again, using a pinecone to make a draft.
17. Follow the pinecone, then turn left where the ice block is. Melt it to get by.
18. Head straight, then turn right. Make the first right into a dead end, where there is a ladder. Climb it.
19. Head straight, then take a left.
20. Continue up the stairs and you’ll pass another campsite and note. You should be able to see the shrine by now.
21. Glide down to the shrine and melt the ice in front.
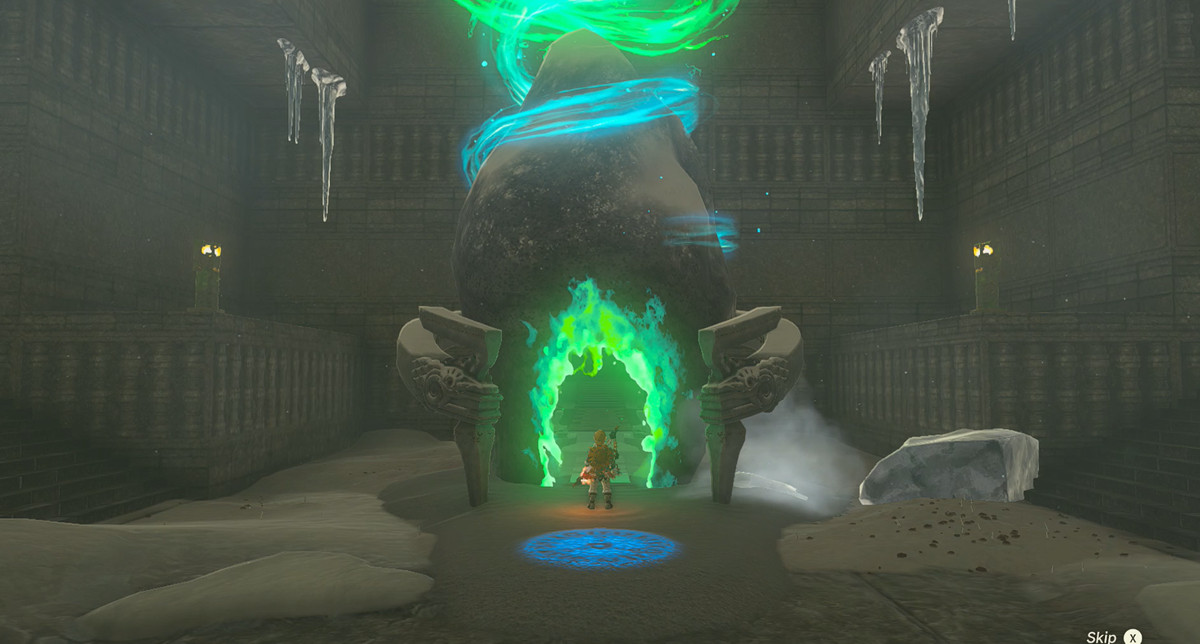

Image: Nintendo EPD/Nintendo via ProSpelare
22. Head inside the shrine to get your reward — a chest with a Diamond and the Light of Blessing.
23. Exit the shrine. Once you’re out, turn around and head over to the opposite wall, toward the stone circle. It’ll unlock another labyrinth in the sky.
34. Right where you’re standing, use Ascend to get through the ceiling. When you reach the next platform, do that again. There’s a chest with a Big Battery Zonai device.
35. Continue up again to reach the top of the shrine.
36. You’ll have to drop back down to the Mayaotaki Shrine from there, or use fast travel to easily get back. Head straight behind the shrine to exit the maze, but beware that Gloom Hands will chase you.
Your other option is to find places within the maze that you can use Ascend, then walk on top of the maze to locate the shrine.
North Lomei Sky Labyrinth and Tenbez Shrine
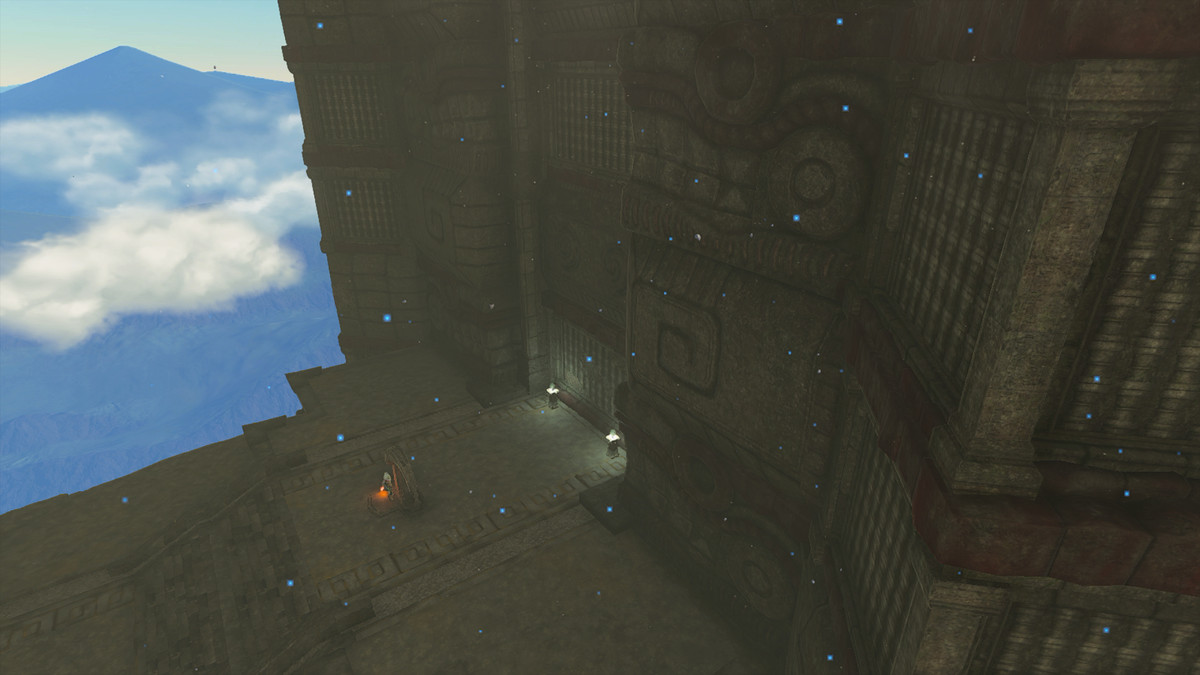
Image: Nintendo EPD/Nintendo via ProSpelare
The North Lomei Sky Labyrinth is not easy to reach, nor is it easy to navigate through. To set yourself up for success, make sure you’ve unlocked the Pikida Stonegrove Skyview Tower and the Thyplo Ruins Skyview Tower. Pikida Stonegrove is essential because you need the mini-map to navigate the sky maze, and Thyplo Ruins is necessary for reaching high into the sky.
To get to North Lomei Sky Labyrinth, travel to Thylo Ruins Skyview Tower. Make sure Tulin is summoned. Launch yourself into the sky and jump from sky island to sky island — there are two in the path — toward the floating block of a maze. You’ll need to use Tulin’s ability and monitor stamina to make it all the way there.
Navigate to the far west end of the top of the shrine where there’s a piece of land jutting out. That’s where the Tenbez Shrine is, which you need to complete to start the sky maze.
Tenbez Shrine solution
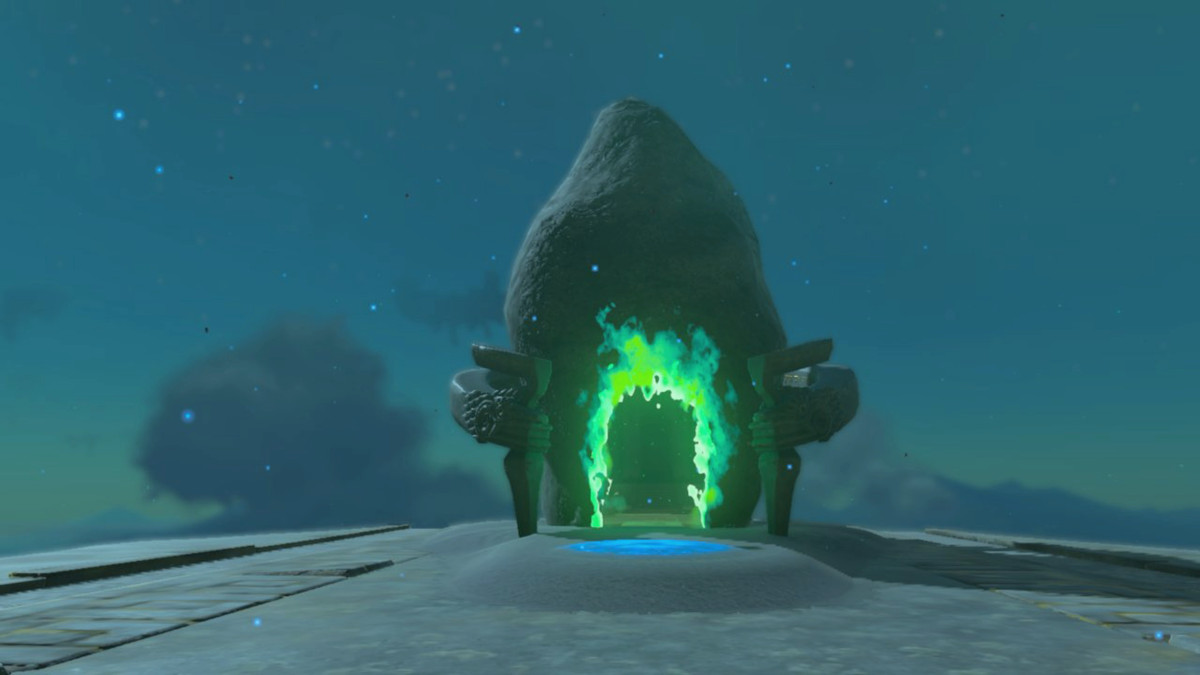
Image: Nintendo EPD/Nintendo via ProSpelare
The Tenbez Shrine solution is about gravity. Here’s how to solve it.
1. You’ll see a large ball being shot back and forth once you walk in, by two launchers. Between the two launchers, there’s a Zonai device. Hit it to turn it from green to yellow, which activates low gravity.
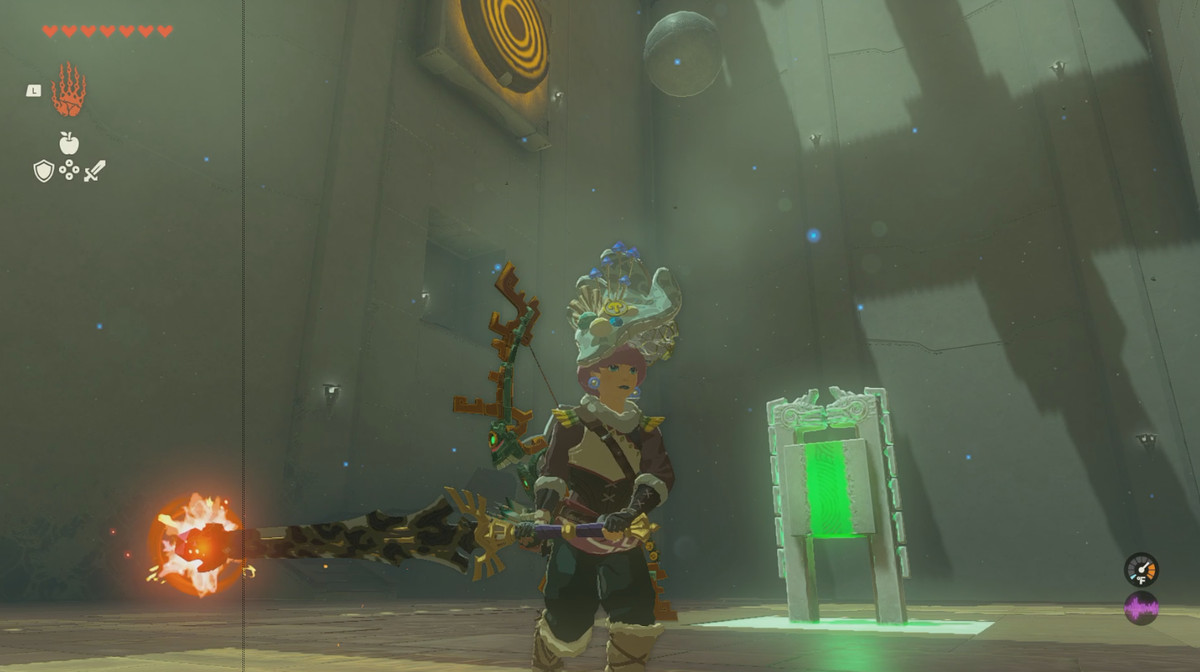

Image: Nintendo EPD/Nintendo via ProSpelare
2. The launcher from the right side will shoot the ball up to the target on the wall, opening a gate on the other end of the room opposite the target.
3. The left-side launcher will now be able to shoot the ball through the gate into the next room.

The ball will soar through here.
Image: Nintendo EPD/Nintendo via ProSpelare
4. Before heading up yourself, head to the left launcher to shoot yourself to the opposite wall nook under the target, where there’s a chest with a large Zonai charge.


Image: Nintendo EPD/Nintendo via ProSpelare
5. Use the launcher under the nook to shoot yourself into the higher room.
6. To the immediate left, there’s another Zonai switch. This will turn high gravity off, which is how we’ll get the ball into the square box that’ll open the next gate. Wait for the ball to return to the far end wall. It’ll get launched a second time, toward the large box. Wait until the ball is just above the box before hitting the switch. It should fall in. If it doesn’t, another ball will come by soon.
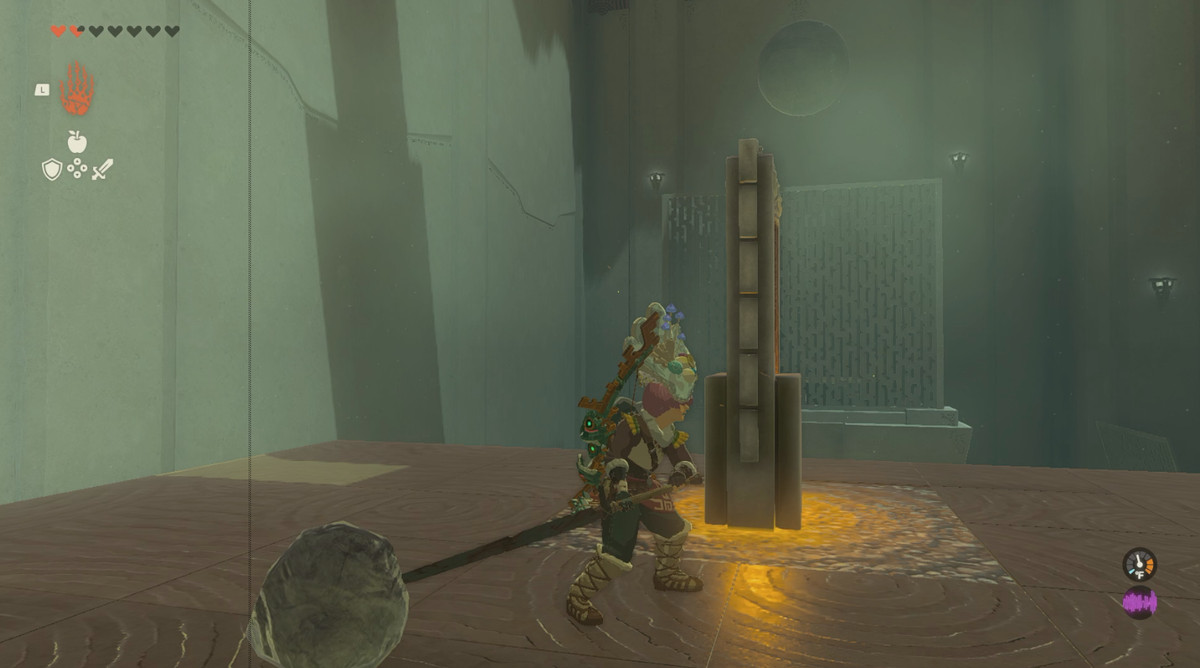

Image: Nintendo EPD/Nintendo via ProSpelare
7. The gate will open. Head inside to complete the shrine and receive the Light of Blessing.
You’ll exit right to the entrance to the sky maze.
North Lomei Sky Labyrinth solution
The North Lomei Sky Labyrinth is challenging — you must navigate the maze using your glider and air bursts to unlock four terminals. The maze itself is complex, but you also need to mitigate stamina. Instead of using exact directions, there’s an easy trick for navigation.
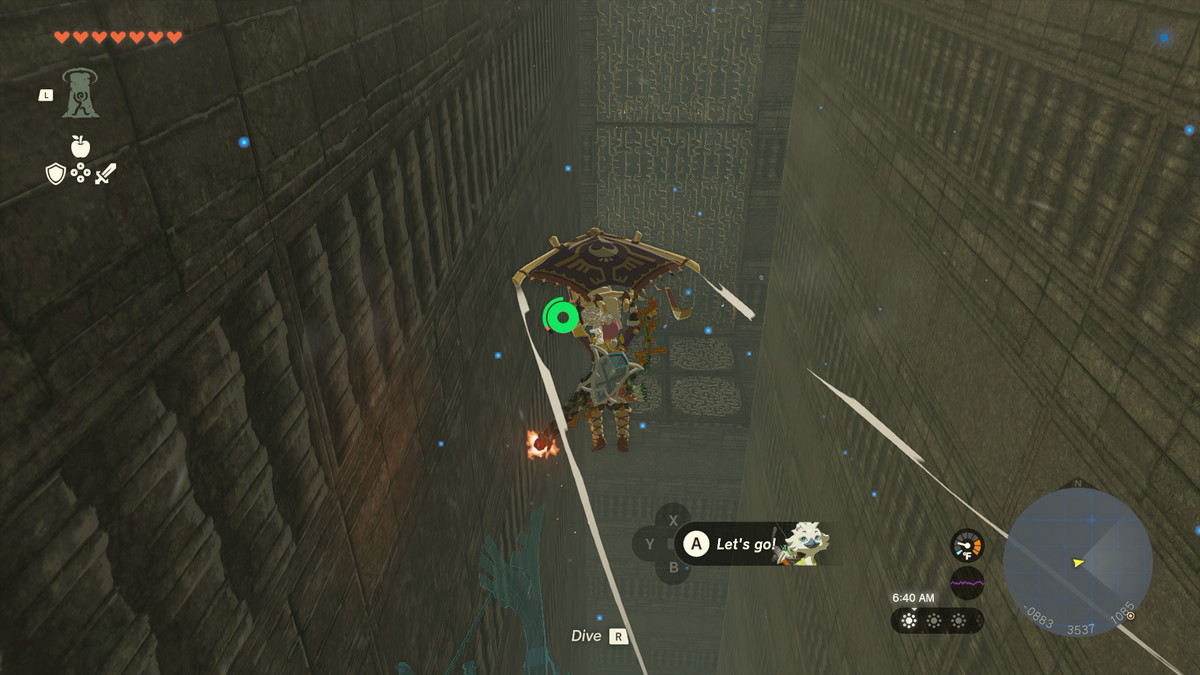
Image: Nintendo EPD/Nintendo via ProSpelare
But first, head straight in. You’ll see the first switch behind the wall. Head either way around to the back side, where the wall is low enough to jump over. Examine the dragon stone to activate the terminal.
Exit that room. Now there are three more terminals to unlock in the north, east, and south corners of the square maze. This is where you need the minimap, which will show you the solution to getting toward each shrine — without it, you will certainly get lost. Use this to follow the pathways to the terminals. You may need to rest at times, so keep your eyes peeled for platforms to land on and air bursts to help you navigate up when needed. These are the approximate paths you’ll take:
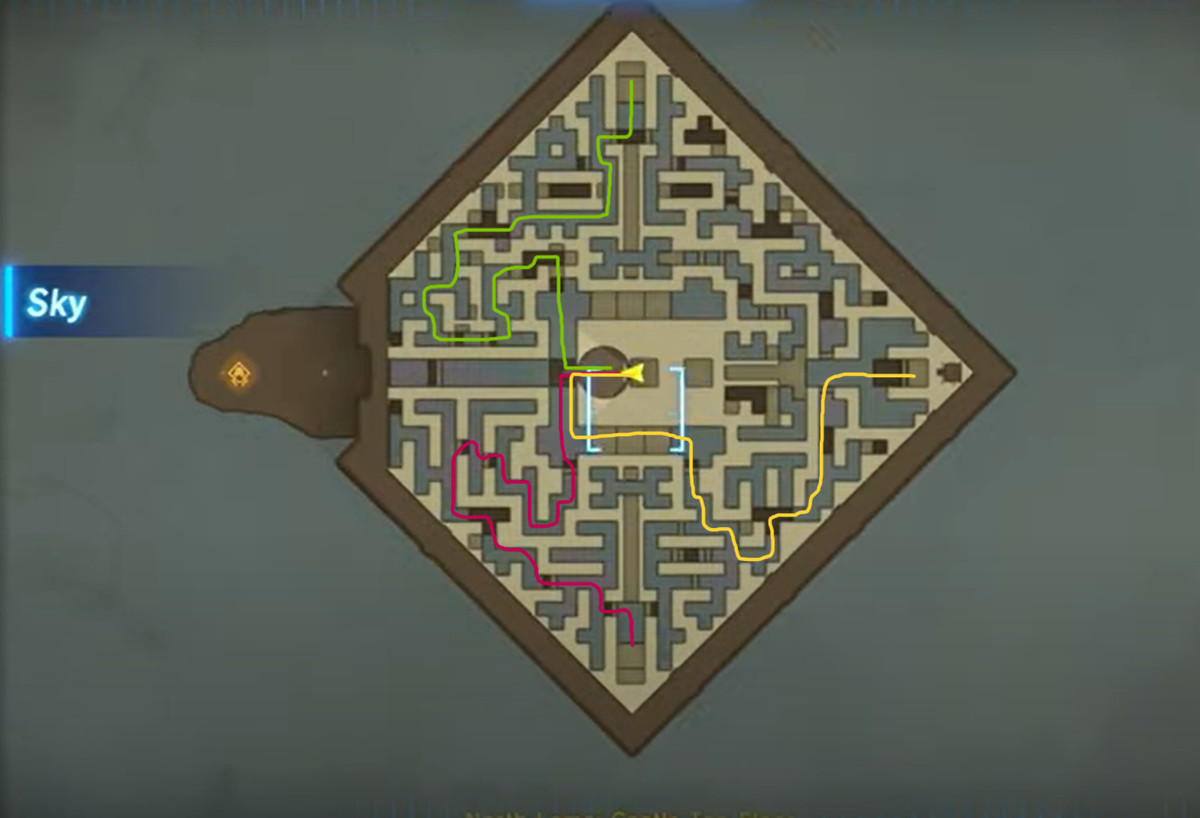

Graphic: Nicole Carpenter/ProSpelare | Image: Nintendo EPD/Nintendo via ProSpelare
At the last terminal, you’ll get a huge blast of air to push you to the top floor of the maze. Head over to the full circle dragon terminal and examine it. Once the sky maze is completed, it’ll open the depths maze, too. A gate will open and you’ll be able to dive in all the way to the surface — then further below.
Jump off the platform to get that started. Just keep heading downward, making sure to aim toward the middle of the surface labyrinth. The opening for the depths is a lit up square.
North Lomei Depths Labyrinth
It’s dark down here, so make sure you look out for some lights at the bottom — you don’t want to crash. Open your glider to land safely. Toss a Brightbloom Seed to light things up and take any passageway into the basement. They all head the same way. You will find some poes on the way down.
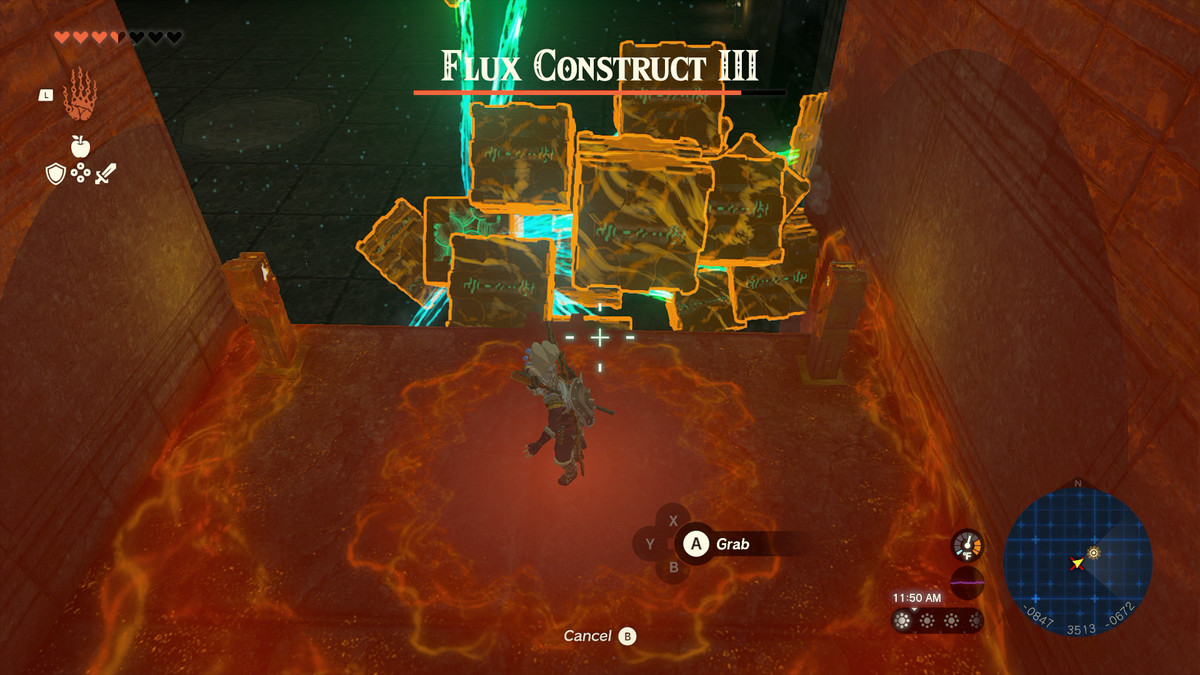
Image: Nintendo EPD/Nintendo via ProSpelare
Continue down the stairs and you’ll find the Flux Construct III. Use a Brightbloom Seed to light up the area and start the fight. Flux Construct III works in the same way the others do: There’s a glowing box that you need to hit — pull it off the Construct using Ultrahand and then hit it. Rinse and repeat.
It’s easier said than done, however. I ended up staying on the higher platform and using arrows to attack the Construct. Once the Construct got close enough, I could pull the glowing box off to attack more. The Construct will change forms, so be wary of that, but attacking from the ledge made things easier.
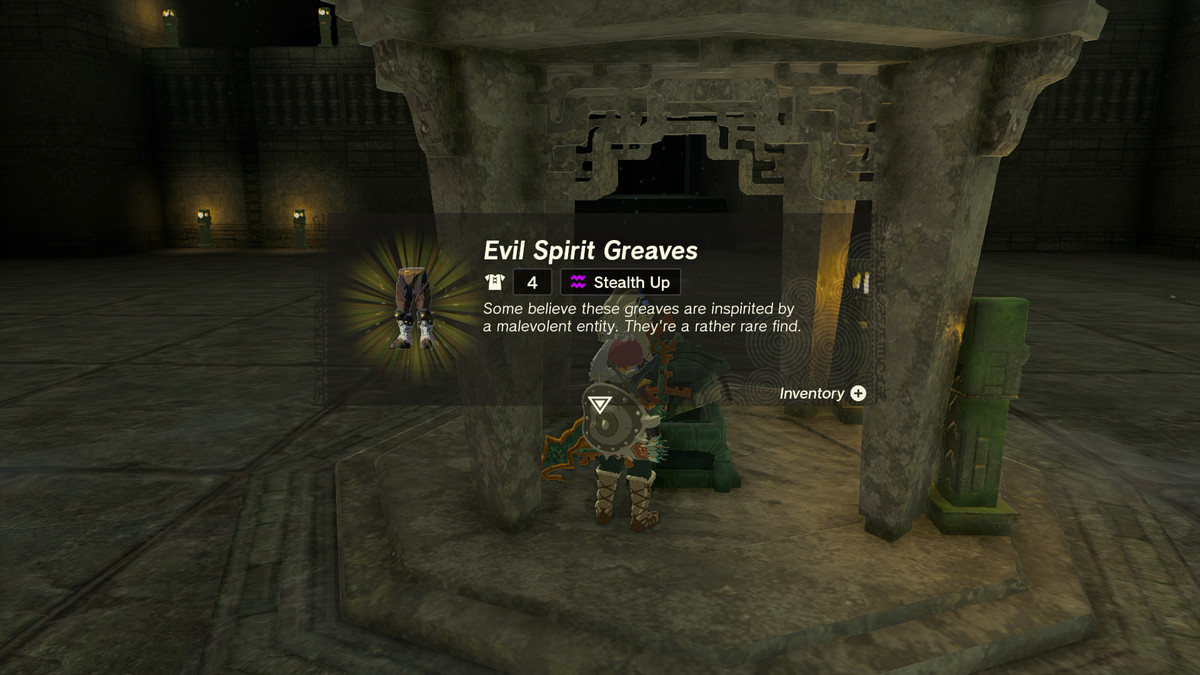
Image: Nintendo EPD/Nintendo via ProSpelare
Once the Construct is defeated, it’ll drop a ton of goods alongside its core. You can’t pick that core up, but you can attach it to a weapon. A chest will spawn in the middle of the room with Evil Spirit Greaves. You’ll also find several chests off each hallway in the basement; they’re full of Zonai weapons.
You’ve done it!