

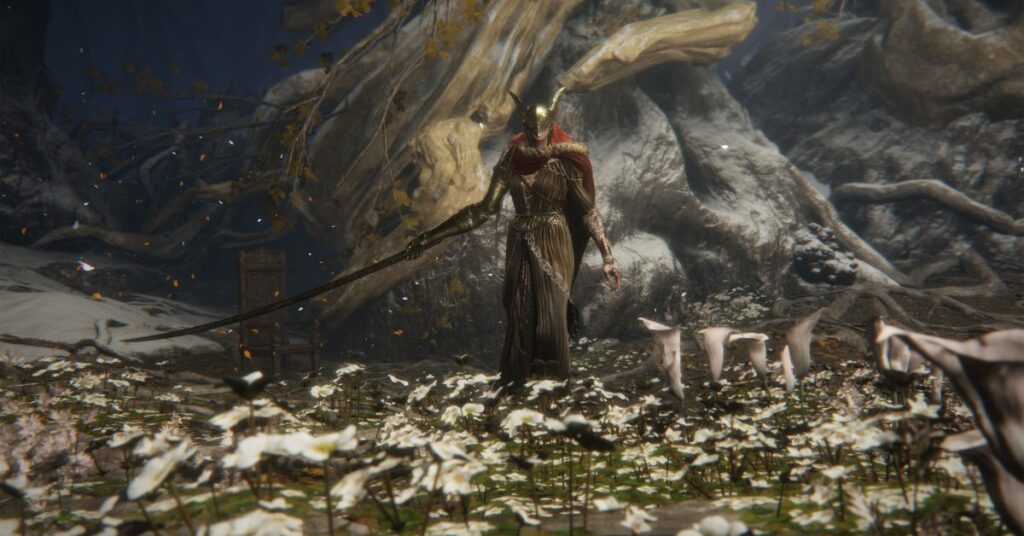
Looking for an Elden Ring Malenia boss guide? Malenia, Blade of Miquella, Goddess of Rot, and bearer of a shard of the Elden Ring, is one of the toughest bosses in the game — and that’s saying something.
Don’t let that discourage you though; with the right preparations and a good battle strategy, even Malenia can be defeated. Our Elden Ring guide will show you how to beat Malenia, including details about her location, weaknesses, and attacks.
Malenia location in Elden Ring
Malenia resides at the bottom of the Haligtree, the relatively small region found north of the Mountaintops of the Giants. To get there, you must advance through Liurnia, Altus Plateau, and the eastern part of the Mountaintops of the Giants before collecting the Elden Ring Haligtree Secret Medallions and gaining access to the Consecrated Snowfield.
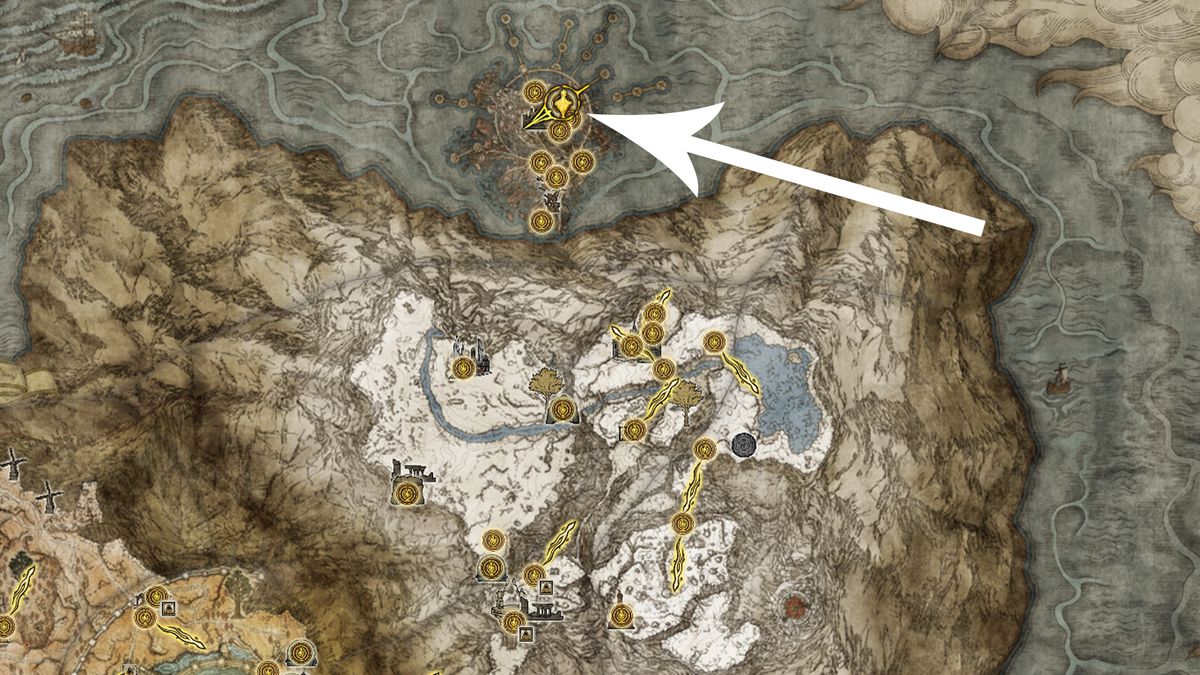

Image: FromSoftware/Bandai Namco via ProSpelare
In the Consecrated Snowfield, find Ordina, the Liturgical Town, and solve the evergoal puzzle to unlock a portal that takes you to the top of the Haligtree. From there, keep descending. At the bottom of the Haligtree, you’ll find a garden with a church; it has a lift inside that’ll take you to Malenia.
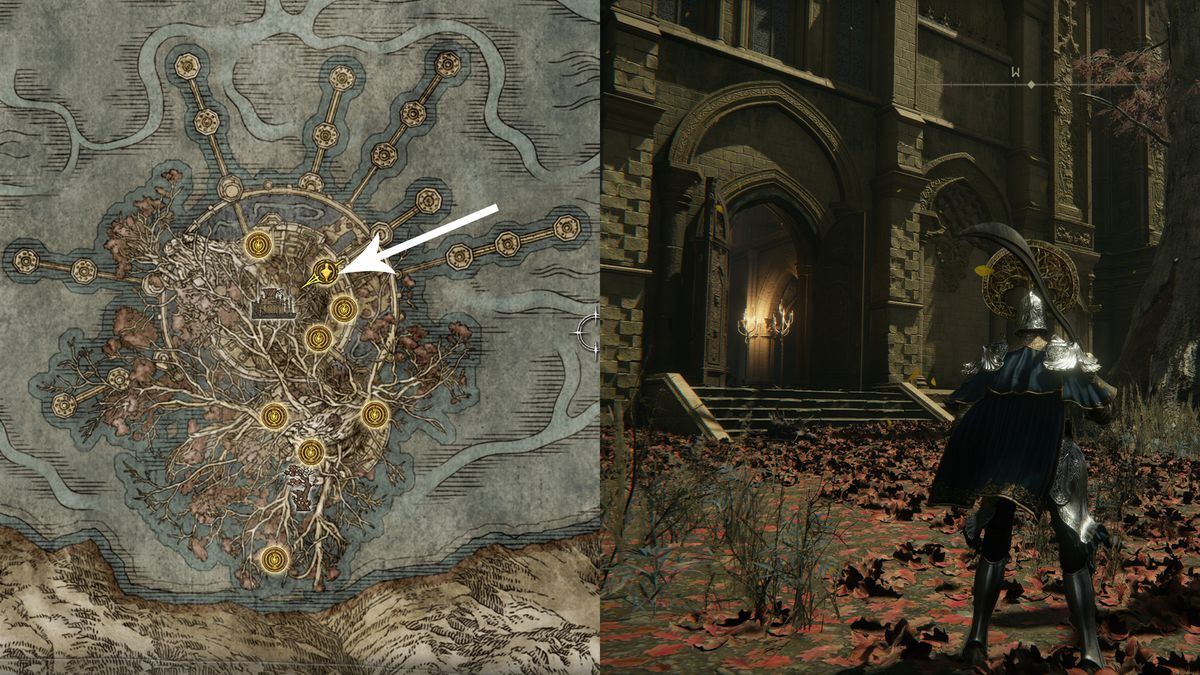
Image: FromSoftware/Bandai Namco via ProSpelare
If you need more help, take a look at our detailed Elphael, Brace of the Haligtree walkthrough.
Things to know about Malenia
- She heals with every hit. Malenia regains health every time she lands a hit on you, even if you block it. For that reason, using a shield in this fight is not advised.
- She deals physical damage with slash and pierce attacks. During the second phase of the fight, she’ll inflict Scarlet Rot.
- She has multiple one-hit-kill attacks. No matter how high you pump your vigor or how heavy your armor is, you can and will be one-shotted by several of Malenia’s attacks. You must learn to avoid them. We’ll go over them below.
- She does have weaknesses. Malenia is almost unbelievably strong, but she does have weaknesses. We’ll tell you exactly what to bring to this fight.
- Summons are key. Summoning other players for this fight is a gamble. You might get lucky, or your phantom helpers might die the first time Malenia uses Waterfowl Dance, leaving Malenia with beefed-up health while you’re still fighting her solo. Using a Spirit Ash is a more reliable choice. We’ll go over your best options in the guide.

Image: FromSoftware/Bandai Namco via ProSpelare
Malenia’s weakness and resistances
Luckily, even Malenia is weak to certain damage and attack types. Here’s a list of everything Malenia is weak against:
- Frost damage. This is Malenia’s lowest resistance.
- Bleed damage, also known as Blood Loss. This is Malenia’s second-lowest resistance.
- Fire damage. While using magical spells isn’t the best strategy against Malenia (more on that below), weapons with innate fire damage work great.
- Physical damage. Melee attacks can work very well against Malenia.
To avoid using this, here’s a list of everything Malenia is exceptionally strong against:
- Scarlet Rot damage. Malenia is highly resistant to the Scarlet Rot status effect.
- Poison damage. Malenia is highly resistant to the poison status effect.
- Holy damage. Malenia has a high Holy damage absorption. If you have a Faith build, it’s better to use fire incantations like Burn O Flame instead of Holy damage.
- Most magic. Malenia will easily dodge most sorceries and incantations you can throw at her. There are exceptions, like the Night sorceries, Ranni’s Dark Moon, and Dragonice. But even then, it’s hard to find enough time to cast them. To top it off, landing spells on Malenia often triggers her most devastating attack, Waterfowl Dance.
- Shields. Malenia heals herself even if you block her attack with your shield, so using one puts you at a serious disadvantage.
- Parrying. Unfortunately, Malenia will only be staggered by every third parry, instead of every parry like a normal enemy. It’s doable, but not recommended.
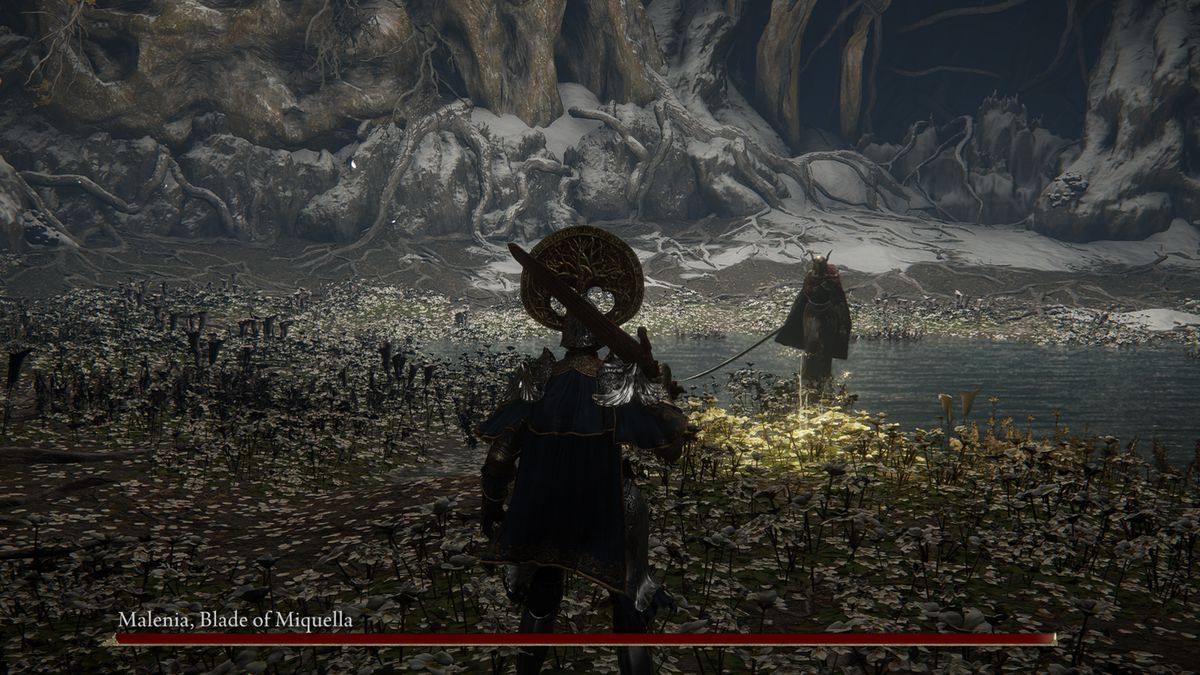
Image: FromSoftware/Bandai Namco via ProSpelare
Prepare for the Malenia boss fight
Now that you know Malenia’s strengths and weaknesses, how do you exploit them? Here’s a list of combat strategies that work well against Malenia:
- Use dual-wielding. Forget about shields; dual-wield two weapons of the same type instead. This allows you to power-stance, which unlocks new attacks using the L1 button. Fast weapons like katanas or twinblades are best, but greatswords like the Claymore can work if you have more strength than dexterity. Whatever you choose, make sure to upgrade both weapons as much as possible.
- Use a light load. Malenia is fast and you don’t have a shield, so you must rely on dodging to stay alive. A heavy load makes things difficult, a medium load is doable, but a light load of less than 30% maximum equipment makes dodging easy. Then again, this is a very risky strategy — one mistake could tilt the fight in Malenia’s favor.
- Or at least not a heavy load. You can use a heavy weapon, but don’t go for a full heavy loadout as you won’t be able to dodge Malenia’s attacks. Basically, choose the most powerful armor set you have that still falls within medium load range.
- Build resistance against physical damage. Armor sets with high resistance against slash and pierce are always the best choice. Don’t forget to combine them with a physical damage-reducing talisman like the Dragoncrest Greatshield.
- Make dodging easier with Bloodhound’s Step. If the light load sounds too difficult, you may imbue your right-hand weapon with the Bloodhound’s Step Ash of War. This is a souped-up dodge that causes you to briefly turn invisible and slide around the room, totally impervious to damage. Without a doubt, it’s the single best tool to give you a slight edge against Malenia. You can get it by defeating the Night’s Cavalry mini-boss at the bridge north of Lenne’s Rise in eastern Caelid.
- Exploit Malenia’s Frost weakness. Imbue at least one of your weapons with the Cold Affinity. Grab the Glintstone Whetblade from the courtyard of Raya Lucaria, or use Dragonice, purchased at the Cathedral of Dragon Communion in Caelid (though its slow cast time leaves you vulnerable). The same goes for Ranni’s Dark Moon, which you can get by following Ranni’s questline and reaching the Moonlight Plateau. If you’d rather just chuck grenades at her, the recipe for Freezing Pots is in the Glintstone Craftsman’s Cookbook (6), located in a building on the east side of the main courtyard of Caria Manor.
- Focus on causing Bleed damage. Thanks to its innate Bleed damage, Rivers of Blood is one of the best weapons against Malenia. If using a katana or another weapon with innate Bleed damage is not an option for your build, go get the Black Whetblade at Night’s Sacred Ground, a part of Nokron, Eternal City accessed by jumping down the rooftops near the Ancestral Woods site of grace (down the meteor hole that appeared after you defeat Radahn). The whetblade enables you to add Blood Affinity to most weapons that have no innate element.
- Deal fire damage. If you have a weapon with innate Fire damage, such as the Magma Blade, that’s a great option too. You can obtain it at Volcano Manor, where it’s dropped by man-serpents. Alternatively, bring some Volcano Pots and chuck them at Malenia whenever you can.
- Stagger Malenia. Yes, you can stagger Malenia, and it’s actually not that hard. Wait for her to finish an attack combo, then hit her immediately afterward to stagger her.
- Get a Scarlet Rot cure. Last but certainly not least, bring enough Preserving Boluses with you to cure Scarlet Rot in the second phase of the battle. The crafting recipe is found in Armorer’s Cookbook (6).
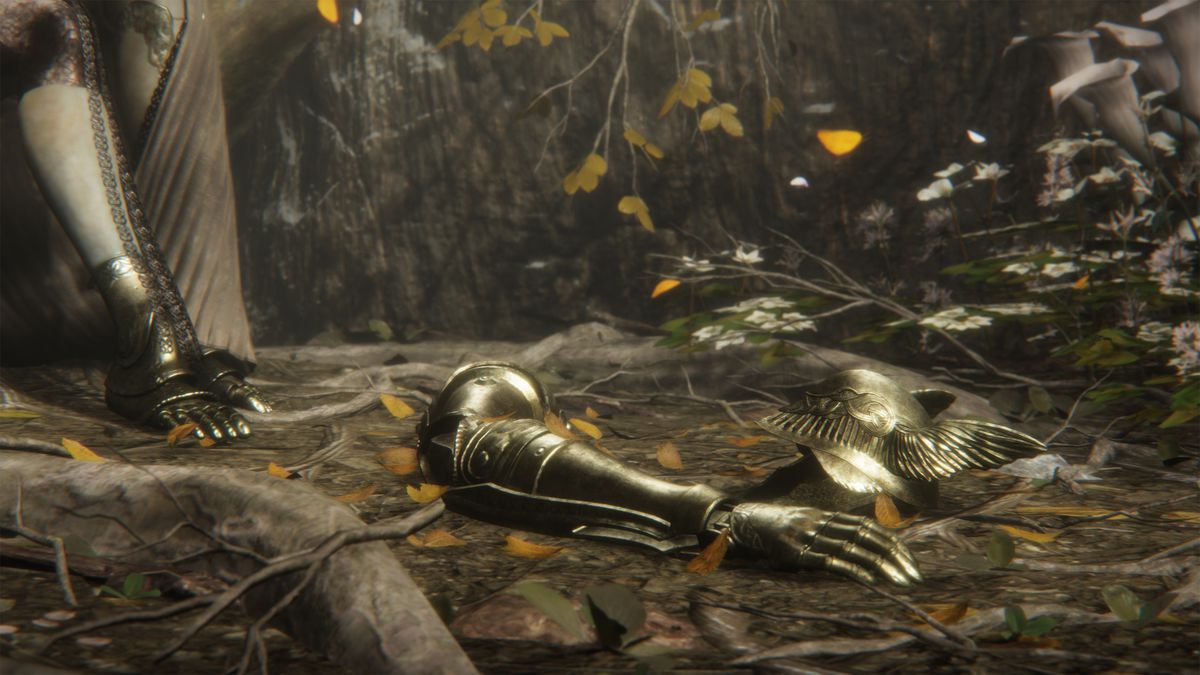
Image: FromSoftware/Bandai Namco via ProSpelare
Best weapons for Malenia
Let’s go over some build examples you may use against Malenia. A solid choice for dual-wielding would be the Cold Uchigatana with Bloodhound’s Step in your right hand and Rivers of Blood in your left hand. When using Bloodhound’s Step, equip the Carian Filigreed Crest talisman, which you can purchase from the blacksmith Iji when following Ranni’s quest. It reduces the FP cost of skills, allowing you to teleport-dodge more frequently.
The Nagakiba katana and Eleonora’s Poleblade are also great weapons against Malenia, especially since both come with Bleed damage and (in the case of the Poleblade) Fire damage. Nagakiba is obtained by completing Bloody Finger Hunter Yura’s questline or by defeating him in combat, and Eleonora’s Poleblade is obtained by defeating Eleonora, the Violet Bloody Finger, at the Second Church of Marika in Altus Plateau
Don’t underestimate the Bloodhound’s Fang either, which has amazing physical damage. You can get it by defeating the Bloodhound Knight Darriwil in Limgrave. Dual-wielding this weapon is quite overpowered as it builds Bleed incredibly fast, but you can only obtain a second Bloodhound’s Fang if it’s gifted to you in multiplayer. If that’s not in the cards, Bloodhound’s Fang goes perfectly fine with Rivers of Blood.
If you’d rather try to stagger Malenia with a heavier weapon, the Blasphemous Blade Greatsword with its massive physical and fire damage is one of the best options. Its Taker’s Flames ability deals amazing stagger damage, knocking Malenia down if you can manage to land it without her dodging the flames. You can trade Rykard’s Remembrance for it in the Roundtable Hold.
If you’re looking for a way to ‘cheese’ the Malenia boss fight, the Ordovis Greatsword is your friend. This is quite surprising, especially since some of its damage is Holy, but the Ordovis Greatsword’s value lies in its Ordovis’s Vortex spinning skill (demonstrated in the picture below).
This attack requires a short charging time, but if Malenia gets caught in it, she can’t break away and it’ll knock her down — allowing you to use it again. In other words, you must carefully wait for an opening, stun-lock Malenia in Ordovis’s Vortex, and deplete her HP. Ordovis Greatsword is dropped by the Crucible Knight in Auriza Hero’s Grave, a dungeon north of Leyndell.
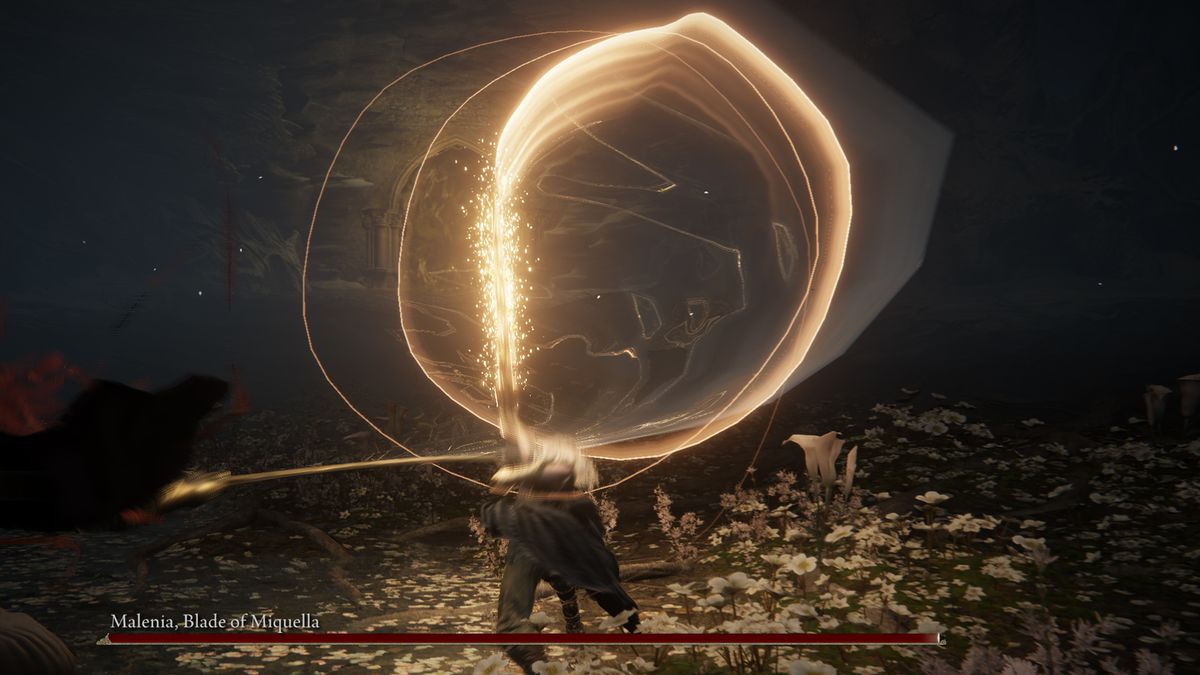
Image: FromSoftware/Bandai Namco via ProSpelare
Best Ashes and Talismans for Malenia
Besides Bloodhound’s Step, there are other Ashes of War that Malenia has a hard time dealing with. Rivers of Blood’s Corpse Piler can rapidly proc Bleed and staggers her somewhat reliably. You get it from the NPC invader near the Church of Repose in Mountaintop of the Giants.
Similarly, Eleonora’s Poleblade’s Bloodblade Dance lets you do heavy Bleed and poise damage then dance away from her to avoid retaliation. It’s obtained from the NPC invasion at the Second Church of Marika in Altus Plateau as part of Yura’s questline.
The best Spirit Ashes to use against Malenia are Black Knife Tiche or Mimic Tear. Unfortunately, tanky spirits aren’t as good as you might think because Malenia will regain health every time she hits them. Tiche, on the other hand, doesn’t have a ton of health but is excellent at dodging.
She’ll distract Malenia while you unleash your attacks. You can get Tiche from the Ringleader’s Evergaol on the Moonlight Plateau (once again, part of Ranni’s quest). As long as you have a decent loadout, the Mimic Tear is always a great choice, but especially if you’re focused on building Frost and Bleed status effects.
As for talismans, the Dragoncrest Greatshield Talisman is incredibly useful as it negates a lot of incoming physical damage. Erdtree’s Favor can help you increase your equipment load limit (especially handy if your favorite armor set is a tad too heavy) while also improving your HP and stamina. For those who depend on vigor, strength, dexterity, and endurance, Radagon’s Scarseal is an amazing option, but beware that it also increases incoming damage. A simple strength-boosting talisman like Starscourge Heirloom may therefore be the better choice.
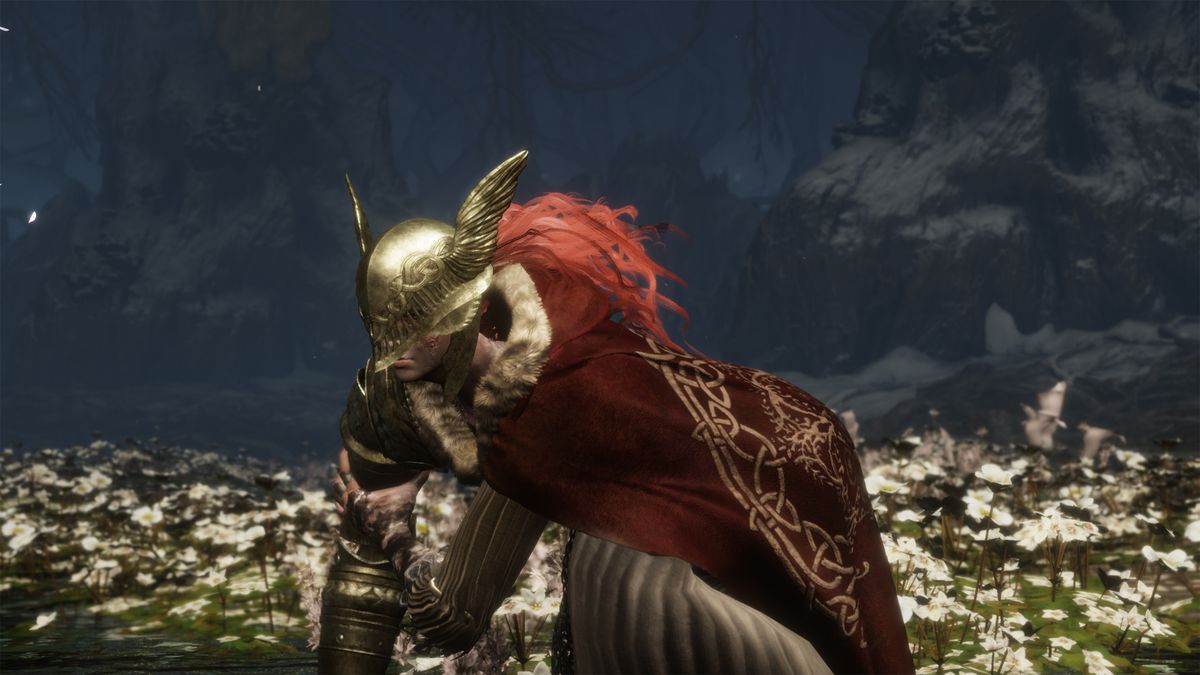
Image: FromSoftware/Bandai Namco via ProSpelare
How to defeat Malenia phase 1
Malenia will approach you as soon as you enter the boss arena. When she’s within melee range, be prepared to dodge her first attacks. The trick to surviving is to be very patient, keep dodging, and hit whenever her combos have finished.
If you’re able to proc Bleed and Frost multiple times, you can burn her down before she even gets a chance to use Waterfowl Dance. Most of the time, mastering this phase is simply a matter of keeping your distance so she doesn’t catch you by surprise, managing your FP so you can always use Bloodhound’s Step to get away from Waterfowl Dance, and being smart about when you try to get in a hit or two.
Here’s an overview of the attacks used by Malenia in the first phase of the battle:
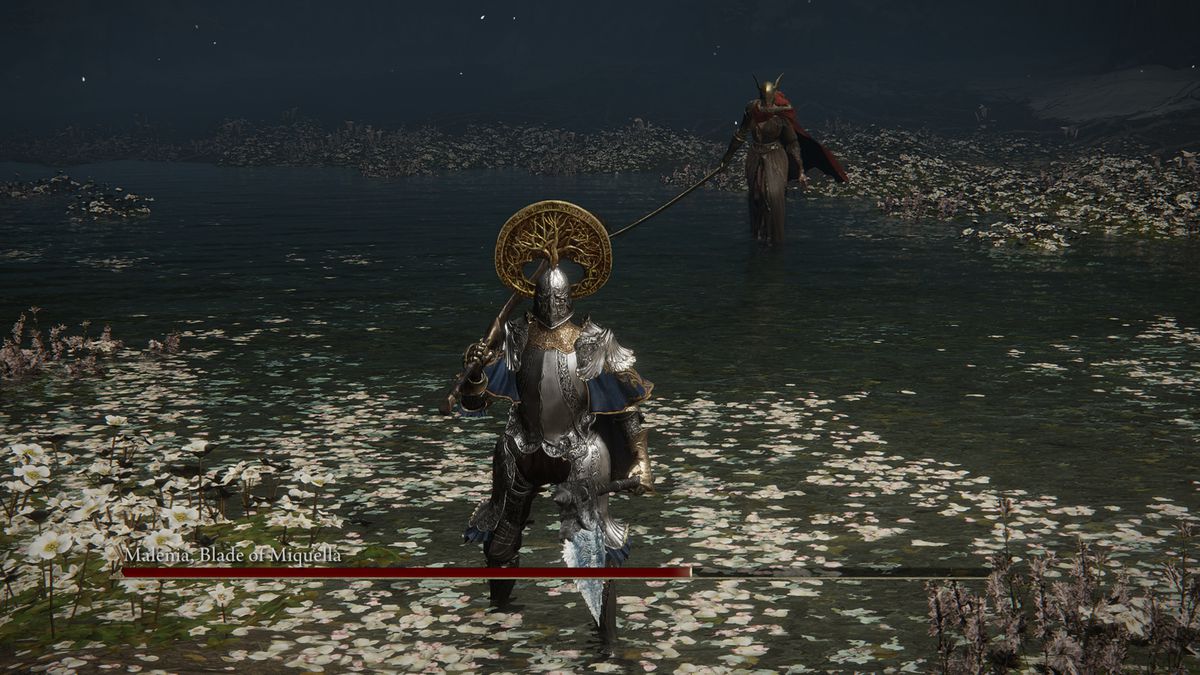
Image: FromSoftware/Bandai Namco via ProSpelare
- Idling. Malenia’s idle state during the first phase of her fight is to simply walk slowly toward you. There’s an opportunity to attack here, as it’s often safe to walk up and poke her with a single probing attack while she’s doing this. Just be ready to dodge away when she inevitably responds. You can “trigger” her idling stance if you dodge away and create a lot of distance between you and Malenia.
- Side jump. Sometimes, when dodging or after taking a hit, Malenia will jump to the left (your left) and have a brief moment of poise break. It’s a great opportunity to land another hit, as she won’t attack immediately afterward. You can try to do a quick stab during idling and follow it up with another attack after a side jump.
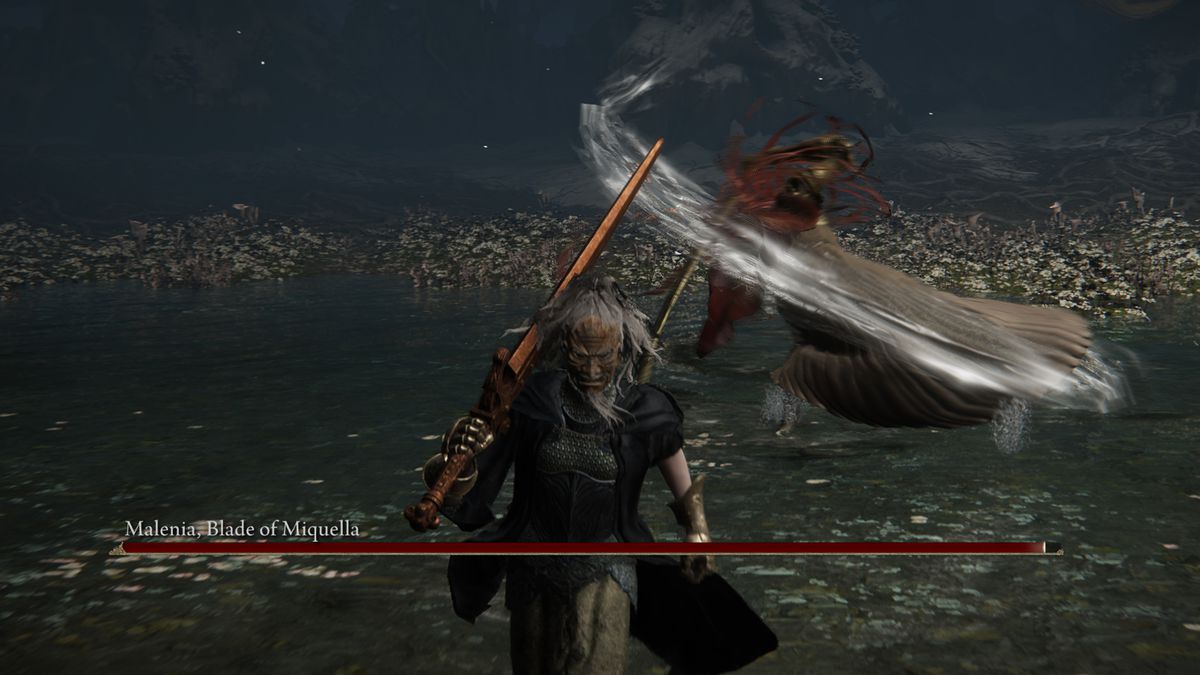
Image: FromSoftware/Bandai Namco via ProSpelare
- Normal slashes. Malenia has a bevy of general slashing attacks using her extra-long katana. She combines these in unpredictable patterns that make them challenging to dodge. Bloodhound’s step makes it easier. In general, you want to keep a medium distance from her for most of the fight, and never try to sneak an attack in during her standard slashing combos. She will punish you almost every time.
- Spin kick. Malenia often opens her combos with a deadly spin kick, which can’t be blocked or parried. Thankfully, it’s slow and the windup is obvious. Since her follow-ups can be more deadly, get some distance when she kicks. Don’t try to attack after it.
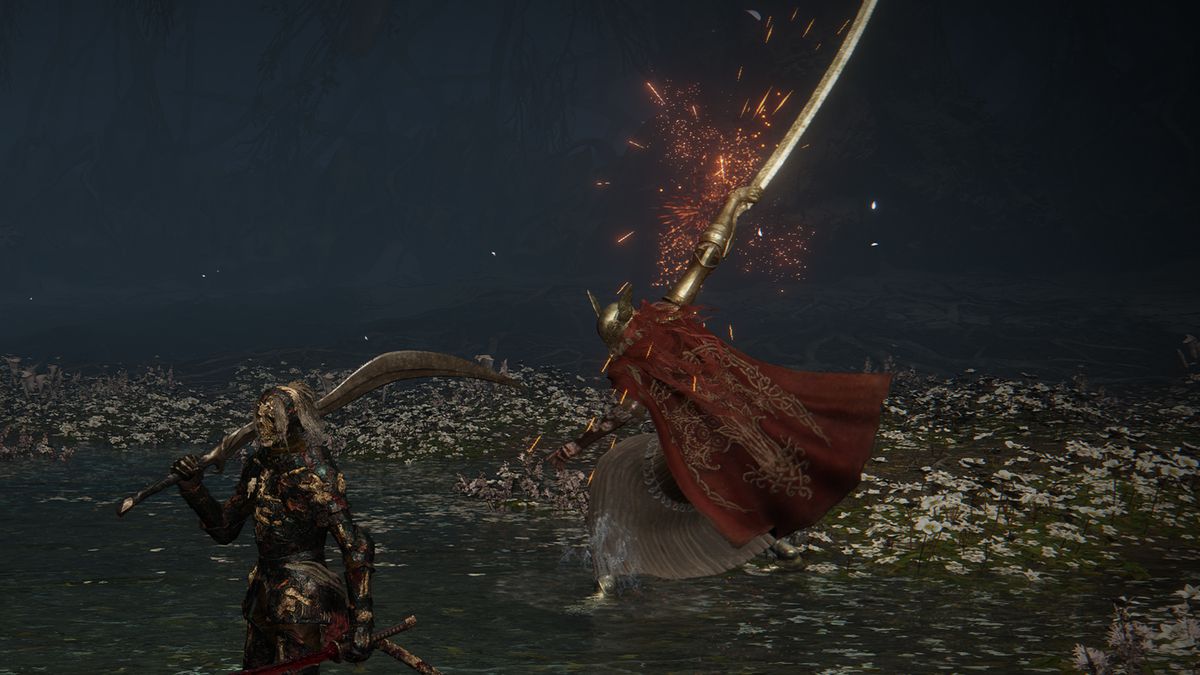
Image: FromSoftware/Bandai Namco via ProSpelare
- Spark Combo. One of Malenia’s most common attacks is a quadruple-slash combo that’s telegraphed by a mechanical sound effect and orange spark from her prosthetic arm. Get used to recognizing this cue and get the hell out of her way when she unleashes this, which she does constantly. With Bloodhound’s Step, you can teleport backward and get out of its range. It’s more difficult to avoid with a normal dodge, so you must make sure you’re far enough away from her at all times.
- There are two variations of that move. You can tell which version you’re getting by the fourth slash in the combo: If the fourth slash arrives quickly after the third, the combo is likely to continue. However, if there’s a slightly longer delay before the fourth slash arrives, she’s about to stop moving for a moment, providing one of your best attack opportunities in the fight.
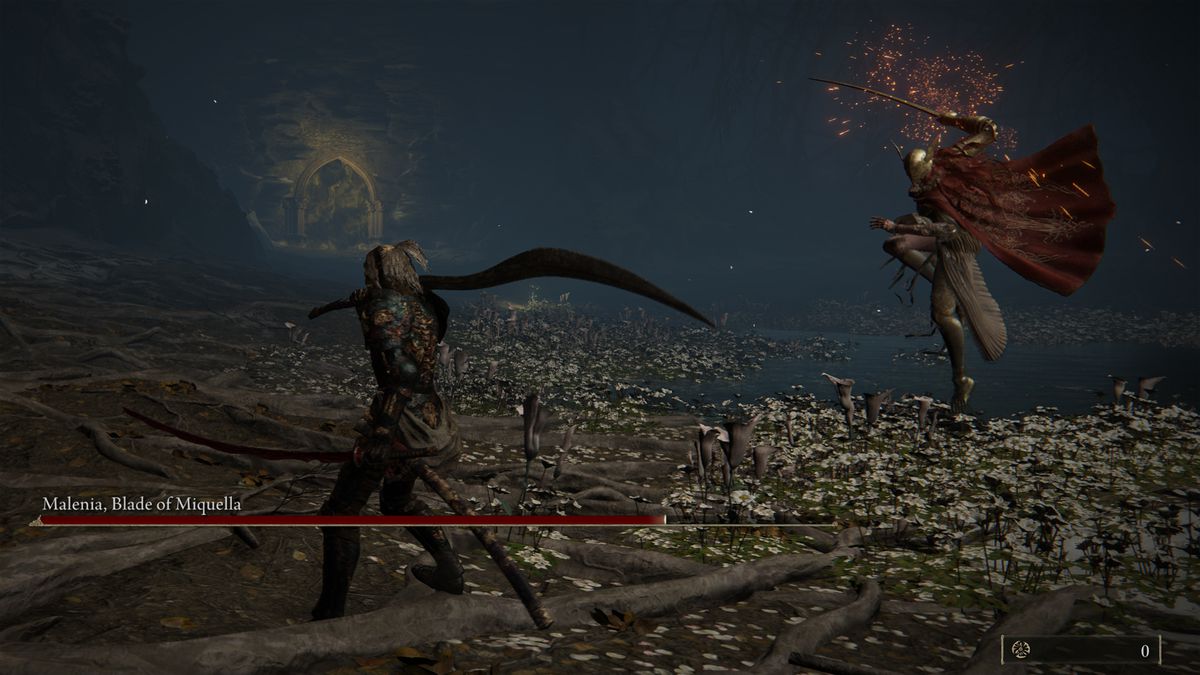
Image: FromSoftware/Bandai Namco via ProSpelare
- Spark thrust. This move is predicated by the same sound effect and orange spark as the previous one, but Malenia’s stance is completely different; she hops in the air for a moment while drawing her sword back, then thrusts towards you. This is the single best attack opportunity during phase 1, as there’s a way to predict it (it often triggers when you create a bit of distance between you and Malenia) and dodge; you don’t even have to use Bloodhound’s Step. And she never follows it up with anything during this phase, so you’re always safe to get a slash or two in after she uses it.
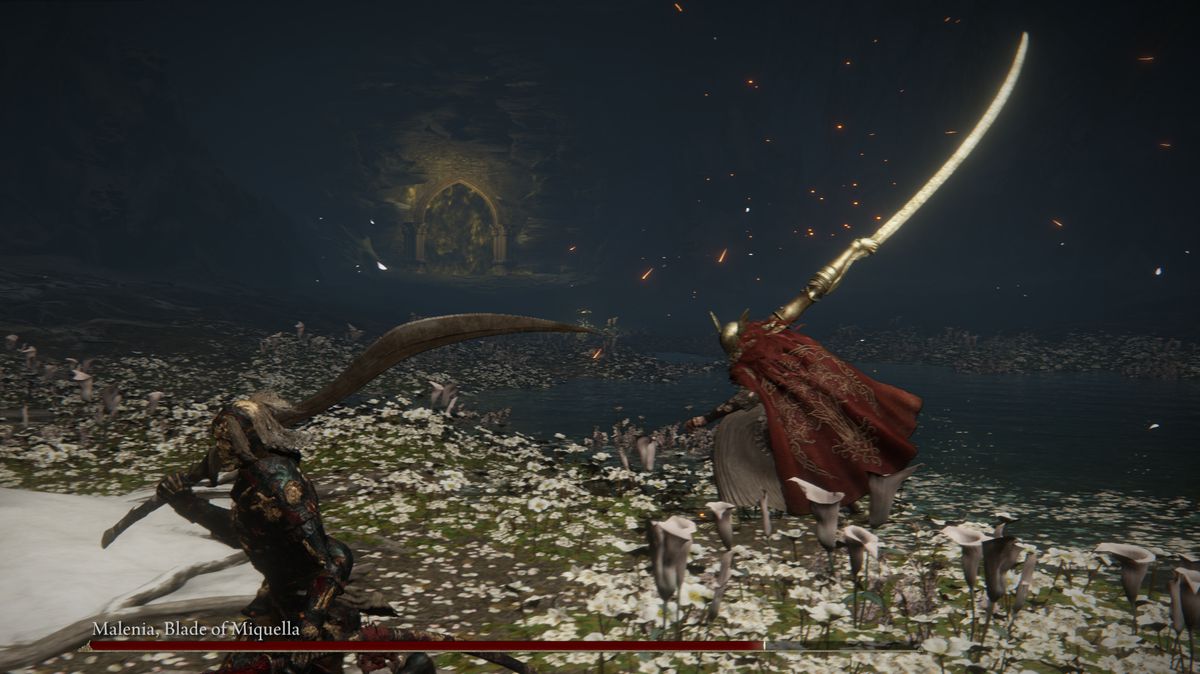

Image: FromSoftware/Bandai Namco via ProSpelare
- Slow lunge combo. When Malenia draws her sword slowly behind her in a crouch, she’s about to lunge toward you for a two-slash combo. There are two variations of this, with slightly different timing. You’ll have to learn the difference, although Bloodhound’s Step makes it easy to dodge either one. This is another attack opportunity — she’s vulnerable after the second swing, and if you’re near her when she starts winding it up, you can even get some hits in before she lunges.
- Overhead jump slash. This attack is similar to the previous one, but without the long wind-up. It’s always preceded by a standard horizontal slash, and often follows the fast version of the four-slash Spark Combo. It’s another great opportunity to attack, as she’s vulnerable after landing.
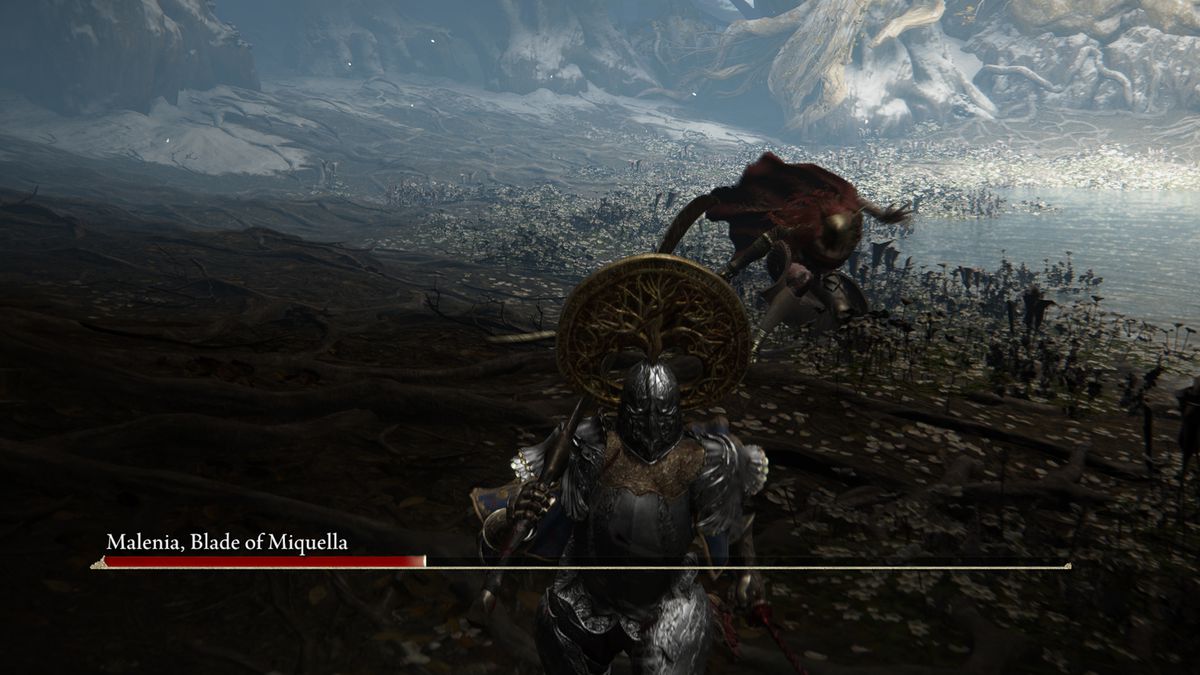
Image: FromSoftware/Bandai Namco via ProSpelare
- Lunging Grab. Malenia pulls her left hand back, crouching down slightly, and lunges at you after a short delay. Avoid this at all costs. It’s easy to dodge, but is also guaranteed to kill you if it lands. We’ve never survived this attack with any build. Thankfully, once you dodge it successfully, it’s another opportunity for you to attack.
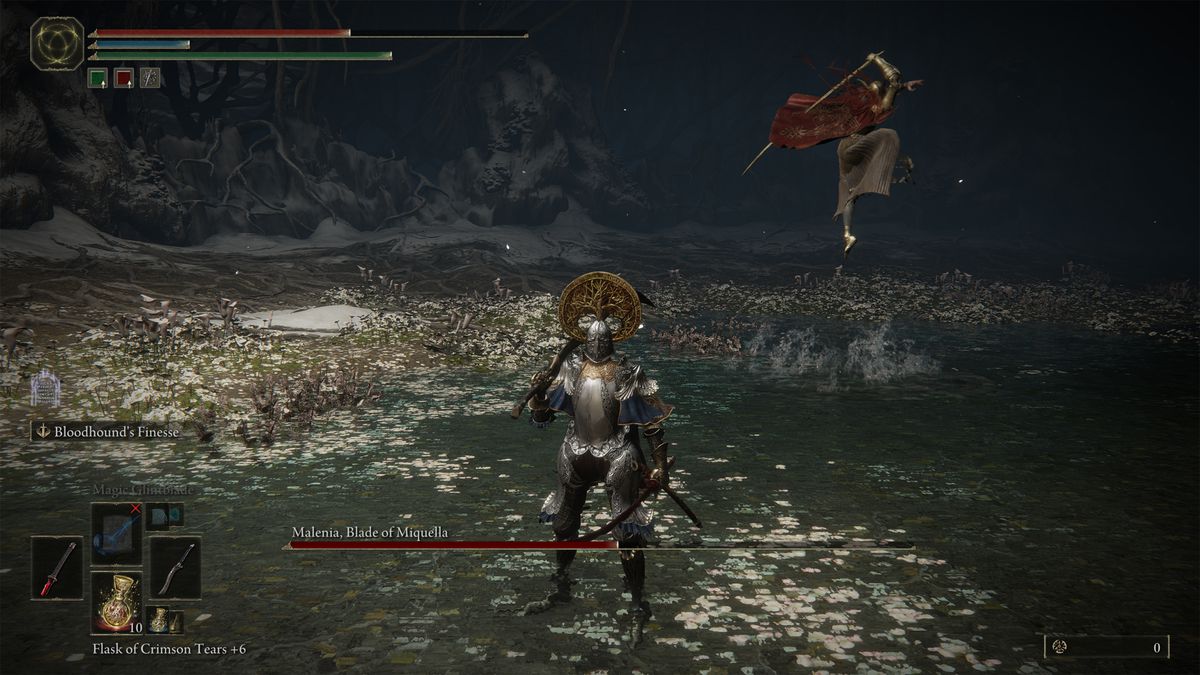
Image: FromSoftware/Bandai Namco via ProSpelare
- Waterfowl Dance. This is the big one. Once her health drops below 75%, Malenia can unleash the deadly Waterfowl Dance any time. She jumps into the air for a long pause (see picture above, make sure you recognize it!), then flies toward you, unleashing a flurry of white slashes. This will kill you if she catches you in it — and yes, it’s borderline unfair. Thankfully, it can be dodged. As soon as she rises into the air, you have to sprint or Bloodhound Step away from her as quickly as possible (this is the main reason why you can’t spend the whole fight up in the boss’s face pressuring her with attacks; if you’re right under her when she does this, it’s almost impossible to survive, even with Bloodhound’s Step). If you can catch enough distance, the first two parts of the Dance will miss you. For the third flurry, she always teleports directly to you, no matter how far away you got; you have to dodge toward her as soon as she does it. She’ll shoot past you, and you can hover just outside of her range for the fourth part, including the final spherical slash that marks the move’s conclusion. After this, she’s vulnerable to another attack — provided you survive that long.
How to defeat Malenia phase 2
Malenia’s second phase is considerably more difficult than the first, as she adds several new attacks to her repertoire:
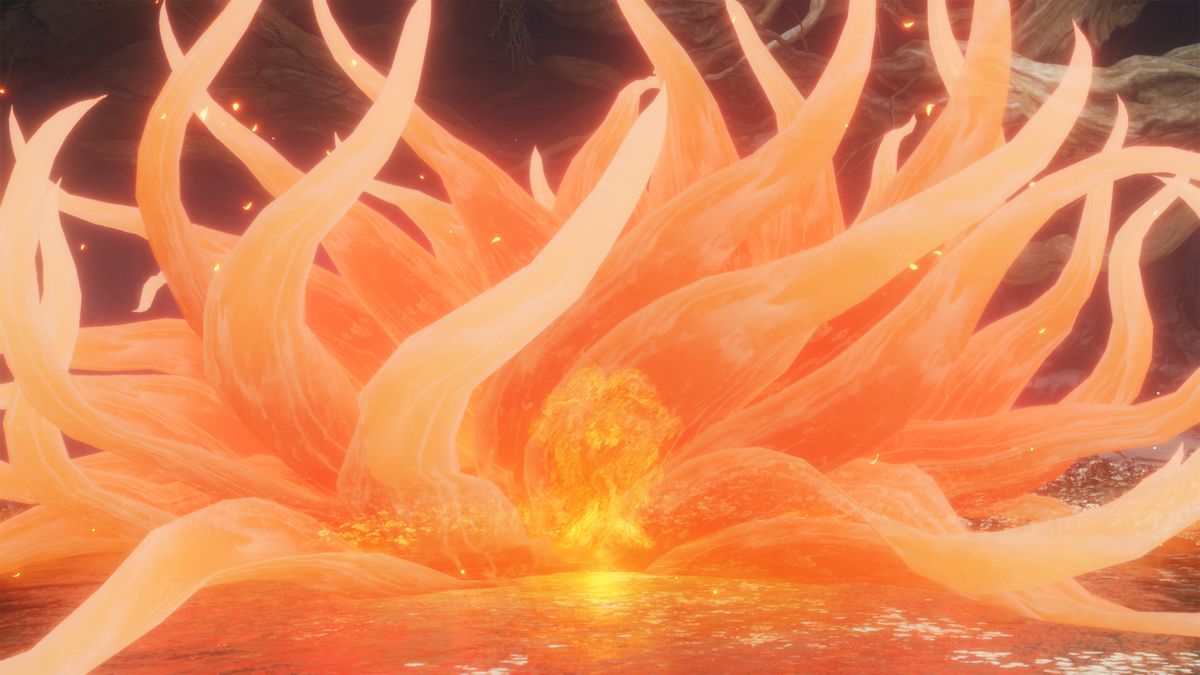
Image: FromSoftware/Bandai Namco via ProSpelare
- Rot Nuke. Malenia flies up into the air, orange and scarlet wings fluttering, and pauses before dive-bombing you. You can survive this by dodging at the exact right moment — try activating Bloodhound’s Step as soon as she begins moving from her floating stance. Then, if you survive the initial impact, the boss explodes again as her petals open, turning her into a huge orange flower. Stay out of range as the petals open to avoid the damage and scarlet rot build-up they cause. This is your one reliable ranged attack opportunity during the fight; you can unleash spells, incantations, and throwables while she’s recovering. You can also rush in as the petals finally dissipate to attack her briefly up close. She always opens the second phase with this attack, so it’s imperative that you learn how to dodge it.
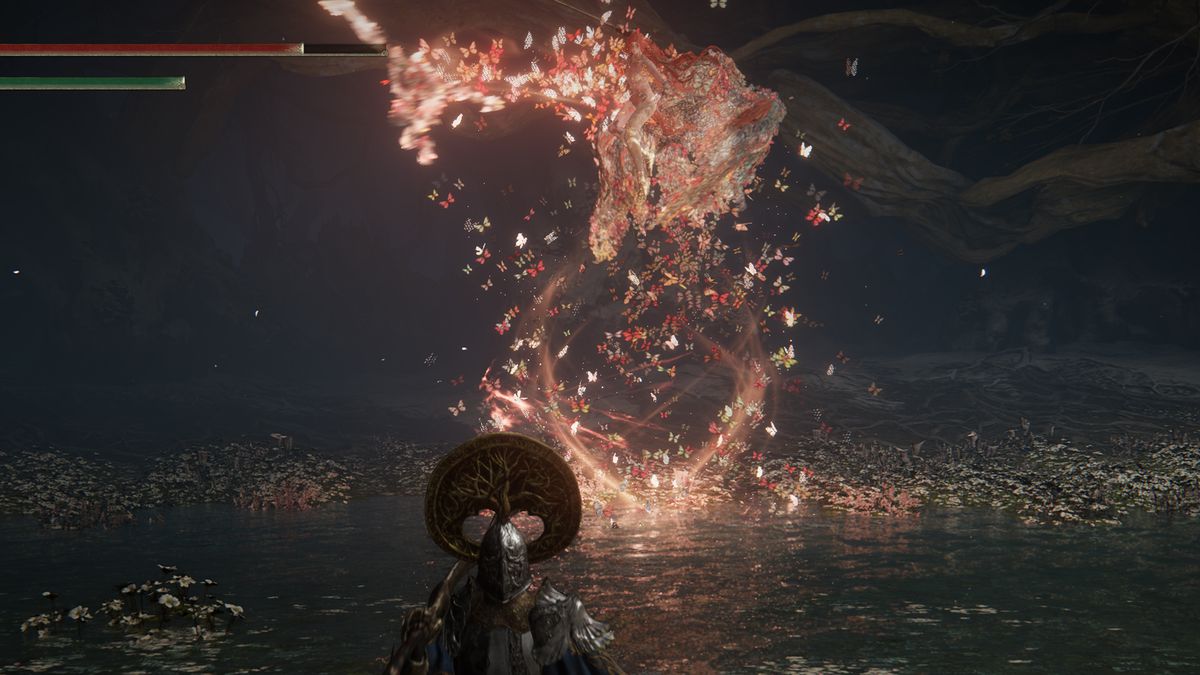
Image: FromSoftware/Bandai Namco via ProSpelare
- Phantom clones. Malenia floats into the air and sends a series of phantom clones slashing and thrusting your way. This attack is fairly easy to recognize as Malenia will fly upward in a glowing whirlwind, but the phantoms are hard to dodge. With Bloodhound’s Step, you can simply spam L2, provided you have enough FP. She ends this attack by lunging toward you herself with a powerful sword thrust. She’s vulnerable to attacks afterward, if you’re close enough to her after dodging, though it’s a small window, since she usually starts up another combo a moment after landing.
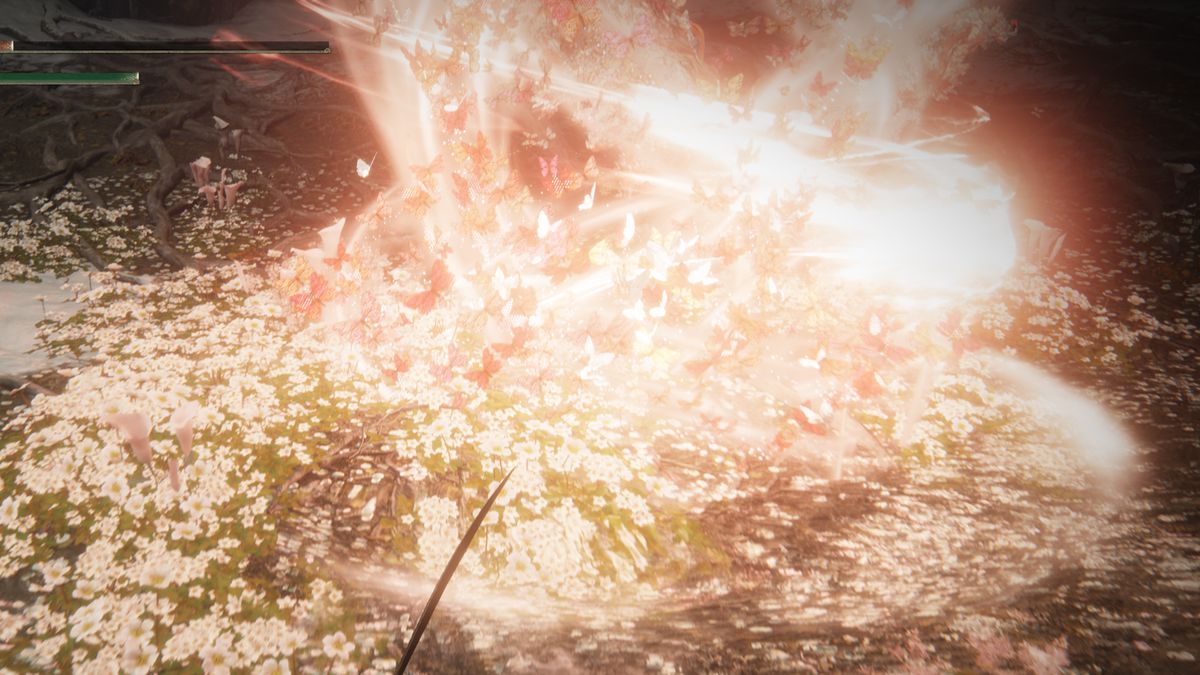
Image: FromSoftware/Bandai Namco via ProSpelare
- Small scarlet flower. Malenia plants a small orange bloom in front of her, which explodes a moment later, causing damage and scarlet rot build-up. Sometimes she flies into the air for a moment, but not always. This is the reason why your attack opportunities from phase 1 are unreliable now. Malenia retains all the same moves and combos from before, but now, she has a roughly 50% chance to follow up any move with this ability. Any combo after which she would have previously been vulnerable, from the Spark Thrust to the Slow Lunge, can be followed by this attack instead. Luckily, she always pauses on the ground as the small flower blows up. If you can get behind her and avoid the small explosion, there’s still a window to attack here.
In addition to those new abilities, Malenia retains all the moves from phase 1. Beware that her combos are even more unpredictable as she tends to fly up into the air more often. Since she spends so much time in the air, it’s harder to predict when Waterfowl Dance is coming. Your only safe bet is to run away anytime she flies upward and get ready to dodge whatever attack is coming. Keep your distance, be patient, wait for your attack opportunities, and keep your FP and health topped up.
When defeated, Malenia drops the Remembrance of the Rot Goddess, Malenia’s Great Rune, and a whopping 480,000 runes on your first playthrough. If you manage to take her down, congratulations — you’re a true Tarnished, no matter how you did it.
Disclaimer: This article contains excerpts from “Elphael, Brace of the Haligtree Elden Ring walkthrough” by Mike Rougeau.
Getting ready for Elden Ring’s Shadow of the Erdtree expansion? Here’s how to pre-order, how to access the DLC, and how to prepare.
.loopnav {
background: #fff;
position: fixed;
top: 0;
width: 100%;
height: 70px;
z-index: 1000;
filter: drop-shadow(0px 0px 5px rgba(0, 0, 0, 0.1));
display: flex;
justify-content: center;
align-items: center;
overflow: hidden;
}
.loopnav:after {
content: ” “;
width: 50px;
height: 100%;
position: absolute;
right: 0;
background: linear-gradient(to right, transparent, #fff);
}
.loopnav ol {
display: flex;
margin: 0 auto;
flex-direction: row;
font-size: 16px;
list-style: none;
padding: 20px 10px;
max-width: 100%;
align-items: center;
overflow-x: scroll;
-ms-overflow-style: none;
scrollbar-width: none;
}
.loopnav ol::-webkit-scrollbar {
display: none;
}
.loopnav ol li {
padding-right: 22px;
white-space: nowrap;
line-height: 1;
}
.loopnav ol li:first-child {
margin-top: -15px;
}
.loopnav ol li:first-child a {
background: url(https://cdn.vox-cdn.com/uploads/chorus_asset/file/24002460/Polygon_logo_large.png) no-repeat;
text-indent: -9000px;
display: block;
width: 105px;
height: 35px;
}
.loopnav ol li:nth-child(2) a {
color: #000;
font-weight: bold;
}
.loopnav ol li:nth-child(2)::after {
content: ‘›’;
font-weight: bold;
margin-left: 5px;
color: inherit;
position: relative;
}
.loopnav ol li a:hover {
text-decoration: underline;
}
.c-tab-bar.tab-bar-fixed,
.c-tab-bar {
display: none !important;
opacity: 0 !important;
}
.loopnav-visible ~ .c-entry-hero–feature {
margin-top: 70px;
}
@media (max-width: 728px) {
.loopnav ol {
font-size: 15px
}
.loopnav ol li {
padding-right: 18px;
}
.loopnav ol li:first-child a {
background: url(https://cdn.vox-cdn.com/uploads/chorus_asset/file/24002461/Polygon_logo_small.png) no-repeat;
width: 21px;
height: 35px;
}
.loopnav ol li:first-child {
margin-top: 0;
padding-right: 10px;
}
}