

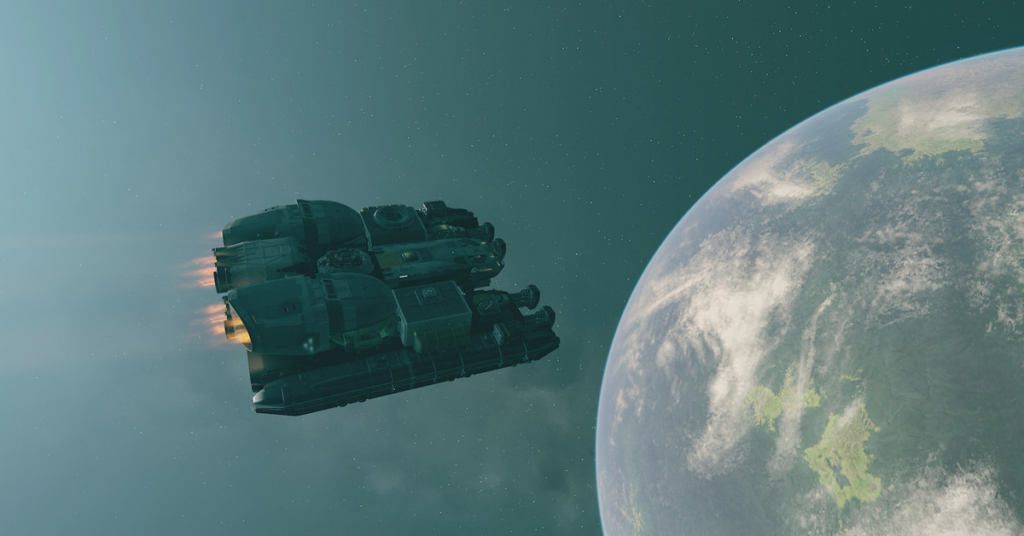
Starfield is a whole lot of game. There are ships to fly, stuffed animals to smuggle, outposts to build, and, oh yeah, artifacts to collect (and great mysteries of the universe to solve). The game itself, though, isn’t really forthcoming about a lot of the details of playing it. We’ve collected 21 tips and tricks we wish we knew before starting Starfield.
Everyone’s playthrough will be a little different
Sure, there’s the whole “your choices have consequences” part to any sprawling RPG, but, in Starfield, the variation goes a little deeper. The settled planets and major cities you’ll visit are all predefined, so they won’t change or differ between players, but some smaller things on planets (like caves or bases) do appear to be randomly generated and randomly located. And that means some missions will have you visiting different systems, planets, and moons than other players.
Don’t spend too long choosing a background and trait(s)
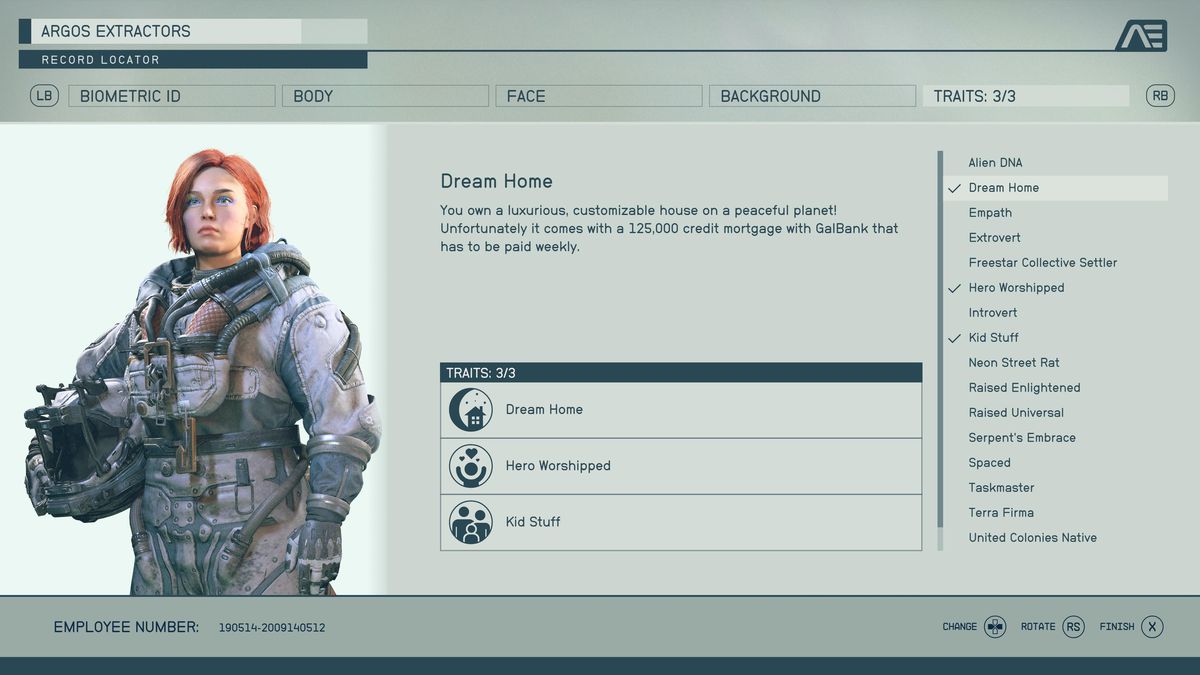

Image: Bethesda Game Studios/Bethesda Softworks via ProSpelare
During “One Small Step,” Starfield’s first campaign mission, you’ll be directed to choose a background (a backstory for your character that also determines three skills you start the game with) and up to three traits (optional perks that both help and hinder your character). Don’t fret over your choice too much. Sure, you’ll get some bonus dialogue options here and there, but nothing that significantly alters the story. Instead, you should focus your choices on which skills you want to start the game with.
If you can’t choose, our guides on the best backgrounds and best traits can help you decide.
Play the main story missions for a while
We won’t go into any details due to spoilers, but we do recommend you play through the main story missions until you complete “Into the Unknown.” After you beat the first two missions, you get three missions you can tackle in any order. “Into the Unknown” rounds out the story of Starfield, and not playing that far before you wander off the critical path leaves out a huge part of the game.
It’s worth mentioning in the same breath that you should also maybe step away from the main quest for a bit after this mission. The main quest is doable at a low level, if you just want to mainline it, but you’ll have a better time if you don’t get randomly killed by a high level enemy mid-campaign.
You can join every faction
You can join four factions in Starfield: the United Colonies Vanguard, the Crimson Fleet, the Freestar Rangers, and Ryujin Industries. Every factions offers sweet gear, a ton of XP5, and missions that are far more interesting than your average side quest (and are in some cases more compelling than the main story). Best of all, you don’t have to commit to just one. You can join them all at the start.
Many features are locked behind skills
Starfield’s skills do more than just improve abilities. A lot of the game’s mechanics are locked behind the first level of an associated skill — which means you’ll have to put at least one skill point into that skill to even use the ability.
This includes things like pickpocketing (Theft), using a boost pack (Boost Pack Training), seeing a Stealth Meter (Stealth), targeting specific systems on an enemy ship (Targeting Control Systems), and several kinds of upgrades to your suit, ship, weapons, and outposts that won’t become available until you drop a point into their Skills.
Get the Boost Pack Training, Security, and Persuasion skills ASAP
Starfield has a lot of skills — a total of 82 (with four ranks each). Aside from the three skills you get from your background, there are a few that will make your life a lot easier right from the beginning of the game, specifically Boost Pack Training, Persuasion, and Security. We explain why in our guide to the best skills.
Use auto-hack and auto-persuade often
Once you get the Persuasion and Security skills, you’ll find more methods to get through several situations. And as you hack and persuade more people, you’ll bank “auto-persuade” and “auto-slot” options into your conversations and hacks respectively.
You’ll generate these bypasses pretty quickly as you play. In the case of a Persuasion attempt, it results in an automatic success. Auto-slot, meanwhile, places one ring on your digipick for you instead. You can see if you have any auto-slots or auto-persuades banked by looking in the bottom right corner of your screen.
Navigating and fast travel involve a lot of menus
Navigating the stars of Starfield’s Settled Systems involves a lot of digging through menus. It can take a bit to get used to. You’ll have a lot of options to fast travel — both on a planet’s surface and between systems and planets — but it takes a bit of work to unlock and there are some unexpected restrictions on what you can and can’t do. We break it all down in our guide to how fast travel actually works in Starfield.
‘Set Course’ is the most helpful button in your menu
As we mentioned above, you’re going to need to get used to the star menu if you want to go anywhere in Starfield. That is, at least, until you discover the “Set Course” button, which in the bottom right of your pause screen. If you hit Set Course, the game will automatically pull up the fast travel location or planet for your current quest. This is a great way to quickly jump back to the Lodge or to a planet that you’ve never been to before.
We didn’t notice the Set Course button until hours into our playthrough, but it instantly improved our collective experience once we found it.
Use your scanner to figure out where to go
Once you get to a planet or a ship to do the next mission objective, you’ll have markers on your HUD for your objective(s) and any extra optional objectives. There won’t, however, be a way to differentiate between those. Pulling up your handscanner with LB on console or F on PC lets you see exactly what each blue diamond represents.

Image: Bethesda Game Studios/Bethesda Softworks via ProSpelare
The scanner also (usually) highlights a route for you to follow to reach the next (non-optional) objective. Which is great because cities can be pretty labyrinthine, ships are deceptively hard to work through, and buildings with multiple floors can be baffling. Having a glowing path is a big help. That said, we included “usually” in the last sentence because sometimes it just… doesn’t put down a path to follow, so your mileage may vary.
While we’re on the topic of moving around in cities…
Read signs
There’s no minimap in Starfield (and the surface map is not really useful for finding your way around a city), so figuring out what buildings are vendors in cities requires a bit of work on your part. First, every large settlement will have yellow information kiosks scattered around. They’ll usually have a commerce section that lists all the places of business and their neighborhood.
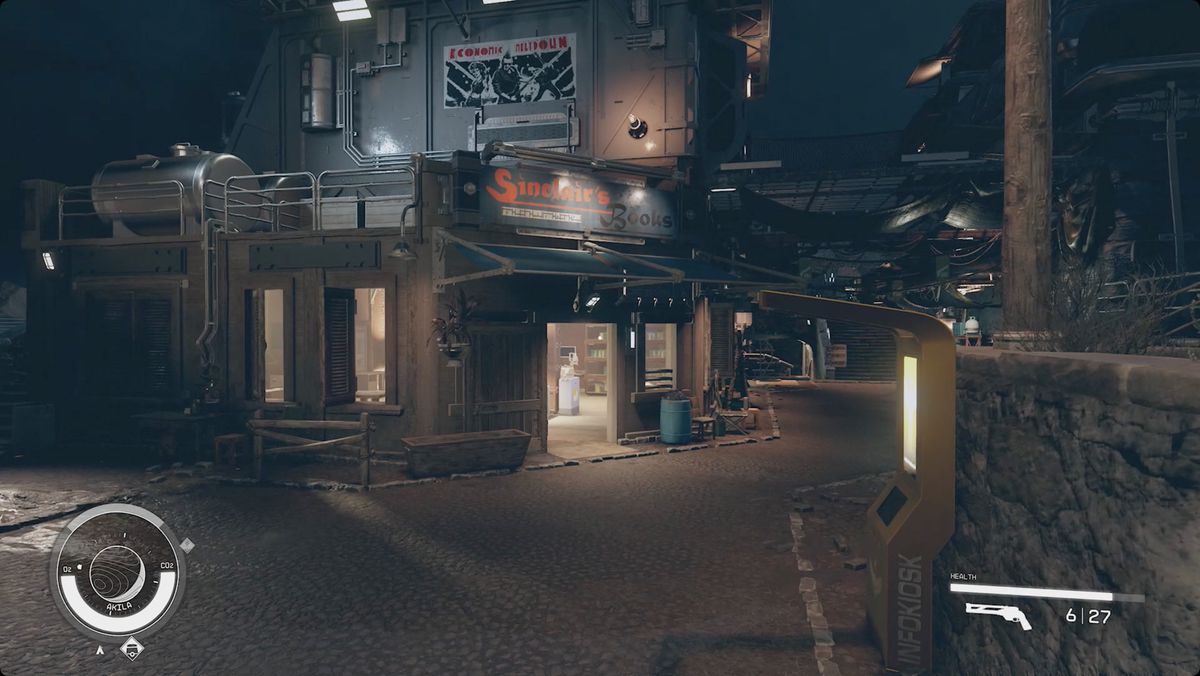
Image: Bethesda Game Studios/Bethesda Softworks via ProSpelare
Once you know what you’re looking for, read the signs on buildings. There will also usually be signposts and arrows pointing the way to various points of interest. You won’t be able to navigate by a minimap, so you’ll just be relying on those signs and each store’s signage.
Some doors are just doors, while other doors have switches
Navigating the various bases and outposts you find throughout the Settled Systems is a hassle all on its own (see our note on using the scanner to find a path above). As you’re making your way through those places, though, you might run into doors that you can’t open.
You can open most doors just by approaching them and then interacting. Some airlocks work this way too. Occasionally, though, you might find doors that don’t pop up the “open” prompt. For those, look around for a nearby switch or button (or, even more rarely, a computer).
You can equip multiple weapons
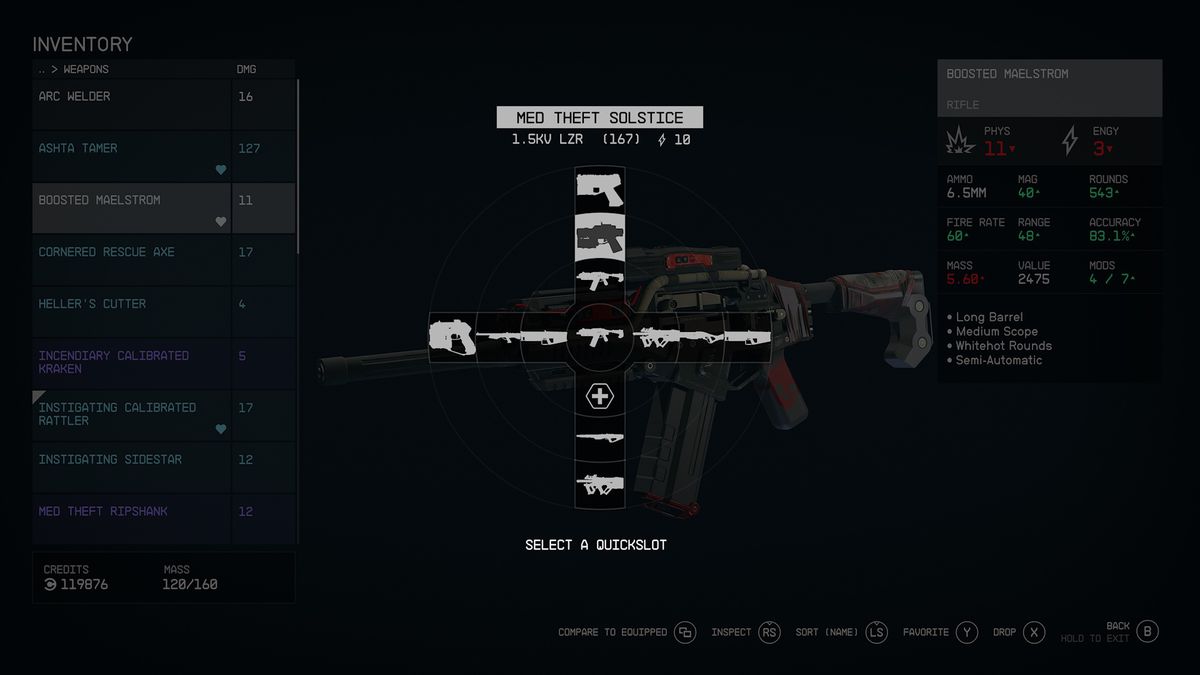

Image: Bethesda Game Studios/Bethesda Softworks via ProSpelare
It’s not immediately apparently, but you don’t need to open up your inventory and tab through five different submenus every time you want to switch weapons. By using the favorite feature, you can equip multiple weapons on your quickslot menu — technically up to 12, though you may want to reserve a slot for healing items.
There are lots of kinds of ammo
Starfield’s weapons don’t have broad categories of ammo (like rifle or pistol) that they fire. Instead, weapons require a specific ammunition type from a list of dozens. Take note of what ammo your favorite weapons use so you can buy extra.
In general, you should just always pick up ammo. And you never have to worry about finding too much because…
Ammo (and some other things) weigh nothing
Luckily, all ammo has zero mass, so you’ll never fill up your inventory with it if you just loot every ammo drop you see. Similarly, med packs and digipicks (that’s Starfield for “lock pick”) weigh nothing. You can pick up all of this stuff with abandon.
Free med packs
While you’re looting your way across the Settled Systems, you’ll need to watch for a little red arrow next to the item you’re considering. If it’s there, taking that item is stealing and might get you into trouble.
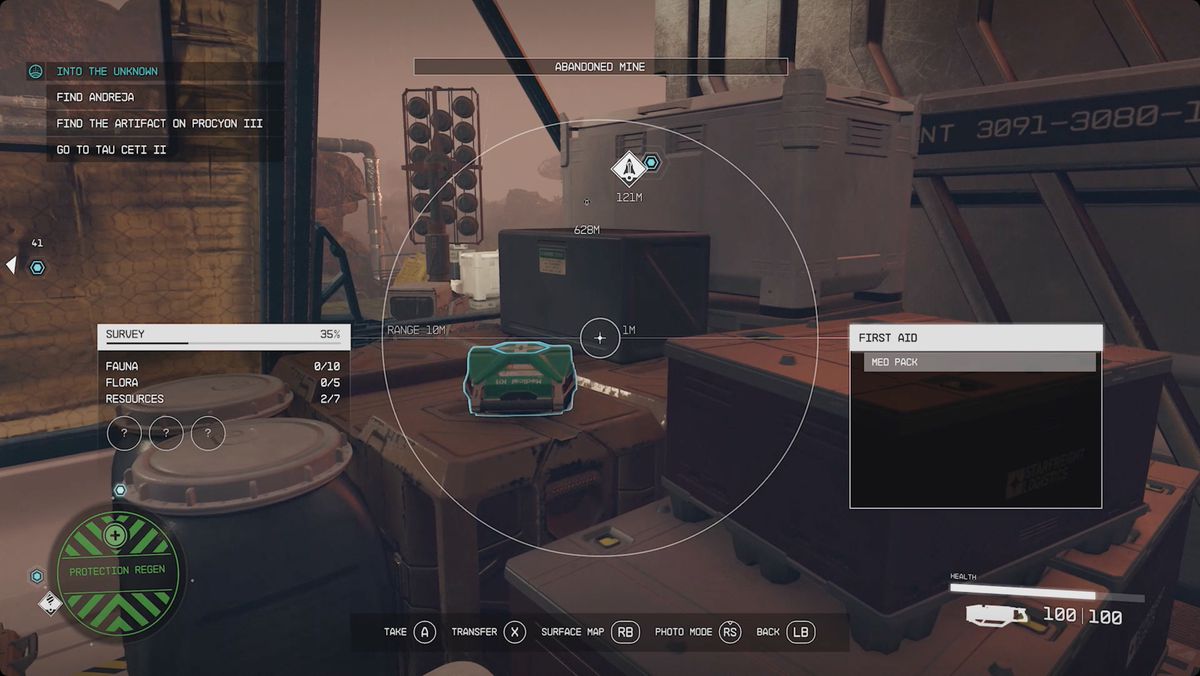
Stealing med packs is universal healthcare.
Image: Bethesda Game Studios/Bethesda Softworks via ProSpelare
A useful exception to this seems to be first aid stations, for the most part. You’ll see a lot of them around. Most (but not all) of the time, the med pack or other Aid item inside is safe to take no matter where you are. Keep an eye out for the green lockers on the wall for free healing. But watch for the red icon!
You don’t have to wear that
A 21st-century truth apparently holds true in the 24th century, too: A suit looks way better than a spacesuit. In your inventory, under the spacesuits tab, you can tap RB (on Xbox) to either show or hide your spacesuit when you’re in a settlement, making it so you walk around in your street clothes (the attire submenu) instead. You can do the same to your helmet, under the helmets tab.
Value is not the same as sell price
Sure, you’ll use some of the loot you pick up because it’s better than what you have equipped, but, for the most part, you’re filling your inventory with stuff to sell. When you look at any item in your inventory, it will have a value — the number of credits it’s worth.
The important thing to note here, though, is that value is not the same as the price a vendor will pay you. The sell price starts out around 13% of the value. You can improve those numbers by putting points into the Commerce Skill.
Generally speaking, weapons and gear (suits, helmets, and packs) are worth the most. They’re also the heaviest things, though.
Use the trade kiosks every time you land on a planet
Getting the proper value for your items is one thing, but finding a vendor with enough credits for you to offload all your stuff is another problem altogether. Many of the vendors in Starfield have a pitifully sized wallet when you try to sell to them, and specialty shops will only take some of your items — you cant sell a pistol to a clothier, for instance.
However, every planet (that has a spaceport) has a yellow trade kiosk located near the shipmaster. This kiosk will buy anything you have to sell — even stolen goods — and resets its credit reserves daily. So even if you drain it of cash, you can come back the next day and sell even more.
You can mine asteroids for resources
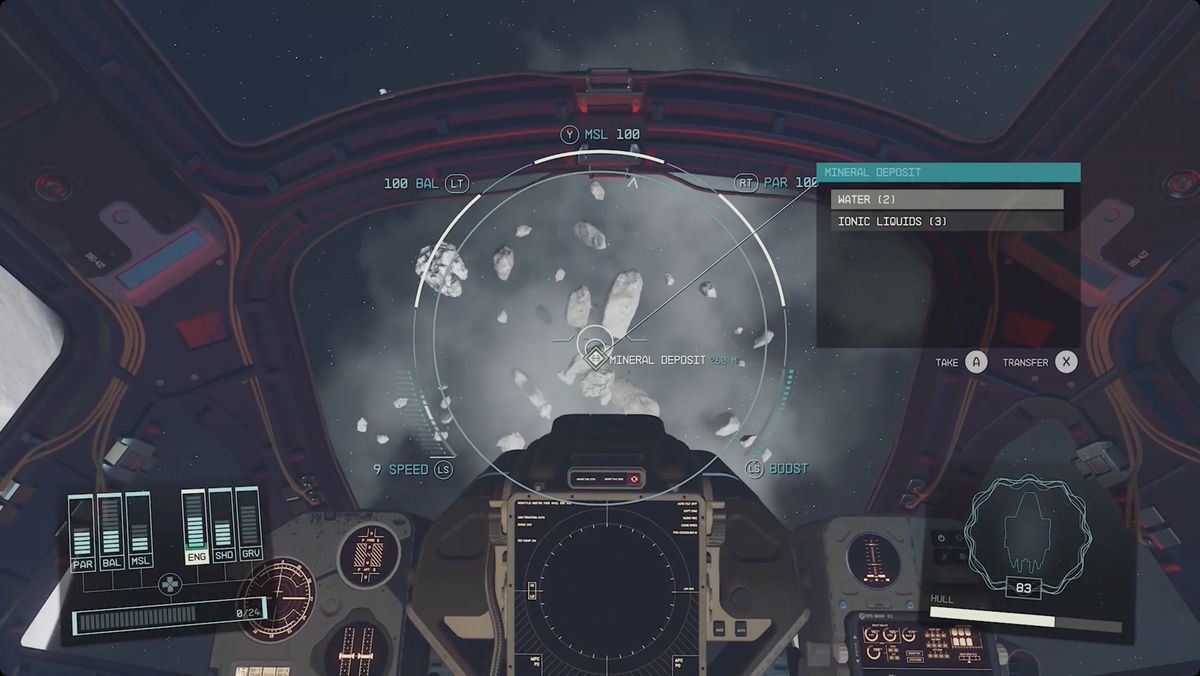
Image: Bethesda Game Studios/Bethesda Softworks via ProSpelare
Starfield doesn’t actually mention this, but you can shoot asteroids from your ship. When they’re destroyed, they’ll leave behind a mineral deposit. If you target it and then get within 500 meters, you’ll be able to pick it up for a few resources — usually things like iron or water.
You can get a house at the start
If you pick the Dream Home trait during character creation, you’ll start with a free house. You only have to pay 500 credits a week, and you can choose to foreclose your house if you don’t want to pay for it anymore.
The flashlight is kind of useless
Hold down F on PC or LB on console to activate your flashlight (when you’re on a planet’s surface). The flashlight’s area of effect isn’t very big, so you may want to just increase your screen’s brightness as you trek through some of the darker caves.
Yes, console commands exist… on PC
Sorry, Xbox players, this trick doesn’t apply to you, but if you’re playing on PC and want to cheat your way into a bazillion credits — or to turn on god mode to avoid a tricky battle — you totally can. You can activate console commands by pressing the ` key on your keyboard. Many of the console commands are the same from Skyrim and Fallout games, so Bethesda veterans should already know what to do.
.loopnav {
background: #fff;
position: fixed;
top: 0;
width: 100%;
height: 70px;
z-index: 1000;
filter: drop-shadow(0px 0px 5px rgba(0, 0, 0, 0.1));
display: flex;
justify-content: center;
align-items: center;
overflow: hidden;
}
.loopnav:after {
content: ” “;
width: 50px;
height: 100%;
position: absolute;
right: 0;
background: linear-gradient(to right, transparent, #fff);
}
.loopnav ol {
display: flex;
margin: 0 auto;
flex-direction: row;
font-size: 16px;
list-style: none;
padding: 20px 10px;
max-width: 100%;
align-items: center;
overflow-x: scroll;
-ms-overflow-style: none;
scrollbar-width: none;
}
.loopnav ol::-webkit-scrollbar {
display: none;
}
.loopnav ol li {
padding-right: 22px;
white-space: nowrap;
line-height: 1;
}
.loopnav ol li:first-child {
margin-top: -15px;
}
.loopnav ol li:first-child a {
background: url(https://cdn.vox-cdn.com/uploads/chorus_asset/file/24002460/Polygon_logo_large.png) no-repeat;
text-indent: -9000px;
display: block;
width: 105px;
height: 35px;
}
.loopnav ol li:nth-child(2) a {
color: #000;
font-weight: bold;
}
.loopnav ol li:nth-child(2)::after {
content: ‘›’;
font-weight: bold;
margin-left: 5px;
color: inherit;
position: relative;
}
.loopnav ol li a:hover {
text-decoration: underline;
}
.c-tab-bar.tab-bar-fixed,
.c-tab-bar {
display: none !important;
opacity: 0 !important;
}
.loopnav-visible ~ .c-entry-hero–feature {
margin-top: 70px;
}
@media (max-width: 728px) {
.loopnav ol {
font-size: 15px
}
.loopnav ol li {
padding-right: 18px;
}
.loopnav ol li:first-child a {
background: url(https://cdn.vox-cdn.com/uploads/chorus_asset/file/24002461/Polygon_logo_small.png) no-repeat;
width: 21px;
height: 35px;
}
.loopnav ol li:first-child {
margin-top: 0;
padding-right: 10px;
}
}